
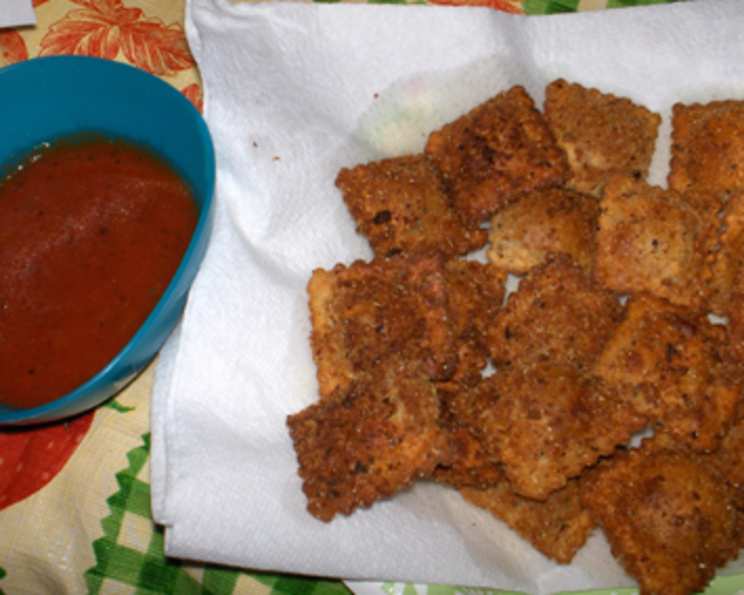
Rachel’s Fried Ravioli: A Crispy, Cheesy Delight
The first time I tasted fried ravioli, it was at a bustling Italian street fair. The air was thick with the aroma of garlic, oregano, and sizzling oil. A vendor handed me a small paper boat filled with these golden-brown, crispy pockets, dusted with parmesan. The moment I bit into one, the warm, melted cheese oozed out, contrasting beautifully with the crunchy exterior. It was pure, unadulterated comfort food, a simple yet incredibly satisfying treat that instantly transported me to a happy place. Ever since then, I’ve been on a quest to recreate that perfect bite at home. And with this recipe, I think I’ve finally cracked the code!
Recipe Overview
- Prep Time: 15 minutes
- Cook Time: 10 minutes
- Total Time: 25 minutes
- Servings: 6
- Yield: 24 ravioli
- Dietary Type: Vegetarian
Ingredients
- 24 ravioli, squares (about 48 if using mini raviolis)
- Olive oil (for frying)
Batter:
- 1 cup milk
- 5 tablespoons whole wheat flour (you can use all-purpose flour if you don’t have this on hand, batter should be runny but able to stir)
- 1/4 teaspoon pepper
- 1/4 teaspoon kosher salt
- 1/4 teaspoon basil
Breading:
- 2 cups panko breadcrumbs, bread flakes (normal breadcrumbs will work too)
- 2 teaspoons Italian seasoning
Equipment Needed
- Shallow pan or skillet
- Mixing bowls
- Fork or whisk
- Paper towels
Instructions
- First, prepare your workstation. Set up three shallow bowls: one for the batter, one for the breading, and a clean plate lined with paper towels to drain the fried ravioli. This assembly line approach will streamline the process.
- Make the batter. In a mixing bowl, whisk together the milk, whole wheat flour, pepper, kosher salt, and basil. The batter should be relatively thin, similar to the consistency of pancake batter. If it seems too thick, add a tablespoon of milk at a time until you reach the desired consistency. Remember, the batter needs to coat the ravioli without being too heavy.
- Prepare the breading. In another shallow bowl, combine the panko breadcrumbs and Italian seasoning. Mix well to ensure the seasoning is evenly distributed throughout the breadcrumbs.
- Now, it’s time to coat the ravioli. Take a ravioli and gently dip it into the batter, ensuring it’s fully coated on all sides. Allow any excess batter to drip off back into the bowl. This prevents the fried ravioli from becoming soggy.
- Immediately transfer the battered ravioli to the breadcrumb mixture. Coat it thoroughly, pressing the breadcrumbs gently to adhere to the batter. Make sure every surface of the ravioli is covered in breadcrumbs for maximum crispiness.
- Heat the olive oil in a shallow pan or skillet over medium heat. You’ll need enough oil to shallow fry the ravioli – about 1/4 to 1/2 inch deep. The oil is ready when a small piece of breadcrumb sizzles gently when dropped into it. Avoid overheating the oil, as this can cause the ravioli to burn before the inside is heated through.
- Carefully place the breaded ravioli into the hot oil, being careful not to overcrowd the pan. Fry in batches, leaving enough space around each ravioli for even cooking.
- Fry the ravioli for about 2-3 minutes on each side, or until they are golden brown and crispy. Keep a close eye on them, as they can brown quickly.
- Remove the fried ravioli from the pan and place them on the prepared plate lined with paper towels to drain any excess oil. This step is crucial for achieving perfectly crispy, non-greasy ravioli.
- Immediately sprinkle with parmesan cheese or queso cotija while the ravioli are still hot, so that the cheese adheres well.
Expert Tips & Tricks
- Don’t skip the draining step. Using paper towels to soak up the excess oil makes a big difference in the final texture of your fried ravioli.
- Use a thermometer to check the oil temperature. Ideally, you want the oil to be around 350°F (175°C). This ensures even cooking and prevents burning.
- If using frozen ravioli, thaw them completely before coating and frying. This will help them cook evenly and prevent the outside from browning too quickly.
- For extra flavor, try adding a pinch of garlic powder or onion powder to the breadcrumb mixture.
- To prevent the batter from becoming too thick as you work, stir in a tablespoon of milk every so often.
- If you find that the ravioli are expanding during frying (a common occurrence with store-bought ravioli due to trapped air), don’t panic! This is perfectly normal. Just continue frying as usual, being careful not to puncture them, as the cheese will spill out and create a mess.
Serving & Storage Suggestions
Serve Rachel’s Fried Ravioli immediately while they’re still hot and crispy. They are fantastic on their own as an appetizer or snack, or as a side dish to a larger Italian meal. For dipping, marinara sauce or salsa are classic choices, but feel free to experiment with other sauces like pesto, garlic aioli, or even a spicy sriracha mayo.
Leftover fried ravioli can be stored in an airtight container in the refrigerator for up to 2-3 days. However, keep in mind that they will lose some of their crispness. To reheat, spread them out on a baking sheet and bake in a preheated oven at 350°F (175°C) for about 5-10 minutes, or until heated through. You can also reheat them in an air fryer for a few minutes to restore some of the crispness. Microwaving is not recommended, as it will make them soggy.
Nutritional Information
| Nutrient | Amount per Serving | % Daily Value |
|---|---|---|
| Calories | 47 kcal | 2% |
| Total Fat | 0.9 g | 1% |
| Saturated Fat | 0.3 g | 1% |
| Cholesterol | 1.4 mg | 0% |
| Sodium | 89.1 mg | 3% |
| Total Carbohydrate | 8.1 g | 2% |
| Dietary Fiber | 0.6 g | 2% |
| Sugars | 0.6 g | 2% |
| Protein | 1.8 g | 3% |
Note: Nutritional information is an estimate and may vary based on specific ingredients used.
Variations & Substitutions
- Gluten-Free: Use gluten-free ravioli, gluten-free flour in the batter, and gluten-free breadcrumbs for the breading.
- Dairy-Free: Use plant-based milk in the batter and dairy-free ravioli (check labels carefully).
- Spicy: Add a pinch of red pepper flakes to the breadcrumb mixture for a kick.
- Herbaceous: Add finely chopped fresh herbs, such as parsley, oregano, or thyme, to the breadcrumb mixture.
- Cheese Ravioli Alternatives: Experiment with different fillings, such as mushroom, spinach and ricotta, or even meat ravioli.
FAQs (Frequently Asked Questions)
Q: Can I use regular breadcrumbs instead of panko breadcrumbs?
A: Yes, you can use regular breadcrumbs, but panko breadcrumbs will give you a crispier texture.
Q: Can I fry these in an air fryer instead of a pan?
A: Absolutely! Air frying is a healthier alternative. Simply spray the ravioli with olive oil and air fry at 375°F (190°C) for about 8-10 minutes, flipping halfway through.
Q: How can I prevent the cheese from leaking out during frying?
A: Ensure the ravioli are well-sealed and don’t have any tears. Also, avoid overcrowding the pan and frying at too high of a temperature.
Q: Can I make these ahead of time?
A: You can coat the ravioli in batter and breadcrumbs ahead of time and store them in the refrigerator for up to a few hours before frying. However, it’s best to fry them just before serving for optimal crispness.
Q: What kind of dipping sauce goes well with fried ravioli?
A: Marinara sauce is a classic choice, but you can also try pesto, garlic aioli, or a spicy sriracha mayo.
Final Thoughts
Rachel’s Fried Ravioli is a delightful dish that’s sure to please everyone. Whether you’re looking for a quick and easy appetizer, a fun snack, or a comforting side dish, this recipe is a winner. The combination of crispy breading, warm melted cheese, and flavorful dipping sauce is simply irresistible. Don’t be afraid to experiment with different variations and substitutions to create your own unique twist on this classic treat. So, gather your ingredients, fire up the stove, and get ready to enjoy a truly delicious experience! And please, let me know how it turns out – I love hearing your feedback!