
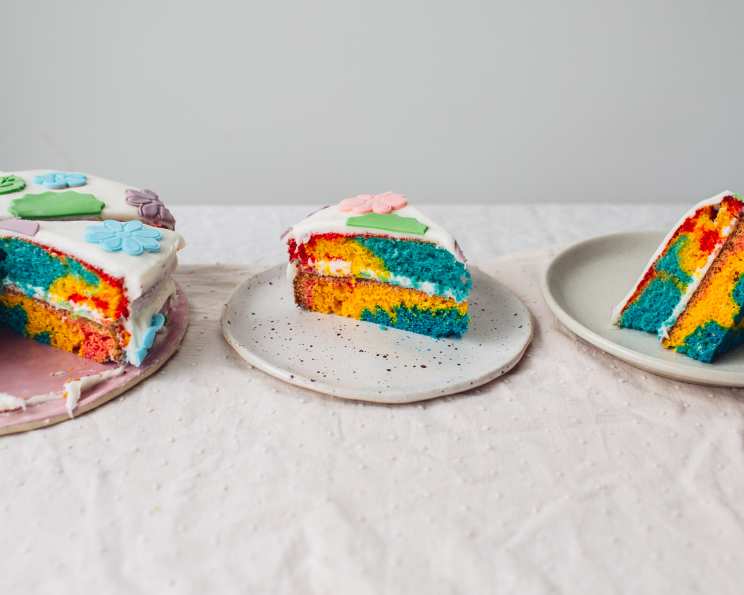
Rainbow Cake: A Symphony of Color and Flavor
I still remember the look on my little sister’s face when I presented her with a rainbow cake for her fifth birthday. Her eyes widened, a gasp escaped her lips, and she dove in with unrestrained glee. The simple joy radiating from her smile is etched in my memory, and it’s why I still cherish making this cake. It’s more than just a dessert; it’s a symbol of happiness and celebration, perfect for bringing a little magic into any occasion.
Recipe Overview
- Prep Time: 20 minutes
- Cook Time: 25-30 minutes
- Total Time: 45-50 minutes
- Servings: 12
- Yield: 1 cake
- Dietary Type: Vegetarian
Ingredients
- 1 (18 ounce) box white cake mix
- Oil (amount according to cake mix directions)
- 3 egg whites (or eggs, according to cake mix directions)
- Water (amount according to cake mix directions)
- Food coloring (red, yellow, and blue)
Equipment Needed
- 3 Mixing Bowls
- 9″x9″ Baking Pan
- Spatula or Spoon
- Measuring Cups and Spoons
- Oven
- Cooling Rack (optional)
Instructions
- Preheat your oven according to the instructions on the white cake mix box. Grease and flour a 9″x9″ baking pan to prevent sticking. This is a critical step for easy removal.
- Prepare the cake batter according to the directions on the box, using the specified amount of oil, egg whites (or whole eggs, depending on the mix), and water. Make sure to mix until just combined; overmixing can lead to a tough cake.
- Divide the prepared cake batter evenly into three mixing bowls. Eyeballing it is fine, but for perfectly even layers, you can use a kitchen scale.
- Add 2-4 drops of red food coloring to one bowl, 2-4 drops of yellow food coloring to another bowl, and 2-4 drops of blue food coloring to the last bowl. Start with fewer drops; you can always add more to achieve your desired color intensity.
- Mix each bowl of batter thoroughly until the food coloring is evenly distributed and you have three distinct, vibrant colors. Be careful not to overmix.
- Pour the red batter into the prepared 9″x9″ baking pan. Use the back of a spoon or an offset spatula to gently spread the batter evenly across the bottom of the pan. Try to avoid any big globs of batter.
- Carefully pour the yellow batter over the red batter in the pan. Use the back of a spoon or spatula to gently spread the yellow batter evenly, being extra careful not to mix the red and yellow batters together too much. The goal is distinct layers of color.
- Repeat the process from step 7 with the blue batter, pouring it carefully over the yellow batter and gently spreading it to create an even layer.
- Bake the cake according to the package directions on the cake mix box. Generally, for a 9″x9″ pan, this will be around 25-30 minutes at 350°F (175°C). Insert a toothpick into the center of the cake; if it comes out clean or with just a few moist crumbs attached, the cake is done.
- Allow the cake to cool in the pan for about 10 minutes before inverting it onto a cooling rack to cool completely.
Expert Tips & Tricks
- Level Layers: For an even more visually striking cake, use a serrated knife to trim the top of the baked cake layer after it has cooled to create a flat surface.
- Color Intensity: Gel food coloring provides more vibrant and concentrated color compared to liquid food coloring. Use it sparingly to achieve the desired shade.
- Prevent Sticking: To ensure easy removal, line the baking pan with parchment paper, leaving an overhang on two sides to use as handles for lifting the cake out.
- Flavor Boost: Add a teaspoon of vanilla extract to the cake batter for enhanced flavor. You can also use other extracts like almond or lemon to complement the colors.
- Frosting Perfection: A simple buttercream frosting works beautifully with this cake. Consider dividing the frosting and tinting it with the same colors as the cake layers for a cohesive look.
- Marbling Effect: If you want to mix the colors a little, swirl the batters together gently with a toothpick before baking for a marbled effect.
- Doneness Check: Ovens can vary in temperature. Start checking for doneness a few minutes before the recommended baking time.
Serving & Storage Suggestions
Serve the Rainbow Cake at room temperature. For a visually stunning presentation, cut it into squares or rectangles to reveal the vibrant layers. A dollop of whipped cream or a scoop of ice cream complements the cake beautifully. Store any leftover cake in an airtight container at room temperature for up to 3 days, or in the refrigerator for up to a week. To freeze, wrap the cake tightly in plastic wrap and then foil; it can be stored in the freezer for up to 2 months. Thaw overnight in the refrigerator before serving.
Nutritional Information
| Nutrient | Amount per Serving | % Daily Value |
|---|---|---|
| Calories | 250 kcal | 13% |
| Total Fat | 6g | 8% |
| Saturated Fat | 1g | 5% |
| Cholesterol | 0mg | 0% |
| Sodium | 398mg | 17% |
| Total Carbohydrate | 45g | 16% |
| Dietary Fiber | 1g | 4% |
| Sugars | 31g | – |
| Protein | 4g | 8% |
Note: Nutritional information is an estimate and may vary based on specific ingredients and preparation methods.
Variations & Substitutions
- Different Shapes: Use round cake pans instead of a square pan to create a layered round cake. You may need to adjust baking times accordingly.
- Cupcakes: Divide the colored batters into cupcake liners for individual rainbow cupcakes. Reduce baking time to approximately 15-20 minutes, or until a toothpick inserted into the center comes out clean.
- Gluten-Free: Use a gluten-free white cake mix for a gluten-free version.
- Natural Food Coloring: Explore natural food coloring options derived from fruits and vegetables, such as beet juice (red), turmeric (yellow), and spirulina (blue). The colors might be less vibrant, but they offer a more natural alternative.
- Extracts: Experiment with different extracts in each colored layer to add unique flavor profiles, such as lemon extract in the yellow layer, raspberry extract in the red layer, and blueberry extract in the blue layer.
FAQs (Frequently Asked Questions)
Q: Can I use a different size pan?
A: Yes, but you may need to adjust the baking time. Smaller pans will require a longer baking time, while larger pans will need less time in the oven. Keep an eye on the cake and check for doneness with a toothpick.
Q: Can I make the batter ahead of time?
A: It’s best to bake the cake as soon as the batter is prepared, especially after adding the food coloring, as the colors can fade over time. However, you can mix the dry ingredients of the cake mix ahead of time.
Q: How do I prevent the colors from bleeding together?
A: Pour each layer of batter carefully and gently spread it out using the back of a spoon or an offset spatula. Avoid pressing down too hard, which can cause the colors to mix.
Q: What kind of frosting should I use?
A: A simple buttercream frosting is a classic choice, but you can also use cream cheese frosting, whipped cream, or even a glaze. Consider matching the colors of the cake layers in your frosting for a cohesive look.
Q: Can I add sprinkles or other decorations?
A: Absolutely! Sprinkles, edible glitter, candies, and fresh fruit are all great additions to a Rainbow Cake. Add them after frosting the cake or just before serving.
Final Thoughts
This Rainbow Cake is more than just a dessert; it’s a vibrant celebration on a plate, perfect for birthdays, holidays, or any occasion that calls for a touch of whimsy. Don’t be intimidated by the multiple layers; the recipe is surprisingly straightforward and rewarding. So, gather your ingredients, unleash your inner artist, and bake a cake that will bring smiles and joy to everyone who takes a bite. I encourage you to try this recipe, put your own spin on it, and share your creations with friends and family. After all, life is too short for boring cake!