
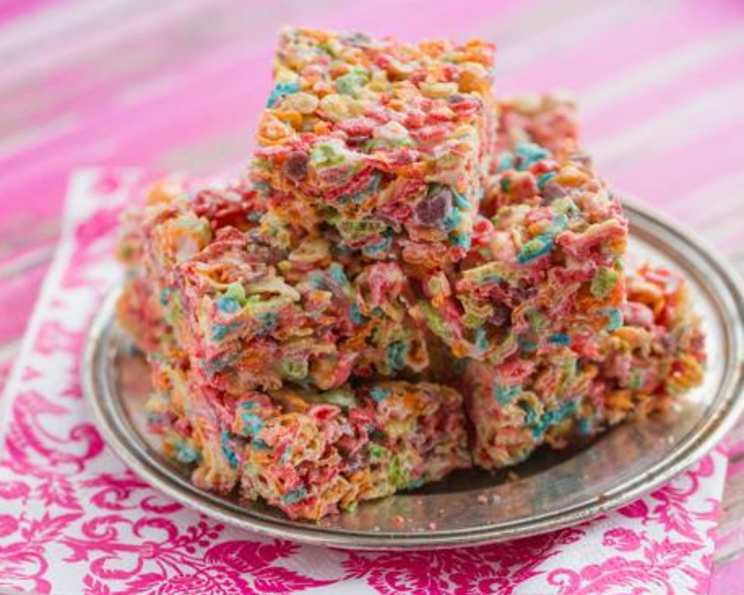
Rainbow Treats: A Symphony of Fruity Flavors
The first time I saw these colorful squares was in the college cafeteria, nestled among cookies and brownies. Their vibrant hues instantly drew me in – a promise of pure, unadulterated fun. Biting into one was a revelation: a chewy, marshmallowy base studded with crunchy, fruity cereal. It was a nostalgic trip back to childhood, all wrapped up in a single, delightful bite. My friends and I would often skip the “real” desserts for these playful treats, a testament to their irresistible charm. They were simply…better.
Recipe Overview
- Prep Time: 10 minutes
- Cook Time: 2 minutes
- Total Time: 12 minutes
- Yields: 24 treats
- Dietary Type: Vegetarian
Ingredients
- 3 tablespoons butter or margarine
- 1 (10 ounce) package mini marshmallows
- 6 cups fruity pebbles cereal (or store brand)
Equipment Needed
- Large saucepan
- 9×13 inch baking pan
- Microwave-safe bowl (optional, for microwave method)
- Spatula or wooden spoon
Instructions
- Melt the butter or margarine in a large saucepan over low heat. Ensure the heat is low to prevent the butter from burning.
- Add the mini marshmallows to the melted butter.
- Stir continuously until the marshmallows are completely melted and the mixture is smooth. This process may take a few minutes; be patient and keep stirring to prevent sticking.
- Remove the saucepan from the heat.
- Immediately add the fruity pebbles cereal to the melted marshmallow mixture.
- Mix gently but thoroughly until the cereal is evenly coated. Be careful not to crush the cereal too much while mixing.
- Press the mixture firmly into a lightly greased 9x13x2-inch baking pan. Using a greased spatula or your hands (also lightly greased) will help prevent sticking. Even pressure will ensure even treats!
- Cool completely before cutting into squares. This allows the treats to set properly and makes them easier to cut.
Microwave Method (Optional):
- Place the butter or margarine in a large microwave-safe bowl.
- Microwave on HIGH (100% power) for 45 seconds, or until melted.
- Add the mini marshmallows to the melted butter, and toss to coat. This helps the marshmallows melt more evenly.
- Microwave for 1 minute and 30 seconds, or until the marshmallows are melted and the mixture is smooth, stirring after 45 seconds. Keep a close eye on the marshmallows, as they can bubble over.
- Proceed with steps 5-8 from the stovetop method.
Expert Tips & Tricks
- Don’t Overcook: Overheating the marshmallow mixture can result in hard, brittle treats. Low and slow is the key!
- Grease is Your Friend: Generously grease your pan and spatula/hands to prevent sticking. This will make pressing and cutting much easier.
- Marshmallow Variations: Experiment with different types of marshmallows. Vanilla-flavored or even toasted marshmallows can add a unique twist.
- Freshness Matters: Use fresh marshmallows for the best results. Stale marshmallows won’t melt as smoothly.
- Even Coating: Make sure every piece of cereal is coated with the marshmallow mixture. This ensures a consistent flavor and texture throughout the treats.
- Texture Control: For chewier treats, add a tablespoon of corn syrup to the marshmallow mixture.
Serving & Storage Suggestions
These Rainbow Treats are best served at room temperature. Cut them into squares of your desired size – smaller squares for bite-sized snacks, larger squares for a more substantial treat.
To store, keep them in an airtight container at room temperature. They will stay fresh for up to 3 days. For longer storage, you can freeze them for up to 2 months. Wrap them individually in plastic wrap before freezing to prevent freezer burn. Thaw at room temperature before serving. They are not usually reheated.
Nutritional Information
| Nutrient | Amount per Serving | % Daily Value |
|---|---|---|
| Calories | 50.6 kcal | N/A |
| Calories from Fat | 13 kcal | 26% |
| Total Fat | 1.5 g | 2% |
| Saturated Fat | 0.9 g | 4% |
| Cholesterol | 3.8 mg | 1% |
| Sodium | 22.2 mg | 0% |
| Total Carbohydrate | 9.7 g | 3% |
| Dietary Fiber | 0 g | 0% |
| Sugars | 6.8 g | 27% |
| Protein | 0.2 g | 0% |
Variations & Substitutions
- Gluten-Free: Ensure your fruity pebbles cereal is certified gluten-free. While most major brands contain gluten, gluten-free alternatives exist.
- Vegan: Substitute the butter with a vegan butter alternative and use vegan marshmallows.
- Chocolate Addition: Mix in rainbow-colored chocolate candies after adding the cereal for an extra burst of sweetness and color.
- Nut Butter Swirl: Swirl in a tablespoon or two of your favorite nut butter (peanut, almond, cashew) into the marshmallow mixture for added flavor and richness.
- Spice it Up: Add a pinch of cinnamon or nutmeg to the marshmallow mixture for a warm, comforting flavor.
- Extract Enhancements: Add a drop or two of vanilla, almond, or lemon extract to the melted marshmallows.
FAQs (Frequently Asked Questions)
Q: Can I use regular-sized marshmallows instead of mini marshmallows?
A: Yes, but you may need to chop them up a bit to help them melt more evenly. Mini marshmallows tend to melt more quickly and smoothly.
Q: My treats are too hard. What did I do wrong?
A: You likely overheated the marshmallow mixture. Make sure to cook it over low heat and avoid over-stirring.
Q: Can I use a different type of cereal?
A: Absolutely! While fruity pebbles provide the signature rainbow effect, you can use any cereal you like. Rice Krispies, Cocoa Krispies, or even Cheerios can be used for different flavor profiles.
Q: How do I prevent the treats from sticking to the pan?
A: Generously grease the pan with butter, margarine, or cooking spray. You can also line the pan with parchment paper, leaving an overhang for easy removal.
Q: Can I make these ahead of time?
A: Yes, these treats can be made a day or two in advance. Store them in an airtight container at room temperature to maintain their freshness and chewiness.
Final Thoughts
These Rainbow Treats are more than just a simple dessert; they’re a celebration of color, flavor, and childhood memories. Whether you’re making them for a party, a snack, or just a fun afternoon activity, they’re guaranteed to bring a smile to everyone’s face. Don’t be afraid to get creative with variations and substitutions – the possibilities are endless! I encourage you to try this recipe and share your own colorful creations. Happy baking!