
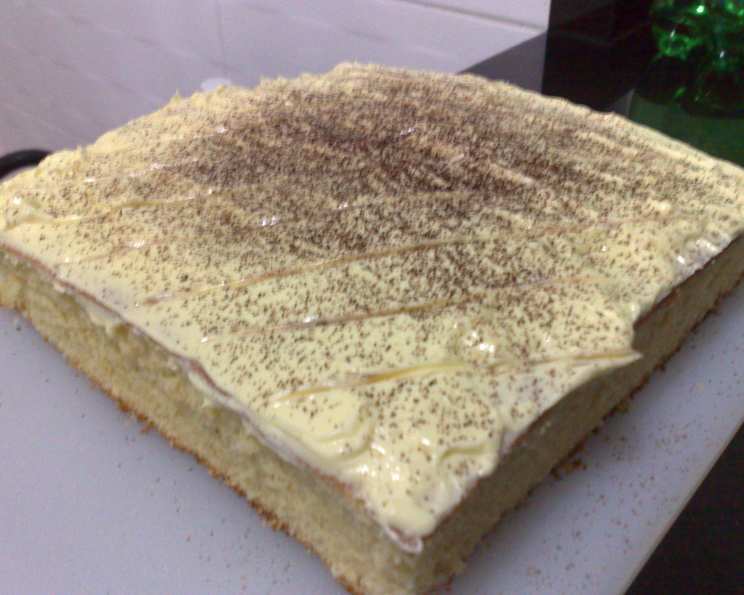
Rainy Day Yellow Cake
I remember the first time I tasted this cake. It wasn’t a sunny birthday party, but a gray December afternoon. My mom, seeing my disappointment at the endless drizzle outside, pulled this golden cake from the oven. The aroma of vanilla and butter filled the kitchen, chasing away the gloom, and each bite was like sunshine on my tongue. She decorated it with a simple, cheerful scene – clouds, raindrops, and a little figure with an umbrella – and suddenly, the rainy day didn’t seem so bad at all. This cake has been a symbol of comfort and celebration in our family ever since, a reminder that even on the dreariest days, there’s always room for something sweet.
Recipe Overview
- Prep Time: 25 minutes
- Cook Time: 35 minutes
- Total Time: 1 hour
- Servings: 12
- Yield: 1 9×13 inch cake
- Dietary Type: Not specified
Ingredients
- 4 large eggs, separated
- ¾ cup butter, at room temperature
- 2 cups granulated sugar
- 2 teaspoons vanilla extract
- 2 ¾ cups all-purpose flour
- 1 ½ teaspoons baking powder
- ½ teaspoon baking soda
- ¼ teaspoon salt
- 1 cup buttermilk
- Frosting (your choice, recipe assumes homemade or store-bought of your preference)
- Food coloring (optional, for decorating)
Equipment Needed
- 9- by 13-inch pan
- Electric mixer
- Medium-sized mixing bowls
- Dry measuring cups
- Liquid measuring cup
- Rubber spatula
- Toothpick
- Cooling rack
- Pastry bag (optional, for decorating)
- Coupler base and ring (optional, for decorating)
- Drawing and star tips (optional, for decorating)
Instructions
-
Preheat your oven to 350°F (175°C). Prepare a 9- by 13-inch pan by greasing it generously with butter or cooking spray and then dusting it with flour. This will prevent the cake from sticking and ensure easy removal. Tap out any excess flour.
-
In a medium-sized mixing bowl, using an electric mixer, beat the egg whites until they form stiff peaks. Be careful not to over-beat them, as this can make them dry. Set the whipped egg whites aside. These will be folded into the batter later to give the cake its light and airy texture.
-
In a separate, larger mixing bowl, cream the butter for 1 to 2 minutes using the electric mixer until it is light and fluffy. This step is crucial for incorporating air into the batter, which contributes to the cake’s overall texture.
-
Gradually add the granulated sugar to the creamed butter, beating for another 2 minutes until the mixture is light, fluffy, and well combined. This process, called creaming, incorporates air into the butter and sugar, creating a stable base for the cake batter.
-
Add the egg yolks all at once to the butter-sugar mixture and beat for another minute, or until the mixture appears light and fluffy. Ensure the egg yolks are fully incorporated for a smooth batter.
-
Beat in the vanilla extract. The vanilla enhances the cake’s flavor, adding a warm, sweet note.
-
In another mixing bowl, measure the all-purpose flour using a dry measuring cup. Level the flour with a knife to ensure an accurate measurement.
-
Add the baking powder, baking soda, and salt to the flour. Stir these dry ingredients together thoroughly with a whisk. The baking powder and baking soda are leavening agents that help the cake rise, while the salt enhances the flavors of the other ingredients.
-
Measure the buttermilk in a liquid measuring cup. Buttermilk adds moisture and a slight tang to the cake, resulting in a tender crumb.
-
Add about a third of the flour mixture to the butter-sugar mixture and mix well until just combined. Be careful not to overmix at this stage, as it can develop the gluten in the flour and result in a tough cake.
-
Add half of the buttermilk, mixing (but not overbeating) after each addition, followed by another third of the flour, then the remaining buttermilk, and finally the last of the flour. Mixing in alternating additions of wet and dry ingredients ensures that the batter remains smooth and prevents gluten development.
-
Gently fold the stiff egg whites into the batter with a rubber spatula. Folding, rather than stirring, helps to maintain the air incorporated into the egg whites, which contributes to the cake’s light and airy texture. Work gently until just combined.
-
Pour the batter into the prepared 9- by 13-inch pan, spreading it evenly.
-
Bake for 35 minutes, or until a toothpick inserted in the center comes out clean. If the toothpick has wet batter clinging to it, continue baking for a few more minutes and check again.
-
Set the baked cake on a wire rack to cool completely before frosting. Cooling the cake completely prevents the frosting from melting.
-
Once the cake is cooled, ice it with any frosting of your choice.
-
Optional Decorative Rainy Day Scene: Prepare a batch of decorators’ frosting, which is slightly stiffer than standard frosting. Divide it into four small bowls and mix in food coloring to achieve desired colors. Spoon the desired color into a pastry bag (place the coupler base into the bag first, then roll the bag down so the frosting goes into the bottom). Attach the desired tip by screwing on the coupler ring. To create a rainy day scene, use a drawing tip to outline clouds, raindrops, grass, and a simple figure holding an umbrella. For best results, wash out the tip each time you switch colors. To make flowers, use a star tip for the petals and a leaf tip for leaves. With the tip of your choice, pipe a border around the whole scene, if desired.
Expert Tips & Tricks
- For an extra moist cake, brush the top of the cooled cake with buttermilk before frosting.
- Don’t have buttermilk? You can make a quick substitute by adding 1 tablespoon of white vinegar or lemon juice to a liquid measuring cup, then filling the rest of the cup to the 1-cup line with milk. Let it stand for 5 minutes before using.
- To prevent the cake from sticking, line the bottom of the pan with parchment paper in addition to greasing and flouring it.
- If the cake starts to brown too quickly in the oven, tent it loosely with aluminum foil.
Serving & Storage Suggestions
Serve the Rainy Day Yellow Cake at room temperature for the best flavor and texture. It’s delicious on its own or with a scoop of vanilla ice cream or a dollop of whipped cream. Store leftover cake in an airtight container at room temperature for up to 3 days, in the refrigerator for up to a week, or in the freezer for up to 2 months. Thaw frozen cake in the refrigerator overnight before serving.
Nutritional Information
| Nutrient | Amount per Serving | % Daily Value |
|---|---|---|
| Calories | 443.2 kcal | N/A |
| Calories from Fat | 146 g | 33% |
| Total Fat | 16.3 g | 25% |
| Saturated Fat | 9.6 g | 47% |
| Cholesterol | 112 mg | 37% |
| Sodium | 352.4 mg | 14% |
| Total Carbohydrate | 67.8 g | 22% |
| Dietary Fiber | 0.9 g | 3% |
| Sugars | 41.4 g | 165% |
| Protein | 7 g | 14% |
Nutritional information is an estimate and may vary based on specific ingredients and serving sizes.
Variations & Substitutions
- Lemon Cake: Add the zest of one lemon to the batter for a bright, citrusy flavor. You can also substitute lemon juice for some of the buttermilk.
- Spice Cake: Add 1 teaspoon of ground cinnamon, 1/2 teaspoon of ground nutmeg, and 1/4 teaspoon of ground cloves to the flour mixture for a warm, spiced cake.
- Chocolate Cake: Add 1/2 cup of unsweetened cocoa powder to the flour mixture for a chocolate version of this cake.
- Gluten-Free: Substitute a gluten-free all-purpose flour blend for the regular all-purpose flour. Be sure to check that the blend contains xanthan gum or add it separately, as it helps bind the ingredients together.
FAQs (Frequently Asked Questions)
Q: Can I use salted butter instead of unsalted butter?
A: Yes, but reduce the amount of salt in the recipe to 1/8 teaspoon to compensate.
Q: Can I make this cake in a different size pan?
A: Yes, you can use two 9-inch round cake pans, but you’ll need to adjust the baking time accordingly. Start checking for doneness after about 25 minutes.
Q: What’s the best way to prevent the cake from sinking in the middle?
A: Avoid opening the oven door frequently during baking, and ensure the oven temperature is accurate. Also, don’t overmix the batter.
Q: Can I freeze the cake after frosting it?
A: Yes, but the frosting may become slightly soft after thawing. To prevent this, freeze the cake uncovered for a few hours until the frosting is firm, then wrap it tightly in plastic wrap and aluminum foil.
Q: What kind of frosting goes best with this cake?
A: This cake is versatile and pairs well with many frostings, including vanilla buttercream, chocolate buttercream, cream cheese frosting, and even a simple glaze.
Final Thoughts
I hope this Rainy Day Yellow Cake brings you as much joy as it has brought to my family over the years. Whether you’re facing a gloomy day or celebrating a special occasion, this cake is sure to brighten your spirits. Don’t hesitate to experiment with different frostings and decorations to make it your own. And if you do, please share your creations and feedback – I’d love to see what you come up with! Consider pairing it with a warm cup of tea or coffee for the ultimate comfort food experience. Happy baking!