
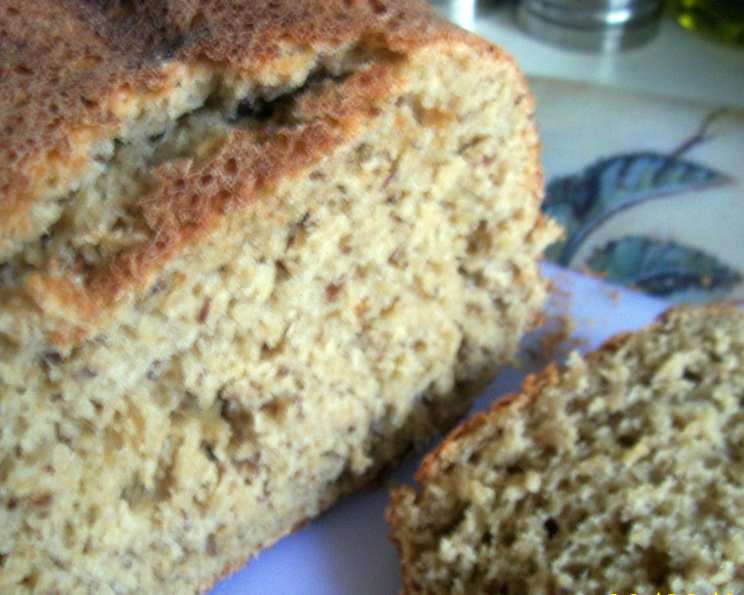
The Irresistible Aroma of Homemade Raisin Bread
The scent of warm raisin bread baking in the oven is a Proustian trigger for me, instantly transporting me back to my grandmother’s kitchen. I can almost feel the sun streaming through the window, hear her humming a forgotten tune, and taste the sweet, slightly spiced loaf slathered with creamy butter. It wasn’t just the bread itself, but the feeling of comfort and love that permeated every slice. I’ve strived to recreate that feeling ever since, and this recipe comes incredibly close to capturing the magic of those memories.
Recipe Overview
- Prep Time: 20 minutes
- Cook Time: 2 hours
- Total Time: 2 hours 20 minutes
- Yields: 1 regular loaf
- Dietary Type: Vegetarian
Ingredients
- ¾ cup water (1 ¼ cups for large loaf)
- 2 cups white bread flour (3 cups for large loaf)
- 1 tablespoon dry milk (2 tbsp for large loaf)
- 1 tablespoon sugar (1 ½ tbsp for large loaf)
- 1 teaspoon salt (1 ½ tsp for large loaf)
- 1 tablespoon butter (2 tbsp for large loaf)
- ½ teaspoon cinnamon (1 tsp for large loaf)
- ½ cup raisins (1 cup for large loaf)
- 2 teaspoons active dry yeast (3 tsp for large loaf)
Equipment Needed
- Bread Machine
- Measuring cups and spoons
Instructions
- Carefully measure all ingredients. Accuracy is key for successful bread making!
- Pour the water into the bread machine pan.
- Add the white bread flour on top of the water. Make sure the flour covers the water.
- Sprinkle the dry milk evenly over the flour. This adds a subtle richness to the bread.
- Add the sugar next. The sugar provides food for the yeast and contributes to the bread’s sweetness and browning.
- Add the salt, being careful not to let it touch the yeast directly. Salt can inhibit yeast activity.
- Place the butter into the pan. The butter adds tenderness and flavor to the bread.
- Add the cinnamon. This spice gives the bread its characteristic warm flavor.
- Finally, add the active dry yeast. Make sure it’s fresh for the best rise.
- Secure the bread machine pan into the bread machine.
- Set the bread machine to the appropriate setting for a standard white bread loaf.
- For the best results and to keep the raisins plump and intact, add them after the first beep or at the end of the first kneading cycle. This prevents them from being crushed during the kneading process. If your machine doesn’t have an add-in signal, carefully monitor the dough and add the raisins approximately 20 minutes into the kneading cycle.
- If you are using a rapid bake cycle, add the raisins along with the other ingredients at the beginning. Be aware that this method may result in the raisins being slightly more crushed.
- Allow the bread machine to complete its cycle according to the manufacturer’s instructions. This will typically involve kneading, rising, and baking.
- Once the baking cycle is complete, carefully remove the bread machine pan from the machine, using oven mitts as the pan will be hot.
- Immediately turn the pan upside down and gently shake the loaf to release it. If the loaf sticks, use a non-stick spatula to carefully loosen the sides.
- Place the freshly baked raisin bread on a wire rack to cool completely before slicing. This allows the steam to escape and prevents the bottom crust from becoming soggy.
- Enjoy!
Expert Tips & Tricks
- Bloom the yeast (optional): For extra insurance that your yeast is active, you can “bloom” it before adding it to the bread machine. Simply combine the yeast with a tablespoon of warm water (about 105-115°F) and a pinch of sugar. Let it sit for 5-10 minutes until it becomes foamy. Then, add it to the bread machine along with the other wet ingredients.
- Adjust liquid levels: Bread flour can vary in its moisture absorption. If your dough seems too dry (crumbly and not forming a smooth ball), add a tablespoon of water at a time until it comes together. If it’s too wet (sticky and clinging to the sides of the pan), add a tablespoon of flour at a time.
- Weigh your ingredients: For the most consistent results, use a kitchen scale to weigh your ingredients instead of relying on volume measurements. This is especially important for flour.
- Enhance the flavor: Add a pinch of nutmeg or allspice along with the cinnamon for a more complex flavor profile.
- Glaze it: For a shiny and slightly sweet crust, brush the top of the loaf with melted butter or an egg wash (1 egg whisked with a tablespoon of water) before baking.
Serving & Storage Suggestions
This homemade raisin bread is delicious served warm or toasted. It’s fantastic with a smear of butter, cream cheese, or peanut butter. It also makes a wonderful base for French toast.
To store, let the bread cool completely. Then, wrap it tightly in plastic wrap or place it in an airtight container. It will keep at room temperature for 2-3 days. For longer storage, you can freeze the loaf for up to 2 months. To thaw, let it sit at room temperature for several hours. You can also slice the bread before freezing for easy access to individual slices. Reheat in a toaster or oven for the best texture.
Nutritional Information
| Nutrient | Amount per Serving | % Daily Value |
|---|---|---|
| Calories | 1342 kcal | N/A |
| Calories from Fat | N/A | N/A |
| Total Fat | 16.8 g | 25% |
| Saturated Fat | 9.1 g | 45% |
| Cholesterol | 38 mg | 12% |
| Sodium | 2456.6 mg | 102% |
| Total Carbohydrate | 267.7 g | 89% |
| Dietary Fiber | 11.7 g | 46% |
| Sugars | 59.2 g | 236% |
| Protein | 33.3 g | 66% |
Note: Nutritional information is an estimate and may vary based on specific ingredients and portion sizes.
Variations & Substitutions
- Whole Wheat Raisin Bread: Substitute half of the white bread flour with whole wheat flour for a nuttier flavor and increased fiber content.
- Cranberry Walnut Bread: Replace the raisins with dried cranberries and chopped walnuts for a festive twist.
- Spiced Apple Raisin Bread: Add 1/2 cup of diced apples and a pinch of ground cloves or ginger along with the cinnamon.
- Dairy-Free Raisin Bread: Substitute the dry milk with a dairy-free milk powder (such as soy or almond milk powder) and use a dairy-free butter alternative.
- Gluten-Free Raisin Bread: While this recipe is designed for wheat flour, you can experiment with gluten-free bread flour blends. Be aware that the texture may be different, and you may need to adjust the liquid levels.
FAQs (Frequently Asked Questions)
Q: Can I use instant yeast instead of active dry yeast?
A: Yes, you can. Instant yeast can be added directly to the dry ingredients without proofing. Use the same amount as specified for active dry yeast.
Q: Why are my raisins sinking to the bottom of the loaf?
A: This can happen if the dough is too wet or the raisins are too heavy. Adding the raisins later in the kneading cycle can help. Lightly coating the raisins with flour before adding them can also prevent them from sinking.
Q: My bread is dense and doesn’t rise well. What went wrong?
A: This could be due to several factors, including old or inactive yeast, too much salt, or not enough liquid. Make sure your yeast is fresh, measure ingredients accurately, and adjust liquid levels as needed.
Q: Can I bake this bread in a regular oven?
A: While this recipe is specifically designed for a bread machine, you can adapt it for a conventional oven. After the kneading cycle, remove the dough, shape it into a loaf, and place it in a greased loaf pan. Let it rise for about an hour, then bake at 350°F (175°C) for 30-40 minutes, or until golden brown and the internal temperature reaches 200-210°F (93-99°C).
Q: How can I make the crust softer?
A: Brushing the crust with melted butter immediately after baking will soften it. You can also try placing a pan of hot water in the oven during baking to create a more humid environment, which will result in a softer crust.
Final Thoughts
I hope this recipe helps you create your own cherished memories centered around the comforting aroma and delicious taste of homemade raisin bread. Don’t be afraid to experiment with variations and make it your own. Whether you enjoy it toasted for breakfast, as a simple afternoon snack, or alongside a warm cup of tea, this bread is sure to bring a little bit of joy to your day. I’d love to hear about your baking adventures, so please feel free to share your feedback and any creative twists you try!