
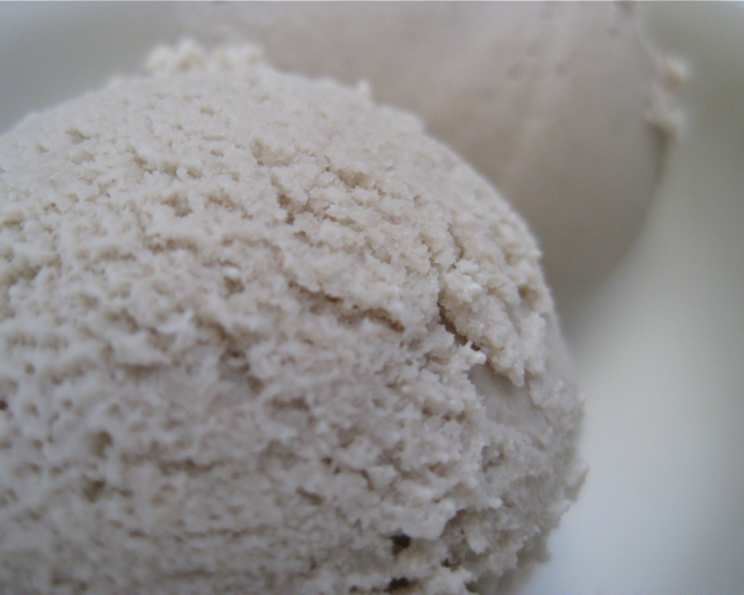
Raw Vegan Cashew Banana Ice Cream: A Guilt-Free Indulgence
There’s a distinct memory etched in my mind: sticky fingers, sunshine warming my face, and the pure, unadulterated joy of demolishing a melting banana ice cream cone at the local boardwalk. Back then, it was all about the dairy, the sugar rush, the carefree abandon. Now, years later, I’ve rediscovered that blissful sensation with a grown-up, guilt-free twist. This Raw Vegan Cashew Banana Ice Cream captures that same essence of summer fun, but with ingredients that nourish my body and soul. It’s a reminder that pleasure and wellness can absolutely coexist, and sometimes, the simplest creations are the most satisfying.
Recipe Overview
- Prep Time: 2 hours 10 minutes
- Cook Time: 0 minutes
- Total Time: 2 hours 10 minutes
- Servings: 4-6
- Yield: 1 pint
- Dietary Type: Vegan, Raw, Gluten-Free, Dairy-Free
Ingredients
- 2 cups raw cashews, soaked for 2 hours
- 1 cup filtered water
- 3 large really ripe organic bananas
- 1/4 cup Agave or 1/4 cup just like sugar
- 1 tablespoon natural vanilla extract
- 1 pinch of celtic sea salt
Equipment Needed
- High-speed blender (such as a Vitamix)
- Ice cream maker
Instructions
-
Begin by ensuring your raw cashews have been soaked for at least 2 hours. This crucial step softens them, allowing for a smoother, creamier ice cream texture. Drain and rinse the cashews thoroughly after soaking.
-
In a high-speed blender, combine the drained cashews with 1 cup of filtered water. Blend on high speed until completely smooth and creamy. This may take a few minutes, depending on the power of your blender. Stop occasionally to scrape down the sides of the blender to ensure all ingredients are fully incorporated. If your blender is struggling, add a tablespoon or two more of water at a time until the mixture moves freely.
-
Add the 3 ripe bananas, 1/4 cup Agave (or just like sugar), 1 tablespoon natural vanilla extract, and 1 pinch of celtic sea salt to the blender.
-
Continue to blend until the mixture is perfectly smooth and uniform in color. Taste and adjust sweetness if necessary, adding a touch more Agave or just like sugar to your liking. Remember that the flavor will mellow slightly once frozen.
-
Transfer the blended mixture to your ice cream maker. Follow the manufacturer’s instructions for churning ice cream. The churning process typically takes around 30 minutes, but this can vary depending on your machine.
-
Once churned, the ice cream will have a soft-serve consistency. You can enjoy it immediately for a delightful, melty treat.
-
For a firmer texture, transfer the ice cream to a freezer-safe container and freeze for at least 2 hours to allow it to firm up further.
Expert Tips & Tricks
- Ripeness is key: The riper the bananas, the sweeter and more flavorful the ice cream will be. Look for bananas with plenty of brown spots.
- High-speed blending is essential: A powerful blender is vital for achieving a truly creamy texture. If you don’t have a high-speed blender, your ice cream may have a slightly grainy consistency. You can try soaking the cashews for a longer period (up to 4 hours) to help soften them further.
- Adjust sweetness to taste: Agave is a natural sweetener, but you can substitute it with other options like maple syrup or coconut sugar. If using a different sweetener, start with a smaller amount and adjust to your preference.
- Don’t over-churn: Over-churning can result in a grainy texture. Keep a close eye on your ice cream maker and stop churning when the ice cream reaches a soft-serve consistency.
- Freeze for optimal texture: Freezing the ice cream for a few hours after churning allows it to firm up and develop a more scoopable texture. However, be careful not to freeze it for too long, as it can become too hard to scoop. If this happens, simply let it thaw for a few minutes before serving.
- Salt is your friend: A pinch of salt enhances the sweetness and brings out the other flavors in the ice cream. Don’t skip this step!
- Add Ins: Feel free to experiment with add ins during the last few minutes of churning, such as cacao nibs, chopped nuts, or berries.
Serving & Storage Suggestions
Serve this Raw Vegan Cashew Banana Ice Cream straight from the ice cream maker for a soft-serve experience or after freezing for a firmer texture. Garnish with fresh fruit, a drizzle of agave, or a sprinkle of cacao nibs for added visual appeal and flavor.
Store leftover ice cream in an airtight container in the freezer. It will keep for up to a week, although the texture may change slightly over time. If the ice cream becomes too hard to scoop, let it thaw at room temperature for a few minutes before serving. Avoid refreezing melted ice cream, as this can affect the texture and quality.
Nutritional Information
Please note that these values are estimates and may vary based on specific ingredients and portion sizes.
| Nutrient | Amount per Serving | % Daily Value |
|---|---|---|
| Calories | 493 kcal | N/A |
| Total Fat | 32.1g | 49% |
| Saturated Fat | 6.4g | 31% |
| Cholesterol | 0mg | 0% |
| Sodium | 158.8mg | 6% |
| Total Carbohydrate | 46.1g | 15% |
| Dietary Fiber | 4.7g | 18% |
| Sugars | 16.3g | N/A |
| Protein | 11.6g | 23% |
Variations & Substitutions
- Nut-Free Version: While this recipe relies on cashews for its creamy base, you could experiment with substituting them with sunflower seeds (soaked for a shorter time, about 1-2 hours). Note that the flavor and texture will be different.
- Sweetener Alternatives: Maple syrup, coconut nectar, or even pitted dates (blended directly into the mixture) can be used in place of agave. Adjust the amount to your desired sweetness level.
- Chocolate Banana Ice Cream: Add 2-3 tablespoons of raw cacao powder to the blender for a rich, chocolatey twist.
- Berry Swirl: Gently swirl in a homemade berry compote (made with berries, a touch of sweetener, and a squeeze of lemon juice) after churning for a beautiful and flavorful ice cream.
- Mint Chocolate Chip: Add a few drops of peppermint extract and some cacao nibs during the last few minutes of churning for a refreshing mint chocolate chip ice cream.
- Spiced Banana Ice Cream: Incorporate a pinch of cinnamon, nutmeg, or ginger for a warm and comforting flavor profile, especially perfect during the cooler months.
FAQs (Frequently Asked Questions)
Q: Can I make this without an ice cream maker?
A: While an ice cream maker provides the best texture, you can try freezing the blended mixture in a shallow container, stirring every 30-60 minutes for the first few hours to break up ice crystals. However, the texture will likely be icier than ice cream maker version.
Q: My ice cream is too hard after freezing. What can I do?
A: Let it thaw at room temperature for 10-15 minutes before scooping. You can also try running your ice cream scoop under warm water to make it easier to scoop.
Q: Can I use frozen bananas instead of fresh?
A: While you can use frozen bananas, the texture of the ice cream may be slightly different. Make sure the bananas are very ripe before freezing them. Let them thaw slightly before blending.
Q: How long does this ice cream last in the freezer?
A: This ice cream is best enjoyed within a week of making it. After that, the texture may start to change, and it may become icier.
Q: Can I add other fruits to this recipe?
A: Yes, absolutely! Berries, mangoes, peaches, and other soft fruits can be added to the blender along with the bananas. Just be mindful of the liquid content, as too much liquid can affect the texture of the ice cream.
Final Thoughts
This Raw Vegan Cashew Banana Ice Cream is more than just a dessert; it’s a celebration of simple, wholesome ingredients transformed into a delightful and satisfying treat. I encourage you to give this recipe a try and experience the pure joy of a guilt-free indulgence. Don’t be afraid to get creative with variations and substitutions, and make it your own! Share your feedback and creations – I’d love to hear what you think! Pair this ice cream with a slice of raw vegan chocolate cake or a refreshing glass of iced herbal tea for the ultimate plant-based dessert experience.