
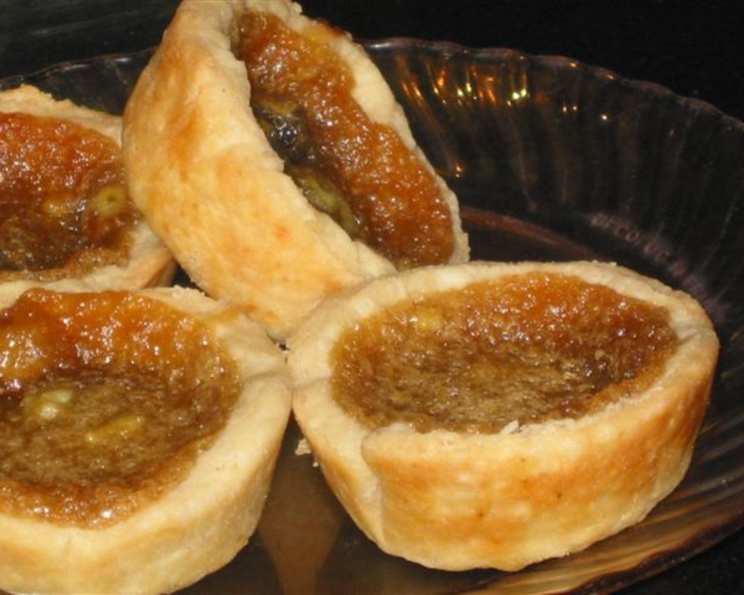
Real Canadian Butter Tarts: A Taste of Home
The aroma of butter tarts baking is pure nostalgia for me. As a child, my Grandma Elsie always had a batch cooling on her counter, their sweet, buttery scent mingling with the ever-present aroma of her pipe tobacco. I remember sneaking warm tarts, their gooey centers burning my tongue, and the feeling of pure, unadulterated joy. They weren’t just a dessert; they were a symbol of her love, and a little piece of Canadian heritage.
Recipe Overview
- Prep Time: 20 minutes
- Cook Time: 25-30 minutes
- Total Time: 45-50 minutes
- Servings: 24 tarts
- Yield: 2 dozen
- Dietary Type: Not suitable for Dairy-Free, Gluten-Free, or Vegan diets.
Ingredients
For the Pastry: (Note: This recipe uses a pre-made pastry base for simplicity, but you can certainly use your favorite homemade shortcrust pastry recipe.)
- Your favorite shortcrust pastry dough (enough for 24 tart shells) or store-bought. Tenderflake brand is recommended.
For the Filling:
- 1 cup (2 sticks) butter, melted
- 3 tablespoons vinegar
- 4 large eggs, lightly beaten
- 4 cups brown sugar, packed
- 2 teaspoons vanilla extract
- 1/4 cup currants (approximately 6-8 per tart)
Equipment Needed
- 2 standard muffin tins (for 24 tarts)
- Mixing bowl
- Measuring cups and spoons
- Rolling pin (if making your own pastry)
- Fork
- Oven
Instructions
-
Prepare the Pastry: If making your own pastry, follow your recipe instructions. If using store-bought, roll it out on a lightly floured surface to about 1/8 inch thickness. You’ll want it slightly thicker than you would for a pie pastry. Use a cookie cutter or a knife to cut out circles slightly larger than the diameter of your muffin tin cups. Press the pastry circles gently into the muffin tins, ensuring they fit snugly. Prick the bottom of each tart shell several times with a fork to prevent them from puffing up during baking. Chill the prepared tart shells in the refrigerator while you prepare the filling.
-
Preheat the Oven: Preheat your oven to a low temperature of 200°F (93°C). This initial low temperature is crucial for preventing the filling from boiling over during the first part of the baking process.
-
Prepare the Currants: Sprinkle 6-8 currants into the bottom of each unbaked tart shell. Distribute them evenly.
-
Make the Filling: In a mixing bowl, let the melted butter cool slightly to room temperature. It shouldn’t be hot, just melted and cooled.
-
Combine the Ingredients: To the cooled butter, add the vinegar, lightly beaten eggs, brown sugar, and vanilla extract.
-
Mix Well: Stir all the ingredients together until the mixture is smooth and well combined. Avoid overmixing, as this can incorporate too much air and affect the texture of the filling.
-
Fill the Tart Shells: Carefully spoon the filling into the unbaked tart shells, filling them about 2/3 full. Do not overfill, as the filling will expand during baking. This is very important!
-
Bake at Low Temperature: Place the muffin tins in the preheated 200°F (93°C) oven and bake for 15 minutes.
-
Increase the Temperature: After 15 minutes, without removing the tarts from the oven, increase the oven temperature to 350°F (175°C).
-
Continue Baking: Continue baking for another 10-15 minutes, or until the tart shells are golden brown and the filling is set and starting to brown. The filling should have a slight jiggle but not be liquid. Keep a close eye on them during this stage to prevent burning.
-
Cool the Tarts: Remove the muffin tins from the oven and let the butter tarts cool in the tins for a few minutes before carefully transferring them to a wire rack to cool completely. Cooling them in the tins helps them set properly.
Expert Tips & Tricks
- Pastry Perfection: If you’re making your own pastry, ensure it’s well-chilled before rolling it out. This will prevent it from shrinking during baking. Also, use a little extra flour on your rolling surface to prevent sticking.
- Prevent Boil-Over: The two-stage baking process – starting at a low temperature – is key to preventing the filling from boiling over. Don’t skip this!
- Currant Placement: Make sure the currants are nestled in the bottom of the shell before adding the filling. This ensures they are evenly distributed and don’t burn on top. You could also substitute the currants with raisins.
- Baking Time Variance: Baking times can vary depending on your oven. Start checking for doneness around 25 minutes total bake time and adjust accordingly.
- Shiny Glaze: For an extra shiny glaze, brush the warm tarts with a simple syrup (equal parts water and sugar, boiled until dissolved) immediately after removing them from the oven.
Serving & Storage Suggestions
Serve the butter tarts warm or at room temperature. They are delicious on their own or with a scoop of vanilla ice cream. Store leftover butter tarts in an airtight container at room temperature for up to 3 days, or in the refrigerator for up to a week. For longer storage, freeze them in an airtight container for up to 2 months. To reheat, thaw them at room temperature and warm them gently in a low oven (around 300°F/150°C) for a few minutes, or microwave them briefly.
Nutritional Information
| Nutrient | Amount per Serving | % Daily Value |
|---|---|---|
| Calories | 224 kcal | N/A |
| Total Fat | 8.5g | 13% |
| Saturated Fat | 5.1g | 25% |
| Cholesterol | 55.6mg | 18% |
| Sodium | 80.6mg | 3% |
| Total Carbohydrate | 36.9g | 12% |
| Dietary Fiber | 0.1g | 0% |
| Sugars | 36.4g | N/A |
| Protein | 1.2g | 2% |
Note: Nutritional information is an estimate and may vary based on specific ingredients and preparation methods.
Variations & Substitutions
- Nutty Butter Tarts: Add chopped walnuts or pecans to the filling along with the currants.
- Raisin Butter Tarts: Substitute the currants with raisins for a classic variation.
- Maple Butter Tarts: Replace some of the brown sugar with maple syrup for a more pronounced maple flavor. Start with ¼ cup maple syrup and adjust to taste.
- Chocolate Chip Butter Tarts: Add a handful of mini chocolate chips to each tart before baking.
- Gluten-Free: While this recipe isn’t naturally gluten-free, you can easily adapt it by using a gluten-free shortcrust pastry recipe or store-bought gluten-free pastry.
FAQs (Frequently Asked Questions)
Q: Why do you bake the tarts at such a low temperature initially?
A: The low initial temperature helps to prevent the filling from boiling over during baking. It allows the pastry to set and the filling to cook gently.
Q: Can I use a different type of sugar?
A: While brown sugar is traditional, you can experiment with other sugars like muscovado or turbinado for a slightly different flavor profile. However, using granulated sugar will change the texture.
Q: My tart shells are browning too quickly. What can I do?
A: If the tart shells are browning too quickly, you can tent them with foil during the last few minutes of baking.
Q: Can I make the pastry ahead of time?
A: Yes, you can make the pastry dough ahead of time and store it in the refrigerator for up to 2 days or in the freezer for up to 2 months. Be sure to wrap it tightly in plastic wrap.
Q: How can I tell if the butter tarts are done?
A: The tarts are done when the pastry is golden brown, and the filling is set around the edges but still has a slight jiggle in the center. The filling will continue to set as it cools.
Final Thoughts
These Real Canadian Butter Tarts are more than just a recipe; they’re a taste of history, a connection to tradition, and a simple pleasure that can brighten any day. Whether you’re a seasoned baker or a beginner, I encourage you to give this recipe a try. Share them with your loved ones, and maybe even create some new memories of your own. And if you have any questions or feedback, I’d love to hear from you. Enjoy!