
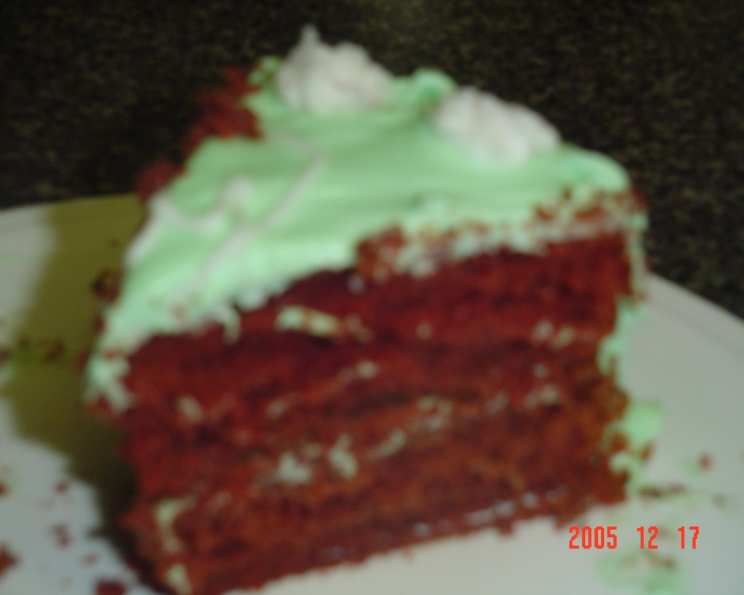
Real Red Devil’s Food Cake
The first time I tasted Devil’s Food Cake, it was at my grandmother’s 80th birthday. A majestic two-layer cake, intensely red and draped in a snowy white frosting, sat as the centerpiece of the table. I remember being captivated by its vibrant color and the rich, chocolatey flavor that was so much deeper than any chocolate cake I’d ever tasted. It wasn’t just dessert; it was a statement, a celebration, and a memory etched in my mind. To this day, the scent of cocoa and vanilla takes me straight back to that joyful gathering.
Recipe Overview
- Prep Time: 20 minutes
- Cook Time: 30 minutes
- Total Time: 50 minutes
- Servings: 12-16
- Yield: 1 cake
- Dietary Type: Not specified
Ingredients
- ½ cup margarine
- 1 ½ cups sugar
- 2 large eggs
- 4 tablespoons cocoa
- 2 tablespoons hot coffee
- 1 7/8 cups flour (that’s 2 cups, minus 2 tablespoons)
- 1 teaspoon red food coloring
- 1 teaspoon salt
- 1 teaspoon baking soda
- 1 cup sour milk or 1 cup buttermilk
- 1 teaspoon vanilla
Equipment Needed
- Mixing Bowls
- Electric Mixer
- Measuring Cups and Spoons
- Two 9-inch Cake Pans
- Parchment Paper (optional)
- Cooling Rack
Instructions
-
Preheat your oven to 350°F (175°C). Prepare two 9-inch cake pans by greasing them thoroughly with margarine or cooking spray. For extra insurance against sticking, you can also line the bottoms with circles of parchment paper.
-
In a large mixing bowl, cream together the ½ cup of margarine and the 1 ½ cups of sugar until the mixture is light and fluffy. This step is crucial for creating a tender cake, so don’t rush it. Use an electric mixer on medium speed for about 3-5 minutes.
-
Add the 2 large eggs one at a time, mixing well after each addition. This ensures that each egg is fully incorporated into the batter, contributing to the cake’s structure and richness.
-
In a separate, smaller bowl, combine the 4 tablespoons of cocoa, 2 tablespoons of hot coffee, and 1 teaspoon of red food coloring. Mix these ingredients together until a smooth, dark red paste forms. The hot coffee intensifies the chocolate flavor and helps bloom the cocoa powder, while the red food coloring provides the signature vibrant hue of Devil’s Food Cake.
-
Blend the cocoa-coffee-food coloring mixture into the creamed margarine and sugar mixture. Mix until well combined. The batter will take on a beautiful reddish-brown color.
-
In another bowl, whisk together the 1 7/8 cups of flour, 1 teaspoon of salt, and 1 teaspoon of baking soda. This dry ingredient mixture will be added to the wet ingredients in alternating increments.
-
Gradually add the dry ingredients to the wet ingredients, alternating with the 1 cup of sour milk or buttermilk. Begin and end with the dry ingredients, mixing until just combined after each addition. Overmixing can lead to a tough cake, so be careful not to overdo it. The order should be: Dry, Milk, Dry, Milk, Dry.
-
Stir in the 1 teaspoon of vanilla extract. This enhances the overall flavor profile of the cake.
-
Pour the batter evenly into the two prepared cake pans.
-
Bake in the preheated oven for 30 minutes, or until the tops of the cakes spring back when lightly touched. A toothpick inserted into the center should come out clean, or with just a few moist crumbs clinging to it.
-
Cool the cakes in the pans for about 10 minutes before inverting them onto a wire rack to cool completely. Ensure they are completely cooled before frosting.
A Note on Utensils: Be cautious about the utensils you use to mix the cocoa, coffee, and food coloring mixture. Plastic or wood can easily absorb the red color and stain permanently. Metal or glass bowls and utensils are recommended for this step.
Expert Tips & Tricks
- Sour Milk Substitute: If you don’t have sour milk or buttermilk on hand, you can easily make your own. Simply add 1 tablespoon of lemon juice or white vinegar to a liquid measuring cup, then fill the cup with milk to reach the 1-cup mark. Let it stand for 5 minutes, and it’s ready to use.
- Intensify the Red Color: For an even more intense red hue, you can use a gel food coloring instead of liquid. Gel food coloring is more concentrated, so you’ll need less to achieve the desired color.
- Preventing a Dry Cake: One of the biggest pitfalls when baking cakes is ending up with a dry result. To avoid this, make sure not to overbake the cake. Start checking for doneness around 25 minutes.
- Make-Ahead Tip: Bake the cake layers a day in advance. Wrap them tightly in plastic wrap and store them at room temperature. This allows the flavors to meld and makes frosting the cake easier.
- Room Temperature Matters: Ensure your margarine and eggs are at room temperature for optimal creaming and emulsification. This will result in a lighter, more evenly textured cake.
Serving & Storage Suggestions
This Real Red Devil’s Food Cake is best served at room temperature. Frost it with your favorite frosting; a classic 7-minute frosting or a simple vanilla buttercream are excellent choices. You can also dust the cake with powdered sugar for a more understated presentation. Store leftover cake in an airtight container at room temperature for up to 3 days, in the refrigerator for up to a week, or in the freezer for up to 3 months. To freeze, wrap the cake layers tightly in plastic wrap, then in foil, before placing them in the freezer. Thaw overnight in the refrigerator before serving.
Nutritional Information
Please note that these values are estimates and can vary based on specific ingredients and serving sizes.
| Nutrient | Amount per Serving | % Daily Value |
|---|---|---|
| Calories | 268 kcal | 13% |
| Total Fat | 9g | 12% |
| Saturated Fat | 2g | 10% |
| Cholesterol | 37mg | 12% |
| Sodium | 408mg | 17% |
| Total Carbohydrate | 42g | 15% |
| Dietary Fiber | 1g | 4% |
| Sugars | 26g | – |
| Protein | 4g | 8% |
Variations & Substitutions
- Chocolate Devil’s Food: For an even richer chocolate flavor, add ¼ cup of melted dark chocolate to the batter.
- Spice it Up: Add ½ teaspoon of cinnamon or nutmeg to the dry ingredients for a warm, spiced variation.
- Vegan Devil’s Food: Substitute the margarine with vegan butter, the eggs with applesauce (¼ cup per egg), and the sour milk/buttermilk with a mixture of plant-based milk and apple cider vinegar (1 tablespoon vinegar per cup of milk).
- Gluten-Free Option: Replace the all-purpose flour with a gluten-free all-purpose blend, ensuring it contains xanthan gum for binding.
FAQs (Frequently Asked Questions)
Q: What makes this cake “Devil’s Food?”
A: The “Devil’s Food” designation comes from the cake’s rich, deep chocolate flavor, achieved through the use of cocoa powder and often enhanced with coffee. The red hue is a more modern addition, distinguishing it from regular chocolate cake.
Q: Can I use regular milk instead of sour milk or buttermilk?
A: While you can, the acidity in sour milk or buttermilk helps to tenderize the cake and activate the baking soda, resulting in a lighter, more moist texture. If you must use regular milk, consider adding a teaspoon of lemon juice to it.
Q: Why do I need to use hot coffee in the cocoa mixture?
A: Hot coffee helps to bloom the cocoa powder, which intensifies its flavor and allows it to fully incorporate into the batter. It also adds moisture and depth to the cake.
Q: How do I prevent the cake from sticking to the pan?
A: Thoroughly grease and flour the cake pans before pouring in the batter. For extra insurance, line the bottoms of the pans with parchment paper.
Q: My cake is browning too quickly. What should I do?
A: If the cake is browning too quickly, tent it loosely with a piece of aluminum foil during the last 10-15 minutes of baking. This will help to prevent the top from burning while allowing the inside to cook through.
Final Thoughts
This Real Red Devil’s Food Cake isn’t just a dessert; it’s an experience. From the vibrant color to the deep, rich flavor, it’s a cake that demands attention and delights the senses. Whether you’re celebrating a special occasion or simply craving a delicious treat, I encourage you to try this recipe and create your own unforgettable memories. Don’t be afraid to experiment with different frostings and decorations to make it your own, and most importantly, share it with loved ones. Let me know what you think and how your baking adventure turns out. Happy baking!