
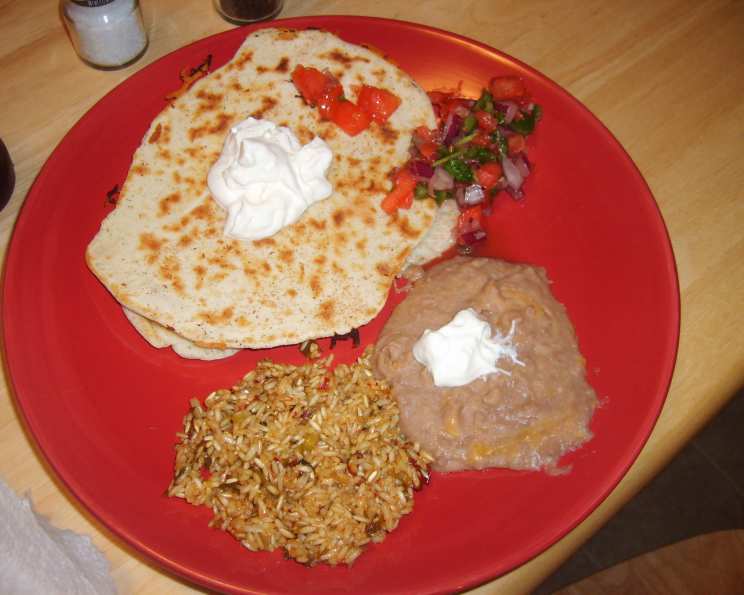
Real Refried Beans: A Culinary Journey
The scent of simmering beans always takes me back to my grandmother’s kitchen in San Antonio. I remember sitting at her worn wooden table, watching her meticulously tend to a pot bubbling with pinto beans, onions, and the subtle heat of dried chilies. The aroma alone was enough to make my mouth water, and the taste? Pure comfort. These weren’t just beans; they were love in a pot, a taste of home that has stayed with me throughout my culinary journey.
Recipe Overview
- Prep Time: 20 minutes
- Cook Time: 2 hours 20 minutes (including soaking)
- Total Time: 2 hours 40 minutes
- Servings: 4
- Dietary Type: Vegan
Ingredients
- 1 ½ cups dried pinto beans
- 2 onions, 1 quartered and 1 chopped
- 2 bay leaves, 1 chopped, 1 whole
- 1 fresh thyme sprig
- 1 dried red chili, such as ancho
- 3 tablespoons olive oil
- 2 teaspoons ground cumin
Equipment Needed
- Large pot
- Colander
- Food processor or blender
- Heavy skillet
Instructions
- Begin by preparing the pinto beans. Place the dried pinto beans in a large pot and cover them generously with cold water. Allow the beans to soak overnight (at least 8 hours) at room temperature. This crucial step helps to soften the beans and reduce cooking time.
- The next day, drain the soaked beans thoroughly using a colander. Discard the soaking water.
- Return the drained beans to the large pot. Add the quartered onion, the chopped bay leaf, the whole bay leaf, the fresh thyme sprig, and the dried red chili.
- Pour enough fresh, cold water over the beans to completely cover them. Bring the mixture to a boil over high heat.
- Once boiling, reduce the heat to low, cover the pot tightly, and let the beans simmer gently for 2 hours, or until the beans are very tender and easily mashed with a fork. It’s important to maintain a gentle simmer to prevent the beans from breaking down too quickly.
- After 2 hours, drain the cooked beans, being sure to reserve the cooking liquid. This liquid is packed with flavor and will be used later to achieve the perfect refried bean consistency. Discard the quartered onion, the bay leaves, the thyme sprig, and the dried red chili.
- Transfer approximately two-thirds of the drained beans and a portion of the reserved cooking liquid into a food processor or blender. The amount of cooking liquid added will determine the final consistency of your refried beans, so start with a small amount and add more as needed.
- Process the beans until they are coarsely blended but not completely smooth. You’re aiming for a texture that has some chunkiness, characteristic of authentic refried beans.
- In a heavy skillet (cast iron is ideal) over medium heat, heat the olive oil.
- Add the chopped onion to the hot oil and cook for 10 minutes, stirring occasionally, until the onion is soft, translucent, and golden brown. This step is essential for building a flavorful base for the refried beans.
- Stir in the ground cumin and cook, stirring constantly, for 2 minutes, until the cumin is fragrant. Be careful not to burn the cumin, as this will impart a bitter taste.
- Add the pureed beans and the reserved whole beans to the skillet. Cook, stirring constantly, until the liquid reduces and the mixture thickens to your desired consistency. This process typically takes about 10-15 minutes. Add more of the reserved cooking liquid if the beans become too thick.
- Taste and adjust seasoning as needed. Add salt and pepper to your preference.
- Serve immediately.
Expert Tips & Tricks
- For extra creamy refried beans, add a tablespoon of butter or lard along with the olive oil. This adds richness and depth of flavor.
- If your beans are taking too long to soften, try adding a pinch of baking soda to the pot during the simmering stage. This helps to break down the bean’s cell walls.
- To prevent sticking, use a heavy-bottomed skillet and stir the beans frequently, especially during the final thickening stage.
- Make-ahead tip: The cooked beans can be made ahead of time and stored in the refrigerator for up to 3 days. Reheat them in a skillet with a little water or broth before refrying.
- Adjusting the consistency: For thinner refried beans, add more of the reserved cooking liquid. For thicker beans, continue cooking until more liquid has evaporated.
Serving & Storage Suggestions
Serve these real refried beans hot as a side dish to your favorite Mexican meals. They are delicious alongside tacos, enchiladas, burritos, or huevos rancheros. Top with shredded cheese, sour cream, chopped cilantro, or a dollop of guacamole for extra flavor and visual appeal.
Leftover refried beans can be stored in an airtight container in the refrigerator for up to 3-4 days. To reheat, simply warm them in a skillet over medium heat, adding a little water or broth if needed to restore their creamy consistency. You can also freeze refried beans for longer storage. Divide them into portion-sized containers or freezer bags and freeze for up to 2-3 months. Thaw in the refrigerator overnight before reheating.
Nutritional Information
| Nutrient | Amount per Serving | % Daily Value |
|---|---|---|
| Calories | 372 kcal | N/A |
| Total Fat | 11.3 g | 17% |
| Saturated Fat | 1.6 g | 8% |
| Cholesterol | 0 mg | 0% |
| Sodium | 13.3 mg | 0% |
| Total Carbohydrate | 52.3 g | 17% |
| Dietary Fiber | 12.3 g | 49% |
| Sugars | 4.5 g | N/A |
| Protein | 16.4 g | 32% |
Variations & Substitutions
- Spicy Refried Beans: Add a pinch of cayenne pepper or a finely chopped jalapeño pepper to the skillet along with the onion for a spicy kick.
- Vegetarian Option: Ensure the olive oil is the only fat used to keep the recipe strictly vegetarian/vegan.
- Black Bean Refried Beans: Substitute the pinto beans with black beans for a different flavor profile. The cooking time may need to be adjusted slightly.
- Smoky Refried Beans: Add a teaspoon of smoked paprika to the skillet along with the cumin for a smoky flavor.
- Refried Beans with Bacon: Cook bacon in the skillet before adding the onion. Remove the bacon and crumble it over the finished refried beans. Use the bacon fat in place of some of the olive oil for extra flavor.
FAQs (Frequently Asked Questions)
Q: Why do I need to soak the beans overnight?
A: Soaking the beans helps to soften them, reducing the cooking time and making them easier to digest. It also helps to remove some of the compounds that can cause gas.
Q: Can I use canned beans instead of dried beans?
A: While you can use canned beans, the flavor and texture will not be the same. Dried beans provide a richer, more authentic flavor. If using canned, be sure to rinse them well. You will need about 4 cups of cooked canned pinto beans. Reduce the simmering time drastically and proceed from step 7.
Q: How do I know when the beans are done simmering?
A: The beans are done when they are very tender and easily mashed with a fork. They should also be creamy and slightly thickened.
Q: What if my refried beans are too thick?
A: If your refried beans are too thick, simply add more of the reserved cooking liquid or a little water or broth until you reach your desired consistency.
Q: Can I freeze refried beans?
A: Yes, refried beans freeze very well. Divide them into portion-sized containers or freezer bags and freeze for up to 2-3 months. Thaw in the refrigerator overnight before reheating.
Final Thoughts
These real refried beans are more than just a side dish; they’re a culinary experience, a taste of tradition, and a warm embrace on a plate. I encourage you to try this recipe and experience the satisfaction of making authentic refried beans from scratch. Don’t be afraid to experiment with different variations and find what you like best. And most importantly, share your creations with loved ones – food is always better when shared!