
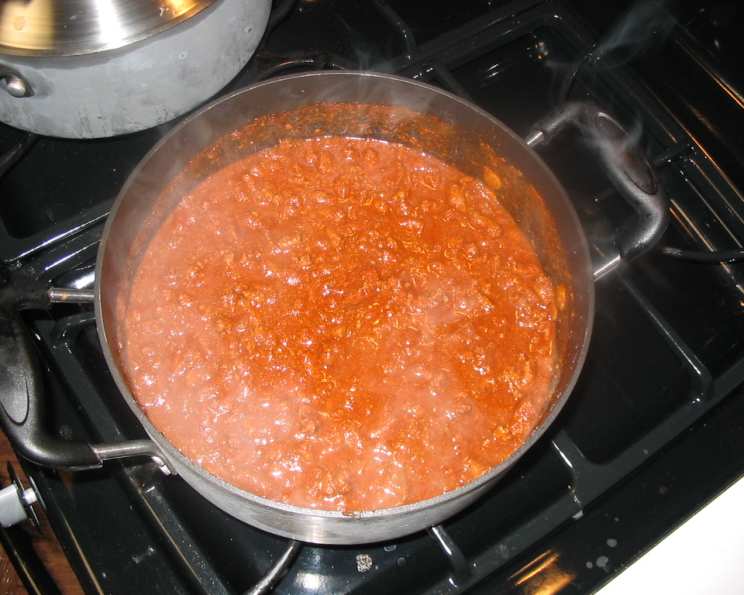
A Bowlful of Texas Pride: My Take on Real Texas Chili
My first encounter with truly authentic Texas chili wasn’t in a restaurant, but at a dusty roadside cook-off deep in the heart of the Lone Star State. The air crackled with anticipation, the scent of chili hung heavy and intoxicating, and the sheer passion radiating from the competitors was palpable. I remember one grizzled veteran, his face etched with years of chili-making experience, telling me, “Son, chili ain’t just food, it’s a feeling.” That feeling, that soul-satisfying warmth, is what I strive to capture in every batch of this Real Texas Chili. It’s a taste of tradition, a celebration of simple ingredients, and a testament to the power of good food to bring people together.
Recipe Overview
- Prep Time: 20 minutes
- Cook Time: 1 hour 40 minutes
- Total Time: 2 hours
- Servings: 8
- Yield: 4 quarts
- Dietary Type: Gluten-Free, Dairy-Free (naturally)
Ingredients
- 2 1/2 lbs top round beef, trimmed and cut into 1/2-inch cubes
- 1 tablespoon olive oil
- 2 cups beef broth
- 1 cup chicken broth
- 1 cup tomato sauce
- 1 beef bouillon cube
- 1 chicken bouillon cube
First Seasoning Dump
- 1 tablespoon onion flakes
- 1/2 teaspoon cayenne
- 4 tablespoons chili powder
Second Seasoning Dump
- 1 tablespoon garlic powder
- 1 tablespoon cumin
- 2 1/2 tablespoons chili powder
- 1/4 teaspoon cayenne
- 1 (1/4 ounce) packet Sazon Goya (optional, see note below)
Third Seasoning Dump
- 1 1/2 tablespoons chili powder
- 1 teaspoon cumin
- 1/2 teaspoon brown sugar
- 1/4 teaspoon garlic powder
Ingredient Notes:
- Sazon Goya: This seasoning, primarily made from coriander and annatto, adds a distinctive flavor and vibrant color. It can usually be found in the Mexican food aisle of most grocery stores. If you can’t find it, don’t worry, the chili will still be delicious without it. Accent also makes a Sazon seasoning.
- Beef: Top round is traditional, but you can experiment with other cuts like sirloin or chuck roast. Just adjust the cooking time as needed for tougher cuts.
Equipment Needed
- Large, heavy-bottomed pot or Dutch oven
- Measuring cups and spoons
- Cutting board
- Knife
Instructions
-
Begin by browning the beef. In your large pot or Dutch oven, heat the olive oil over medium-high heat. Add the beef cubes in batches, being careful not to overcrowd the pot. Brown the beef on all sides until it is no longer pink, but don’t worry about cooking it all the way through at this stage. Remove the beef from the pot and set aside. Do not drain the rendered fat from the pot. The fond (browned bits) left in the pot is crucial for developing flavor.
-
Return the browned beef to the pot. Add the beef broth, chicken broth, tomato sauce, beef bouillon cube, and chicken bouillon cube. Bring the mixture to a boil over high heat.
-
Once boiling, add the First Seasoning Dump: onion flakes, cayenne, and chili powder. Reduce the heat to a low simmer, cover the pot tightly, and let it simmer for one hour. This slow simmering process allows the flavors to meld and the beef to tenderize.
-
After an hour, add the Second Seasoning Dump: garlic powder, cumin, chili powder, cayenne, and Sazon Goya (if using). Stir well to combine.
-
Adjust the liquid if necessary. You should have a nice, thick “gravy” consistency. If the chili seems too thick, add a little more beef broth to thin it out. If it seems too thin, continue to simmer it uncovered for a bit to allow some of the liquid to evaporate.
-
Cover the pot again and cook for another 30 minutes on low simmer.
-
Finally, add the Third Seasoning Dump: chili powder, cumin, brown sugar, and garlic powder. Stir well and cook for about 5-10 minutes longer to allow these final flavors to incorporate. Taste and adjust seasonings as needed. Some like it hotter, some like it sweeter.
-
Serve hot and enjoy!
Expert Tips & Tricks
- Don’t skimp on the browning: A good sear on the beef is crucial for building deep, rich flavor in your chili.
- Adjust the heat: The cayenne pepper is what provides the chili’s heat. Feel free to adjust the amount to your liking. Start with less and add more at the end if needed. Remember, you can always add more heat, but you can’t take it away!
- Make it ahead: Chili is a fantastic make-ahead dish. In fact, the flavors often improve after a day or two in the refrigerator.
- Spice it up: For extra depth of flavor, try adding a teaspoon of smoked paprika along with the Second Seasoning Dump.
- Dealing with Tough Beef: If your beef is still a little tough after the initial simmer, don’t worry! Just continue to simmer it for longer, checking every 30 minutes, until it reaches your desired tenderness.
- Don’t overcrowd the pot when browning the beef: Overcrowding lowers the temperature of the pan and leads to steaming instead of browning.
Serving & Storage Suggestions
Serve your Real Texas Chili hot, straight from the pot. Traditional toppings are simple: shredded cheddar cheese, chopped onions, and maybe a dollop of sour cream or a sprinkle of cilantro. For a truly Texan experience, serve it with a side of cornbread.
Leftover chili can be stored in an airtight container in the refrigerator for up to 3-4 days. For longer storage, freeze it in freezer-safe containers for up to 2-3 months.
To reheat, simply warm the chili in a pot over medium heat, stirring occasionally, until heated through. You can also reheat it in the microwave. If the chili has thickened too much during storage, add a splash of broth or water while reheating.
Nutritional Information
Please note that these values are estimates and may vary based on specific ingredients used.
| Nutrient | Amount per Serving | % Daily Value |
|---|---|---|
| Calories | 320 kcal | 16% |
| Total Fat | 17g | 26% |
| Saturated Fat | 6g | 28% |
| Cholesterol | 87mg | 29% |
| Sodium | 717mg | 30% |
| Total Carbohydrate | 9g | 3% |
| Dietary Fiber | 3g | 12% |
| Sugars | 3g | N/A |
| Protein | 34g | 68% |
Variations & Substitutions
- Bean Believer? While true Texas chili purists eschew beans, you can certainly add a can of drained and rinsed pinto beans or kidney beans during the last 30 minutes of cooking if you desire.
- Vegetarian/Vegan Option: Substitute the beef with plant-based crumbles and use vegetable broth instead of beef and chicken broth. Ensure your bouillon cubes are also vegetable-based.
- Spicier Chili: Add finely chopped jalapeños or serrano peppers along with the First Seasoning Dump for an extra kick.
- Smoky Flavor: Add a tablespoon of chipotle powder or a few drops of liquid smoke for a smoky dimension.
- Different Meats: While top round is classic, you can use other cuts of beef, such as chuck roast, or even a combination of beef and pork.
- Beer: Replace 1 cup of the beef broth with your favorite dark beer for a richer flavor. Add it with the first seasoning dump.
FAQs (Frequently Asked Questions)
Q: Is this chili really spicy?
A: The level of spiciness can be adjusted. The recipe calls for 1/2 teaspoon of cayenne in the first seasoning dump and 1/4 teaspoon in the second. If you’re sensitive to heat, start with less and add more to taste.
Q: Can I make this in a slow cooker?
A: Yes, you can adapt this recipe for a slow cooker. Brown the beef as instructed, then transfer all ingredients to the slow cooker. Cook on low for 6-8 hours or on high for 3-4 hours.
Q: What can I serve with this chili?
A: Cornbread is a classic pairing. Other great options include tortilla chips, avocado, rice, and a simple green salad.
Q: Can I use ground beef instead of cubed beef?
A: While not traditional, you can use ground beef. Brown it thoroughly before adding the other ingredients. Keep in mind that the texture will be different. Reduce the simmer time if using ground beef.
Q: What is the “correct” consistency for Texas chili?
A: Texas chili should have a thick, “gravy-like” consistency. It shouldn’t be watery or soupy.
Final Thoughts
This Real Texas Chili recipe is more than just a set of instructions; it’s an invitation to experience a culinary tradition. I encourage you to try it, experiment with the variations, and make it your own. Don’t be afraid to adjust the seasonings to your personal preferences. Most importantly, share it with friends and family, and let the warmth and flavor of this authentic Texas chili bring everyone together. I’d love to hear your feedback and any creative twists you add to the recipe! Enjoy!