
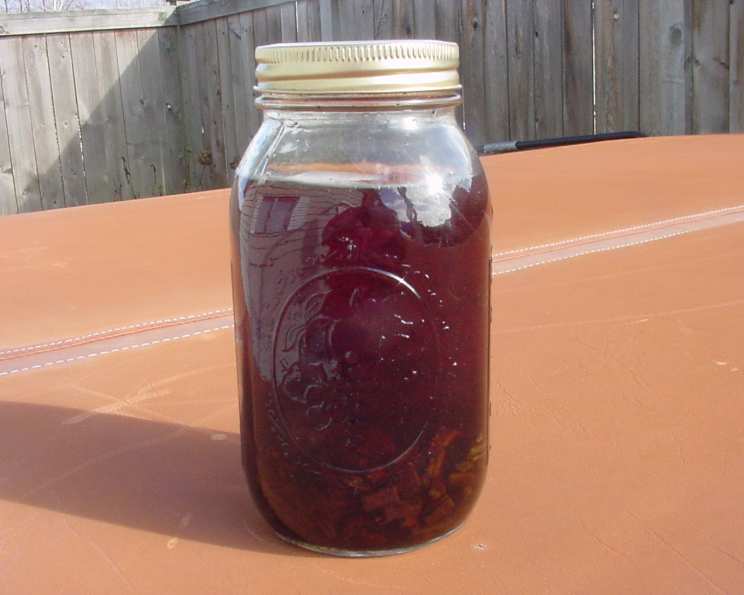
Really Easy Sugar-Free Vanilla Extract, Double Strength
The scent of vanilla always takes me back to my grandmother’s kitchen. She wasn’t a fancy baker, but her simple sugar cookies, always intensely flavored with vanilla, were legendary. I remember sneaking into the pantry, drawn by the sweet aroma emanating from her well-worn bottle of extract. I never understood why it tasted so much better than store-bought until I discovered her secret – she made it herself, patiently coaxing flavor from plump vanilla beans. This recipe is a tribute to her and her unwavering commitment to quality, even in the simplest of things.
Recipe Overview
- Prep Time: 5 minutes
- Steep Time: 30 days (minimum)
- Total Time: 30 days, 5 minutes (minimum)
- Yields: 3 1/2 cups
- Dietary Type: Sugar-Free
Ingredients
- 20 vanilla beans (Tahitian Grade B vanilla beans)
- 1 fifth (750ml) vodka, 80 proof (the cheapest you can find)
Equipment Needed
- 1-quart canning jar with a canning lid and band
- Fine muslin cloth
- Dark glass bottles for storage
Instructions
- Begin by preparing the vanilla beans. Split each bean lengthwise using a sharp knife. Then, chop the split beans into approximately 1-inch pieces. Splitting the beans exposes more surface area, allowing for maximum flavor extraction. The smaller pieces also fit more compactly into the jar.
- In a clean 1-quart canning jar, combine the chopped vanilla beans and the vodka. Ensure the beans are fully submerged in the vodka. The vodka acts as a solvent, drawing out the flavorful compounds from the beans. Use the cheapest vodka you can find because the alcohol itself doesn’t impart any flavor to the final product; it’s just a carrier for the vanilla.
- Seal the jar tightly with a canning lid and band. Place the jar in a dark cupboard or pantry. Light can degrade the vanilla extract over time, so a dark storage space is crucial.
- Steep the mixture for at least one month, but ideally longer. The longer it steeps, the more intense the vanilla flavor will become. Give the jar a shake whenever you remember to do so. This helps to redistribute the vanilla bean particles and promote even extraction.
- After the steeping period, it’s time to strain the extract. Line a strainer with fine muslin cloth (cheesecloth works too, but muslin is finer and preferable). Pour the vanilla extract through the lined strainer to remove the vanilla bean pieces and any tiny seeds. This step is important for achieving a clear, sediment-free extract. Repeat the straining process a few times to ensure all solid particles are removed.
- Transfer the strained vanilla extract to dark glass bottles for storage. Dark bottles help protect the extract from light and preserve its flavor. Ensure the bottles are tightly sealed to prevent evaporation.
- Don’t discard the spent vanilla bean pieces! You can rinse them off with a little vodka or water and dry them thoroughly on several layers of paper towels. Once completely dry, add them to a jar of sugar to make vanilla sugar. Just remember to sift the sugar before using to remove any remaining bean particles.
- Store the finished vanilla extract in a dark place at room temperature. Do not freeze or refrigerate it, as this can negatively affect its flavor. Properly stored, this vanilla extract will last indefinitely.
Expert Tips & Tricks
- Quality of Beans: While Grade B Tahitian vanilla beans are recommended, you can experiment with different types of beans (Madagascar Bourbon, Mexican) to find your preferred flavor profile. The key is to use high-quality, plump, and fragrant beans.
- Vodka Choice: While cheap vodka is perfectly acceptable, avoid flavored vodkas. The goal is to extract pure vanilla flavor, not to introduce additional flavors.
- Patience is Key: The longer the vanilla beans steep, the more intense and complex the flavor will be. Consider allowing the mixture to steep for 6 months or even a year for the best results.
- Double Infusion: For an even stronger vanilla flavor, you can use half the vodka initially, steep for a month, strain, then add the strained extract back to a fresh batch of chopped vanilla beans and the remaining vodka. This “double infusion” method yields an exceptionally potent extract.
- Preventing Cloudiness: If your vanilla extract becomes cloudy, it’s likely due to temperature fluctuations. This doesn’t affect the flavor, but you can try filtering it again through a coffee filter to remove the cloudiness.
Serving & Storage Suggestions
This homemade vanilla extract can be used in any recipe that calls for vanilla extract. Use it in baking, desserts, sauces, beverages, and more. It’s especially delicious in homemade ice cream, cakes, cookies, and custards.
Store the vanilla extract in a tightly sealed, dark glass bottle in a cool, dark place, away from direct sunlight and heat. Properly stored, it will last indefinitely, though the flavor may mellow slightly over time. Do not refrigerate or freeze.
Nutritional Information
Because this recipe only uses vanilla beans and vodka, the nutritional content is negligible. There are virtually no calories, fat, carbohydrates, or protein.
| Nutrient | Amount per Serving | % Daily Value |
|---|---|---|
| Calories | 0 kcal | 0% |
| Total Fat | 0g | 0% |
| Saturated Fat | 0g | 0% |
| Cholesterol | 0mg | 0% |
| Sodium | 0mg | 0% |
| Total Carbohydrate | 0g | 0% |
| Dietary Fiber | 0g | 0% |
| Sugars | 0g | 0% |
| Protein | 0g | 0% |
Variations & Substitutions
- Different Liquors: While vodka is the most common choice, you can experiment with other liquors like bourbon, rum, or brandy for a different flavor profile. Keep in mind that the flavor of the liquor will impart itself to the vanilla extract.
- Vanilla Bean Paste: Instead of making extract, you can scrape the seeds from the vanilla beans and mix them with a thick syrup to create vanilla bean paste.
- Vanilla Powder: You can also grind dried vanilla beans into a powder for a concentrated vanilla flavor.
FAQs (Frequently Asked Questions)
Q: Why use Grade B vanilla beans?
A: Grade B vanilla beans are typically more dehydrated than Grade A, which makes them ideal for extracting flavor into a liquid like vodka. They tend to be more affordable as well.
Q: Can I use vanilla extract that contains sugar?
A: This recipe is specifically for a sugar-free extract. Store-bought extracts often contain added sugar or corn syrup. If you require a sugar-free option, making your own is the best way to ensure it.
Q: How can I tell if my vanilla extract has gone bad?
A: Properly stored vanilla extract will last indefinitely. However, if you notice a significant change in aroma or the presence of mold, it’s best to discard it.
Q: Can I speed up the steeping process?
A: While there’s no way to drastically reduce the steeping time, you can slightly accelerate the process by placing the jar in a warm location (not direct sunlight) or by using a vacuum sealer to remove air from the jar. However, patience is key for optimal flavor.
Q: What if I don’t have a dark cupboard to store the extract while it steeps?
A: If you don’t have a dark cupboard, you can wrap the jar in a dark cloth or place it in a box to protect it from light.
Final Thoughts
Making your own vanilla extract is a remarkably simple process that yields an unparalleled flavor. The rich, complex notes of homemade vanilla elevate even the most basic recipes. It’s a project that rewards patience, and the end result is a kitchen staple that you’ll cherish for years to come. Don’t be intimidated – give it a try! You might find yourself, like my grandmother, never buying store-bought vanilla again. Share your creations and flavor combinations, and happy baking!