
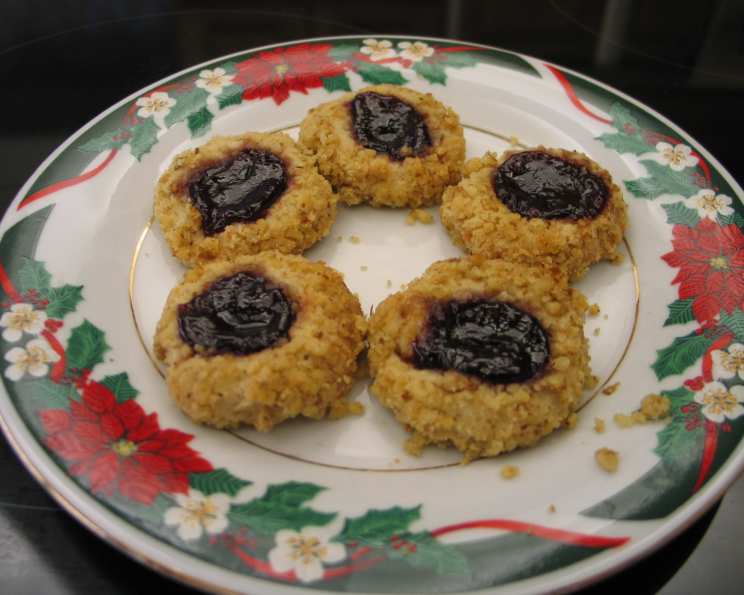
Red Currant Jelly Thumbprint Cookies: A Taste of Tradition
There’s something magical about the smell of baking cookies, especially during the holidays. For me, the aroma of buttery shortbread mingled with the sweet-tart scent of red currant jelly instantly transports me back to childhood Christmases. My grandmother, a woman whose kitchen was always filled with warmth and delicious things, made these every year. I can still picture her, flour dusting her apron, carefully pressing her thumb into each cookie, creating a tiny nest for that glistening ruby-red jelly.
Recipe Overview
- Prep Time: 30 minutes
- Cook Time: 12-15 minutes
- Total Time: 45 minutes
- Yields: About 42 cookies
- Dietary Type: Vegetarian
Ingredients
- 1 cup butter, softened
- ½ cup firmly packed brown sugar
- 2 large eggs, separated
- ½ teaspoon vanilla extract
- 2 ½ cups all-purpose flour
- ¼ teaspoon salt
- 1 ½ cups finely chopped walnuts
- 3-4 tablespoons red currant jelly (or raspberry jam)
Optional: Powdered sugar & butter for icing, flavored with chocolate or instant coffee
Equipment Needed
- Large mixing bowl
- Electric mixer
- Small bowl
- Measuring cups and spoons
- Greased baking sheets
- Cooling rack
Instructions
-
Preheat your oven to 375°F (190°C). Ensure the oven rack is positioned in the center.
-
In a large mixing bowl, using an electric mixer, cream together the softened butter and brown sugar until the mixture is light and fluffy. This step is crucial for creating tender cookies, so don’t rush it! Beat for at least 3-5 minutes.
-
Separate the eggs. Place the egg whites in a small bowl. Lightly beat the egg whites with a fork until they are slightly frothy but not stiff. Set aside for later.
-
Add the egg yolks and vanilla extract to the creamed butter mixture. Beat well until everything is thoroughly combined. Scrape down the sides of the bowl to ensure even mixing.
-
In a separate bowl, whisk together the all-purpose flour and salt. This ensures the salt is evenly distributed throughout the flour, which is important for flavor.
-
Gradually add the flour and salt mixture to the wet ingredients (butter mixture), blending thoroughly after each addition. Be careful not to overmix, as this can develop the gluten in the flour and result in tough cookies. Mix until just combined.
-
Using your hands, roll the dough into balls about 1-inch in diameter. They should be uniform in size for even baking.
-
Dip each ball in the lightly beaten egg whites, ensuring it is evenly coated.
-
Immediately roll the egg-white-coated ball in the finely chopped walnuts, pressing gently so the nuts adhere to the cookie. The walnuts add a wonderful nutty flavor and a satisfying crunch.
-
Place the walnut-coated cookies on greased baking sheets, spacing them about 1 inch apart. This allows for even air circulation and prevents the cookies from sticking together during baking.
-
Using your thumb or the tip of a spoon (I prefer my thumb – it’s more personal!), gently make an indentation in the center of each ball. Be careful not to press all the way through to the baking sheet.
-
Neatly fill each indentation with about ¼ teaspoon of red currant jelly or raspberry jam. A small spoon or a piping bag works well for this. If using icing, you’ll fill the cookies after baking.
-
Bake in the preheated 375°F (190°C) oven for 12-15 minutes, or until the cookies are lightly browned around the edges. Keep a close eye on them, as baking times can vary depending on your oven.
-
Let the cookies cool on the baking sheets for about 1 minute before transferring them to a wire rack to cool completely. This prevents them from breaking while they are still warm and soft.
-
If using icing instead of jelly/jam, fill each cookie with icing once they are completely cooled.
Expert Tips & Tricks
- Butter Temperature: Ensure your butter is properly softened, but not melted. It should be soft enough that you can easily press a finger into it, but still hold its shape. This is crucial for achieving a light and tender cookie.
- Don’t Overmix: Overmixing the dough will develop the gluten in the flour, resulting in tough cookies. Mix until just combined.
- Chill the Dough: If the dough is too soft to handle, wrap it in plastic wrap and chill it in the refrigerator for 30 minutes before rolling into balls.
- Even Baking: For even baking, use an oven thermometer to ensure your oven is accurately heated. Also, rotate the baking sheets halfway through baking.
- Jelly Selection: Use a high-quality red currant jelly or raspberry jam for the best flavor. Look for varieties with a good balance of sweetness and tartness.
- Nut Alternatives: If you’re not a fan of walnuts, you can substitute other nuts such as pecans, almonds, or hazelnuts.
Serving & Storage Suggestions
These Red Currant Jelly Thumbprint Cookies are perfect served with a cup of tea or coffee, or as part of a holiday dessert platter. Their bright color and festive appearance make them a beautiful addition to any table.
- Storage: Store the cooled cookies in an airtight container at room temperature for up to 3-4 days.
- Freezing: For longer storage, you can freeze the cookies. Place them in a single layer on a baking sheet and freeze until solid. Then, transfer them to a freezer bag or container. They can be frozen for up to 2-3 months. Thaw at room temperature before serving. It’s best to freeze them before adding the jelly, and add it after thawing for best results.
Nutritional Information
Here’s an estimate of the nutritional information per cookie. Keep in mind this is an approximation and may vary based on specific ingredients used.
| Nutrient | Amount per Serving | % Daily Value |
|---|---|---|
| Calories | 125 kcal | 6% |
| Total Fat | 7g | 10% |
| Saturated Fat | 3g | 15% |
| Cholesterol | 20mg | 7% |
| Sodium | 30mg | 1% |
| Total Carbohydrate | 11g | 4% |
| Dietary Fiber | 0.5g | 2% |
| Sugars | 5g | – |
| Protein | 1.5g | 3% |
Variations & Substitutions
- Gluten-Free: Substitute a gluten-free all-purpose flour blend for the regular all-purpose flour. You may need to add a binder like xanthan gum to help with the structure of the cookies.
- Different Jams/Jellies: Experiment with different flavors of jam or jelly, such as apricot, strawberry, or even citrus marmalade.
- Chocolate Chips: Add mini chocolate chips to the dough for a chocolatey twist.
- Spice it Up: Add a pinch of cinnamon or nutmeg to the dough for a warm, comforting flavor.
- Vegan Option: Use a vegan butter substitute, flax eggs (1 tablespoon ground flaxseed mixed with 3 tablespoons water per egg), and ensure your jelly is vegan-friendly.
FAQs (Frequently Asked Questions)
Q: Can I make the dough ahead of time?
A: Yes, you can make the dough ahead of time. Wrap it tightly in plastic wrap and store it in the refrigerator for up to 2 days. Let it soften slightly before rolling into balls.
Q: Can I use a different type of nut?
A: Absolutely! Pecans, almonds, or hazelnuts would all be delicious alternatives to walnuts.
Q: Why are my cookies spreading too much?
A: This could be due to a few factors, such as using butter that is too soft or overmixing the dough. Try chilling the dough before baking and ensure your oven is not too hot.
Q: Can I use powdered sugar instead of brown sugar?
A: While you can, the brown sugar adds a lovely depth of flavor and a slightly chewy texture. Powdered sugar will result in a more delicate cookie.
Q: My jelly is bubbling out during baking. What should I do?
A: Try using a smaller amount of jelly in each indentation. Also, make sure your oven temperature is accurate.
Final Thoughts
These Red Currant Jelly Thumbprint Cookies are more than just a recipe; they’re a piece of my family history. They are surprisingly easy to make, yet yield incredibly satisfying results. The combination of the buttery shortbread, the crunchy walnuts, and the sweet-tart jelly is simply irresistible. I encourage you to try this recipe and create your own memories with these delicious cookies. Don’t be afraid to experiment with different flavors and variations to make them your own. And most importantly, enjoy the process! Happy baking!