
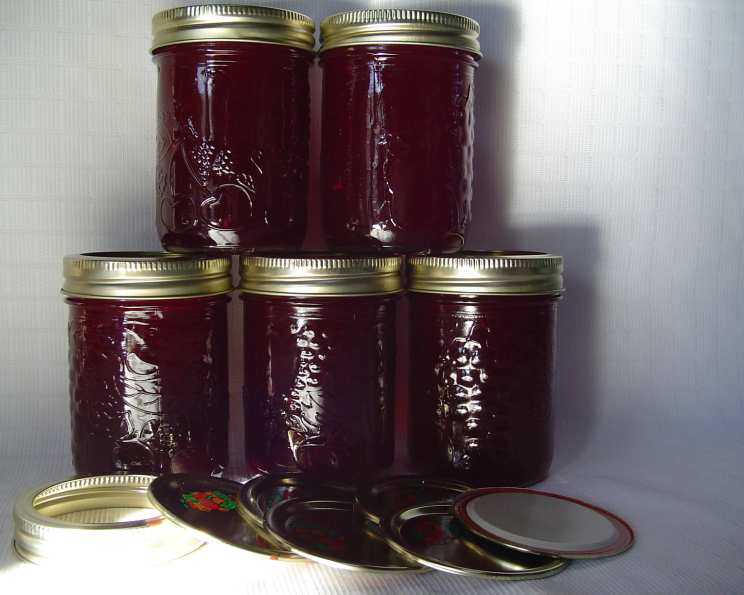
Red Currant & Raspberry Jelly: A Taste of Summer Sunshine
The scent of red currants and raspberries simmering on the stove instantly transports me back to my grandmother’s kitchen. I remember standing on a stool, mesmerized as she stirred the bubbling mixture, her wooden spoon worn smooth with years of use. The tart aroma, mingled with the sweetness of sugar, promised a treat that captured the very essence of summer, a taste of sunshine preserved in a jar. Now, decades later, I carry on that tradition, filling my own kitchen with the same delightful fragrance and creating memories for a new generation.
Recipe Overview
- Prep Time: 20 minutes
- Cook Time: 30 minutes
- Total Time: 50 minutes
- Yield: Approximately 4 cups
- Dietary Type: Vegan, Gluten-Free, Dairy-Free
Ingredients
- 4 cups red currants, washed and stemmed
- ¾ cup water
- 4 cups raspberries
- 7 cups granulated sugar
- 1 (85 ml) packet liquid fruit pectin
Equipment Needed
- Large stainless steel or enamel saucepan
- Potato masher
- Coarse sieve
- Jelly bag or cheesecloth (optional)
- Sterilized jars and lids
- Jar lifter
- Canning pot
Instructions
-
In a very large stainless steel or enamel saucepan, use a potato masher to crush the red currants. The goal is to release their juices without completely pulverizing them.
-
Add the water to the saucepan and bring the mixture to a boil over high heat. Watch carefully as it starts to bubble up!
-
Once boiling, reduce the heat to low, cover the saucepan, and let the mixture boil gently for 10 minutes. This softens the currants and helps extract their flavor.
-
Add the raspberries to the saucepan. Return the mixture to a boil over high heat, then reduce the heat and boil gently for 3 minutes.
-
Strain the mixture through a coarse sieve, pressing down on the pulp with a spoon or ladle to extract as much juice as possible. Discard the solids. This step removes the majority of the seeds and skins.
-
Optional Step: For an even clearer jelly, pour the strained juice through a jelly bag or several layers of cheesecloth set over a bowl. Let the juice drip through naturally, without squeezing. I personally skip this step sometimes, as I don’t mind a little more texture in my jelly.
-
Measure the strained juice. You should have approximately 4 cups of juice. If you don’t have quite enough, you can top it up with cranberry cocktail to reach the required amount.
-
In the clean stainless steel or enamel saucepan, combine the juice with the sugar. Stir well to ensure the sugar is evenly distributed.
-
Bring the mixture to a full rolling boil over high heat, stirring constantly to prevent scorching. Once boiling, boil hard, still stirring constantly, for exactly 1 minute. Use a timer to ensure accuracy, as this step is crucial for proper setting.
-
Remove the saucepan from the heat. Stir in the liquid fruit pectin until it is fully incorporated.
-
Using a ladle, carefully pour the hot jelly into sterilized jars, leaving ½ inch of headspace at the top.
-
Gently remove any air bubbles trapped in the jars by tapping them lightly on the counter or using a clean utensil.
-
Carefully place the filled jars into a boiling water canner. Add enough water to the canner to cover the jar lids by at least 2 inches. Return the water to a boil.
-
Once boiling, process the jars for 5 minutes. Processing ensures a proper seal and extends the shelf life of your jelly.
-
Remove the jars from the canner using a jar lifter and place them on a towel-lined surface to cool completely. As the jars cool, you should hear a “pop” sound as the lids seal.
-
After the jars have cooled completely, check the seals by pressing down on the center of each lid. If the lid flexes, it is not properly sealed and should be reprocessed or stored in the refrigerator for immediate use.
-
Label the sealed jars with the date and contents. Store them in a cool, dark place.
Expert Tips & Tricks
- Sterilize your jars and lids properly before filling them. This is essential for preventing spoilage. You can sterilize them by boiling them in water for 10 minutes, or by running them through a hot dishwasher cycle.
- Use a candy thermometer to ensure that the jelly reaches the proper setting point (around 220°F or 104°C). However, following the boiling time instructions is usually sufficient.
- Don’t overcook the jelly, as it can become too thick and rubbery.
- If you are using a jelly bag, don’t squeeze it to extract the juice, as this will make the jelly cloudy.
- If you don’t have liquid fruit pectin, you can use powdered pectin, but be sure to follow the instructions on the package.
- If your jelly doesn’t set properly, you can reprocess it by combining it with more pectin and boiling it again.
Serving & Storage Suggestions
This vibrant red currant and raspberry jelly is delicious spread on toast, scones, or biscuits. It also makes a wonderful accompaniment to cheese, grilled meats, or even as a glaze for pastries.
Sealed jars of jelly can be stored in a cool, dark place for up to 1 year. Once opened, store the jelly in the refrigerator for up to 3 weeks.
Nutritional Information
(Estimated, per tablespoon serving)
| Nutrient | Amount per Serving | % Daily Value |
|---|---|---|
| Calories | 50 kcal | 3% |
| Total Fat | 0g | 0% |
| Saturated Fat | 0g | 0% |
| Cholesterol | 0mg | 0% |
| Sodium | 0mg | 0% |
| Total Carbohydrate | 13g | 5% |
| Dietary Fiber | 0g | 0% |
| Sugars | 13g | N/A |
| Protein | 0g | 0% |
Variations & Substitutions
- Mixed Berry Jelly: Substitute other berries, such as blackberries, blueberries, or strawberries, for some of the raspberries.
- Spiced Jelly: Add a cinnamon stick, a few cloves, or a star anise to the saucepan while the mixture is boiling for a warm, spiced flavor.
- Chili Jelly: For a sweet and spicy kick, add a pinch of red pepper flakes to the mixture.
- Herb Infusion: Add a few sprigs of fresh mint or rosemary to the mixture while it boils for a subtle herbal note. Remember to remove the herbs before jarring the jelly.
FAQs (Frequently Asked Questions)
Q: Why is it important to sterilize the jars before filling them?
A: Sterilizing the jars eliminates any bacteria or mold that could cause the jelly to spoil. This is essential for ensuring a long shelf life and preventing foodborne illness.
Q: Can I use frozen berries instead of fresh ones?
A: Yes, you can use frozen berries. There’s no need to thaw them first; just add them to the saucepan as directed in the recipe.
Q: How do I know if the jelly is properly set?
A: A simple test is the “wrinkle test.” Place a small spoonful of the hot jelly on a chilled plate. After a minute, push the jelly with your finger. If it wrinkles, it’s ready. If not, continue boiling for a few more minutes and test again.
Q: What if my jelly doesn’t set?
A: If your jelly doesn’t set, you can reprocess it by combining it with more pectin and boiling it again. Follow the pectin package instructions for reprocessing.
Q: Can I reduce the amount of sugar in this recipe?
A: While you can try reducing the sugar slightly, remember that sugar is crucial for both the flavor and the setting process of the jelly. Reducing it too much may result in a jelly that doesn’t set properly or has a less vibrant flavor.
Final Thoughts
Making your own red currant and raspberry jelly is a rewarding experience that allows you to capture the flavors of summer and enjoy them throughout the year. Don’t be intimidated by the canning process; it’s simpler than it seems, and the results are well worth the effort. So, gather your berries, dust off your saucepan, and get ready to create a taste of sunshine in a jar. I encourage you to experiment with different variations and share your creations with friends and family. I’d love to hear about your experience and any special twists you add to this recipe!