
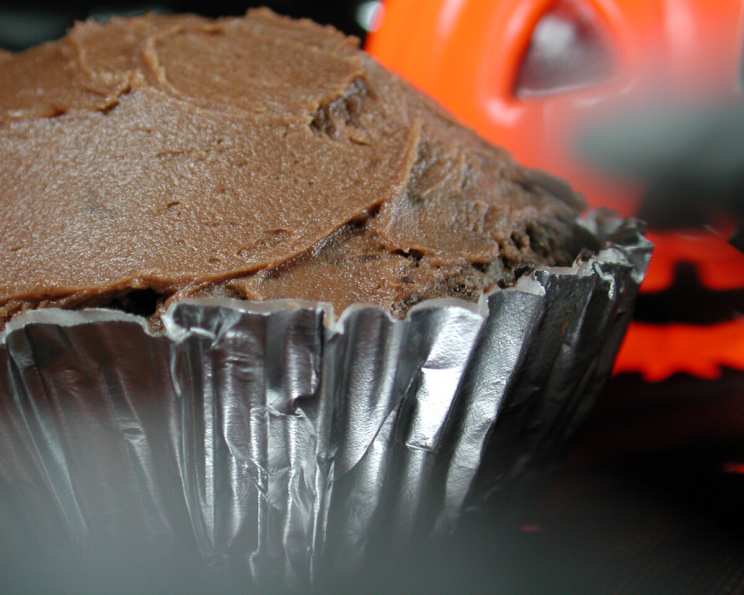
Red Devil’s Food Cupcakes With Mocha Cocoa Frosting
My grandmother, a woman who could coax joy from the most mundane tasks, always had a batch of these cupcakes ready when we visited. I remember the subtle reddish hue hinting at the rich, chocolatey indulgence to come, and the aroma of coffee mingling with cocoa, a scent that still instantly transports me back to her cozy kitchen, filled with warmth and love. Baking these Red Devil’s Food Cupcakes is more than just following a recipe; it’s recreating a cherished memory.
Recipe Overview
- Prep Time: 20 minutes
- Cook Time: 15 minutes
- Total Time: 35 minutes
- Servings: 18
- Yield: 18 cupcakes
- Dietary Type: Not specified
Ingredients
For the Cupcakes:
- 1/2 cup cocoa or 1/2 cup Dutch-process cocoa
- 1 cup boiling water
- 2 cups all-purpose flour
- 1 teaspoon baking soda
- 1/2 teaspoon salt
- 1/2 cup (1 stick) unsalted butter, softened
- 1 cup granulated sugar
- 2 large eggs
- 1 teaspoon vanilla extract
For the Mocha Cocoa Frosting:
- 3 cups confectioners’ sugar, sifted
- 1/2 cup cocoa, sifted
- 1/3 cup (5 1/3 tablespoons) unsalted butter, softened
- 1/2 teaspoon vanilla extract
- Pinch of salt
- 1/3 cup cold strong coffee, about
Equipment Needed
- Cupcake pan (for 18 cupcakes)
- Cupcake liners (optional)
- Small bowl
- Medium bowl
- Electric mixer
- Wooden spoon or rubber spatula
- Measuring cups and spoons
- Sieve
- Cake tester or toothpick
Instructions
-
Preheat your oven to 350 degrees F (175 degrees C). Prepare your cupcake pan by spritzing it with nonstick baking spray or lining it with cupcake papers. This will prevent the cupcakes from sticking and make for easy removal.
-
In a small bowl, place the cocoa (either regular or Dutch-process). Gradually add the boiling water, stirring slowly until the cocoa is well blended and smooth. Set aside to cool until lukewarm. This cocoa mixture adds intense flavor and moisture to the cupcakes.
-
In a separate small bowl, whisk together the all-purpose flour, baking soda, and salt. The baking soda helps the cupcakes rise, while the salt enhances the sweetness.
-
In a medium bowl, using an electric mixer, cream together the softened butter and sugar until the mixture is light and fluffy. This process incorporates air into the batter, resulting in a tender crumb.
-
Beat in the eggs, one at a time, ensuring each is fully incorporated before adding the next. Then, stir in the vanilla extract.
-
Add the cooled chocolate mixture to the butter mixture all at once. Stir well to combine.
-
Add the flour mixture all at once and stir with a wooden spoon or rubber spatula until just smooth and the white patches of flour disappear. Be careful not to overmix the batter, as this can lead to tough cupcakes. A few streaks of flour are okay.
-
Using a measuring cup or a spoon, scoop out the batter and fill the cupcake liners (or prepared cupcake pan) about 3/4 full. This leaves enough room for the cupcakes to rise without overflowing.
-
Bake for 15 minutes, or until a cake tester or toothpick inserted into the center of a cupcake comes out clean. Keep a close eye on the cupcakes, as baking times may vary depending on your oven.
-
Once baked, remove the cupcakes from the oven and let them cool in the pan for a few minutes before transferring them to a wire rack to cool completely.
-
While the cupcakes are cooling, prepare the mocha cocoa frosting. To remove any lumps from the confectioners’ sugar and cocoa, place the measured ingredients into a sieve set over a bowl. Push and rub with the back of a spoon or rubber spatula until all the dry ingredients are sifted.
-
In a medium bowl, using an electric mixer, cream the softened butter until smooth.
-
Add the vanilla extract and salt to the butter.
-
Add the sifted confectioners’ sugar all at once and mix until almost blended.
-
Gradually beat in the cold strong coffee, adding as much as needed to achieve a smooth, spreadable frosting consistency. Adjust the amount of coffee to your preference; a little more coffee will deepen the mocha flavor.
-
Once the cupcakes are completely cooled, generously frost them with the mocha cocoa frosting.
Expert Tips & Tricks
- For a more intense chocolate flavor, use Dutch-process cocoa in both the cupcakes and the frosting. Dutch-process cocoa is less acidic and has a smoother, richer taste.
- Don’t have coffee on hand? Strong brewed tea can be substituted in the frosting.
- To ensure even baking, rotate the cupcake pan halfway through the baking time.
- If your frosting is too thick, add a teaspoon of coffee at a time until you reach the desired consistency. If it’s too thin, add a tablespoon of sifted confectioners’ sugar.
- For a neater presentation, use a piping bag fitted with a decorative tip to frost the cupcakes.
Serving & Storage Suggestions
Serve these Red Devil’s Food Cupcakes with Mocha Cocoa Frosting at room temperature. They are perfect for parties, picnics, or as a sweet treat any time of day.
Store leftover cupcakes in an airtight container at room temperature for up to 2 days, or in the refrigerator for up to 5 days. For longer storage, freeze the cupcakes (frosted or unfrosted) for up to 2 months. Thaw frozen cupcakes at room temperature before serving.
For a delightful presentation, sprinkle the frosted cupcakes with cocoa powder or chocolate shavings. If you are packing them for a lunchbox or picnic, consider cutting them in half and sandwiching the frosting in the middle for easy handling and less mess. Wrap them individually in wax paper or plastic wrap to keep them fresh.
Nutritional Information
| Nutrient | Amount per Serving | % Daily Value |
|---|---|---|
| Calories | 273.4 kcal | N/A |
| Calories from Fat | 86 g | 32% |
| Total Fat | 9.6 g | 14% |
| Saturated Fat | 5.6 g | 27% |
| Cholesterol | 43.2 mg | 14% |
| Sodium | 189.2 mg | 7% |
| Total Carbohydrate | 44.4 g | 14% |
| Dietary Fiber | 1.3 g | 5% |
| Sugars | 30.8 g | N/A |
| Protein | 3.1 g | 6% |
Note: Nutritional information is an estimate and may vary based on specific ingredients and preparation methods.
Variations & Substitutions
- Gluten-Free: Substitute the all-purpose flour with a gluten-free blend. Be sure to choose a blend that contains xanthan gum or add it separately for improved texture.
- Dairy-Free: Use a dairy-free butter substitute for both the cupcakes and the frosting. Replace the coffee in the frosting with a dairy-free milk alternative, such as almond milk or soy milk.
- Spiced Cupcakes: Add 1/2 teaspoon of ground cinnamon or nutmeg to the flour mixture for a warm, spiced flavor.
- Espresso Frosting: Increase the amount of coffee in the frosting or add a teaspoon of espresso powder for a bolder coffee flavor.
FAQs (Frequently Asked Questions)
Q: What does Dutch-process cocoa do differently than regular cocoa?
A: Dutch-process cocoa is treated with an alkaline solution to neutralize its acidity, resulting in a milder, smoother chocolate flavor and a darker color. It also blends more easily into batters and frostings.
Q: Can I make the cupcakes ahead of time?
A: Yes, you can bake the cupcakes a day in advance. Let them cool completely, then store them in an airtight container at room temperature until you are ready to frost them.
Q: My frosting is too sweet. What can I do?
A: Add a pinch more salt to balance the sweetness. You can also add a teaspoon of lemon juice or a splash of coffee to cut through the sweetness.
Q: Can I freeze the frosted cupcakes?
A: Yes, but the frosting may change texture slightly after thawing. Place the frosted cupcakes in the freezer for about an hour to harden the frosting, then wrap them individually in plastic wrap before placing them in an airtight container.
Q: How do I prevent my cupcakes from being dry?
A: Be sure to measure the flour accurately and avoid overbaking the cupcakes. Adding the cocoa mixture also contributes to a more moist cupcake.
Final Thoughts
These Red Devil’s Food Cupcakes with Mocha Cocoa Frosting are a delightful treat that’s sure to please everyone. Don’t be intimidated by the multiple steps – each one is straightforward and contributes to the exceptional flavor and texture of the final product. I encourage you to try this recipe and create your own cherished memories, just like my grandmother did. And please, don’t hesitate to share your baking experiences and any creative twists you add along the way! Enjoy!