
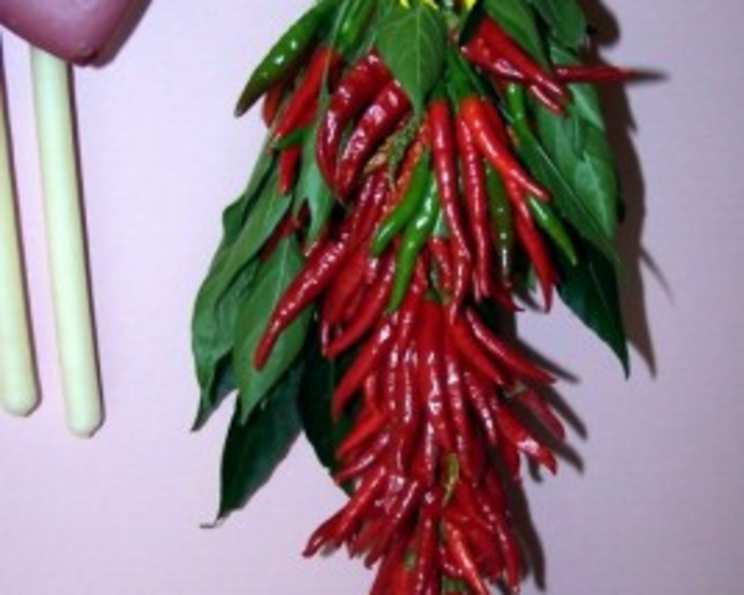
Red Hot Edible Pepper Wreath
The aroma of drying chilies always transports me back to my grandmother’s sun-drenched kitchen in New Mexico. Strings of crimson peppers, ristras as she called them, hung from the rafters, their fiery scent a promise of the warmth they would bring to winter stews. She taught me that drying peppers wasn’t just about preservation; it was about capturing the essence of summer and holding onto it. This edible pepper wreath is a beautiful and practical homage to that tradition, a spicy declaration of flavor that can be both admired and savored.
Recipe Overview:
- Prep Time: 15 minutes
- Cook Time: N/A (Air Drying)
- Total Time: Several weeks (for drying)
- Servings: Varies, depending on usage
- Yield: 1 Wreath
- Dietary Type: Vegan, Gluten-Free
Ingredients:
- 20-30 bunches of chilies (1-2 with the leaves still on)
- 1 fresh edible flower (such as sunflower, yarrow, or similar)
- Wire (garden or floral wire, strong enough to hold the weight of the peppers)
Equipment Needed:
- Wire cutters
- Gloves (optional, for handling hot peppers)
Instructions:
- Prepare your workspace. Clear a large, clean area where you can assemble the wreath. Lay down some paper or a cloth to protect your surface, especially if working with very hot chilies. Consider wearing gloves to protect your hands from the chili oils, which can cause irritation.
- Start with a strong foundation. Take your first bunch of chilies and tightly wrap the wire around the stems. Ensure the wire is secure and won’t slip as you add more bunches.
- Overlap and secure. Add another bunch of chilies, slightly overlapping the stems of the first bunch. Wrap the wire tightly around the stems, securing them together. This overlapping technique is crucial for creating a full, dense wreath.
- Continue adding bunches. Continue this process of overlapping and securing, adding bunches of chilies one at a time, until you have used all the bunches or until you reach the desired length for your wreath. Remember to wrap the wire tightly with each addition.
- Incorporate the leafy bunches. When you reach the end, use one of the bunches that still has leaves attached. Carefully arrange the leaves so they are visually appealing, creating a natural, decorative finish to the wreath.
- Create a hanging loop. Wrap the wire securely around the end bunch, leaving a length of wire extending beyond the last bunch. Form this extended wire into a loop for hanging. Make sure the loop is strong enough to support the weight of the dried peppers.
- Add the finishing touch. Place the fresh edible flower where you would traditionally place a bow on a wreath. Secure it gently with a small piece of wire if needed. The flower adds a pop of color and a touch of elegance to the rustic chili wreath, but it will obviously dry out with the chilies.
- Hang to dry. Hang the completed wreath in your kitchen or another well-ventilated area with good air circulation. Avoid direct sunlight, which can fade the color of the peppers.
- Patience is key. Allow the wreath to dry completely. This can take several weeks, depending on the humidity and temperature. The peppers are fully dried when they are brittle and easily snap.
- Use and enjoy! Once dried, the peppers can be easily snipped off the wreath for use in your cooking, adding a burst of fresh chili flavor to any dish.
Expert Tips & Tricks:
- Variety is the spice: Use a mix of different types of chilies for a more complex flavor profile and a visually interesting wreath. Consider incorporating peppers of varying colors, shapes, and heat levels.
- Tight wiring: The key to a sturdy wreath is tight wiring. Don’t be afraid to use plenty of wire to secure the chilies together. The tighter the wrap, the less likely the peppers are to fall off as they dry.
- Leaf Placement: Be strategic with the placement of the bunches with leaves. Aim for a balanced and aesthetically pleasing arrangement.
- Protect your hands: The oils in hot peppers can cause skin irritation. Wear gloves when handling the chilies to prevent burning sensations. If you don’t wear gloves, wash your hands thoroughly with soap and water after handling the peppers, avoiding touching your eyes or face.
- Drying Location: Choose a location with good air circulation and low humidity to prevent mold growth during the drying process. A well-ventilated kitchen or pantry is ideal.
- Consider the Heat: If you’re sensitive to spice, opt for milder chili varieties. You can also remove the seeds from some of the peppers to reduce their heat level.
- Wire Gauge: Use a sturdy gauge wire that can handle the weight of the drying peppers without bending or breaking.
Serving & Storage Suggestions:
The primary purpose of this wreath is decorative and functional. To serve, simply snip off the desired number of chilies with scissors or kitchen shears as needed for your recipes. Store the wreath in a dry, well-ventilated area. The dried peppers will last for several months at room temperature. Avoid storing them in humid environments, which can cause them to mold. Since the drying process preserves them, refrigeration is not needed.
Nutritional Information:
Please note that the following information is an estimate, as the nutritional content will vary based on the specific types and quantities of chilies used.
| Nutrient | Amount per Serving (1 chili) | % Daily Value |
|---|---|---|
| Calories | 5 kcal | 0% |
| Total Fat | 0g | 0% |
| Saturated Fat | 0g | 0% |
| Cholesterol | 0mg | 0% |
| Sodium | 0mg | 0% |
| Total Carbohydrate | 1g | 0% |
| Dietary Fiber | 0g | 0% |
| Sugars | 0g | 0% |
| Protein | 0g | 0% |
| Vitamin A | Varies | Varies |
| Vitamin C | Varies | Varies |
Variations & Substitutions:
- Garlic and Herb Wreath: Add dried garlic cloves, bay leaves, rosemary sprigs, or other herbs to the wreath for additional flavor and visual interest.
- All-One-Pepper Wreath: Make the wreath from only one variety of pepper. This provides a uniform and readily identifiable heat.
- Ornamental Pepper Wreath: While this recipe focuses on edible peppers, ornamental peppers can also be used for a purely decorative wreath. However, be sure to label it clearly if you use non-edible varieties.
- Mini Wreaths: Create smaller individual wreaths using fewer chilies for party favors or gifts.
FAQs (Frequently Asked Questions):
Q: How long does it take for the pepper wreath to dry completely?
A: The drying time depends on humidity and temperature, but typically it takes several weeks (2-4 weeks). The peppers should be brittle when fully dried.
Q: How do I know if my peppers are safe to eat after drying?
A: Properly dried peppers should be firm and brittle, with no signs of mold or moisture. If you see any mold, discard the affected peppers.
Q: Can I use any type of chili for this wreath?
A: Yes, you can use any type of edible chili, but consider the heat level and flavor profile you desire. Mix different varieties for a complex flavor and visual appeal.
Q: What is the best way to store the dried pepper wreath?
A: Store the wreath in a dry, well-ventilated area away from direct sunlight. This will help prevent moisture and mold.
Q: How do I clean the peppers before drying?
A: Gently wipe the peppers with a clean, dry cloth to remove any dirt or debris. Avoid washing them with water, as this can promote mold growth.
Final Thoughts:
Crafting this Red Hot Edible Pepper Wreath is more than just a recipe; it’s an experience. It’s a celebration of flavor, color, and tradition. As you carefully select your chilies, weave them together, and watch them transform into a vibrant wreath, you’re creating a beautiful and practical piece of culinary art. Don’t be afraid to experiment with different pepper varieties and herbs to create a unique wreath that reflects your personal taste. And most importantly, share the spice and beauty with friends and family – a fiery testament to the art of cooking and the joy of gathering.