
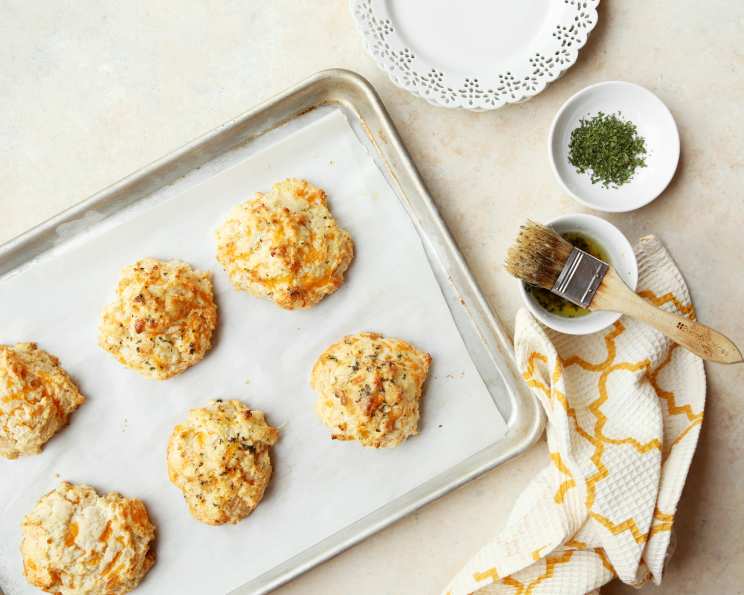
Mastering the Magic: Homemade Cheddar Bay Biscuits
The scent alone transports me back to childhood. Family vacations always meant at least one pilgrimage to Red Lobster, and for me, the highlight wasn’t the lobster, it was those golden, garlicky biscuits. Steaming hot, practically melting in your mouth, and infused with that unmistakable cheddar flavor – they were pure comfort. I remember trying to sneak extra biscuits when my parents weren’t looking. Now, I can recreate that magic in my own kitchen, and I’m excited to share the secrets with you.
Recipe Overview
- Prep Time: 15 minutes
- Cook Time: 8-10 minutes
- Total Time: 25 minutes
- Servings: 6
- Dietary Type: Not Gluten-Free
Ingredients
- 2 cups Bisquick
- 2/3 cup milk
- 1/2 cup shredded cheddar cheese
- 6 tablespoons butter
- 1/2 teaspoon garlic powder
- 1/4 teaspoon Old Bay Seasoning
Equipment Needed
- Large bowl
- Pastry cutter or large fork
- Cookie sheet
- Small saucepan
Instructions
-
Preheat your oven to 450°F (232°C). Ensure your oven rack is positioned in the center for even baking.
-
In a large bowl, combine the Bisquick and 4 tablespoons of butter. This is where the texture begins. Use a pastry cutter or a large fork to cut the butter into the Bisquick until the mixture resembles coarse crumbs. The finer you can get this, the better the texture of the final biscuit will be.
-
Add the milk and shredded cheddar cheese to the bowl.
-
Stir the ingredients together until just combined. Be careful not to overmix, as this can lead to tough biscuits. A few streaks of flour are okay.
-
Spoon the dough onto an ungreased cookie sheet. Use a spoon or small ice cream scoop to form mounds of dough. Aim for approximately 6 biscuits, depending on their desired size. Leave a little space between each biscuit.
-
Bake in the preheated oven for 8-10 minutes, or until the biscuits are golden brown. Keep a close eye on them, as oven temperatures can vary. The edges should be nicely browned, and the tops should be lightly golden.
-
While the biscuits are baking, prepare the garlic butter topping. In a small saucepan, combine the remaining 2 tablespoons of butter, garlic powder, and Old Bay Seasoning.
-
Heat the mixture over low heat until the butter is completely melted and the spices are fragrant. Be careful not to burn the butter.
-
Once the biscuits are out of the oven, immediately spoon the garlic butter mixture over the hot biscuits. Ensure each biscuit is evenly coated with the delicious garlic butter.
-
Serve immediately and enjoy!
Expert Tips & Tricks
- Don’t overmix! Overmixing develops the gluten in the Bisquick, resulting in tough, dense biscuits instead of light and fluffy ones. Stir until just combined.
- Cold butter is key. Using cold butter in the Bisquick mixture is crucial for creating flaky layers in the biscuits. You can even chill the Bisquick beforehand for extra insurance.
- Grate your own cheese. Pre-shredded cheese often contains cellulose, which can inhibit melting. Grating your own cheddar ensures a smoother, cheesier biscuit.
- For extra flavor, add a pinch of cayenne pepper or a dash of hot sauce to the garlic butter topping.
- Adjust baking time: Baking time can vary depending on your oven. Start checking the biscuits at 8 minutes, and bake until they are golden brown and cooked through.
- Make ahead: You can prepare the biscuit dough ahead of time and store it in the refrigerator for up to 24 hours. Bake just before serving.
- For a more intense garlic flavor, add some minced fresh garlic to the melted butter along with the garlic powder. Sauté briefly until fragrant, being careful not to burn it.
- Don’t have Old Bay? Use a seafood seasoning blend, or a mix of paprika, celery salt, and black pepper.
Serving & Storage Suggestions
Serve these Cheddar Bay Biscuits warm, straight from the oven, for the best experience. They are a perfect accompaniment to soups, salads, seafood dishes, or even as a snack on their own.
- Room Temperature: Biscuits can be stored at room temperature for up to 2 days in an airtight container. They may lose some of their crispness.
- Refrigerator: For longer storage, store the biscuits in the refrigerator for up to 4 days in an airtight container.
- Freezer: Biscuits can be frozen for up to 2 months. Wrap them individually in plastic wrap and then place them in a freezer bag.
- Reheating: To reheat, warm them in a preheated oven at 350°F (175°C) for a few minutes, or microwave them for a short time. You can also reheat them in an air fryer for a crispy texture.
Nutritional Information
| Nutrient | Amount per Serving | % Daily Value |
|---|---|---|
| Calories | 170 kcal | 9% |
| Total Fat | 11g | 17% |
| Saturated Fat | 6g | 28% |
| Cholesterol | 23mg | 7% |
| Sodium | 303mg | 12% |
| Total Carbohydrate | 14g | 4% |
| Dietary Fiber | 1g | 1% |
| Sugars | 3g | 10% |
| Protein | 3g | 6% |
Note: Nutritional information is an estimate and may vary based on specific ingredients and portion sizes.
Variations & Substitutions
- Gluten-Free Cheddar Bay Biscuits: Substitute Bisquick with a gluten-free all-purpose baking mix. You may need to add a binder like xanthan gum to help with the texture.
- Spice It Up: Add a pinch of red pepper flakes to the dough or the garlic butter topping for a spicy kick.
- Herbaceous Delight: Incorporate finely chopped fresh herbs like parsley, chives, or dill into the dough for a more complex flavor profile.
- Different Cheese: Experiment with different types of cheese, such as Monterey Jack, pepper jack, or even a smoky Gouda.
- Buttermilk Biscuits: Substitute the milk with buttermilk for a tangier flavor and a slightly softer texture.
- Vegan Cheddar Bay Biscuits: Use vegan butter, vegan cheddar cheese shreds, and your favorite plant-based milk.
FAQs (Frequently Asked Questions)
Q: Can I use self-rising flour instead of Bisquick?
A: While you can, Bisquick already has fat incorporated, which is key to the texture. Using self-rising flour will require you to adjust the butter in the recipe. It’s generally best to stick with Bisquick for the most reliable results.
Q: How do I prevent the biscuits from being dry?
A: Avoid overbaking! Check them frequently during the last few minutes of baking time. Also, make sure you measure the ingredients accurately, especially the liquid.
Q: Can I add other seasonings to the biscuits?
A: Absolutely! Feel free to experiment with other seasonings like onion powder, smoked paprika, or even a touch of Italian seasoning.
Q: The butter is browning too quickly in the saucepan, what do I do?
A: Reduce the heat immediately to the lowest setting and stir constantly. If the butter is already browned, discard it and start again, using lower heat.
Q: Can I make these ahead and freeze them unbaked?
A: Yes! Shape the biscuits and place them on a baking sheet lined with parchment paper. Freeze until solid, then transfer them to a freezer bag. Bake from frozen, adding a few minutes to the baking time.
Final Thoughts
There’s something incredibly satisfying about recreating a restaurant favorite at home. These Cheddar Bay Biscuits are surprisingly easy to make, and the aroma that fills your kitchen as they bake is simply irresistible. So, gather your ingredients, preheat your oven, and get ready to experience the warm, cheesy, garlicky goodness of homemade biscuits. Don’t be afraid to experiment with variations and make them your own. And most importantly, share them with friends and family – they’re guaranteed to be a hit! Let me know in the comments how they turned out for you.