
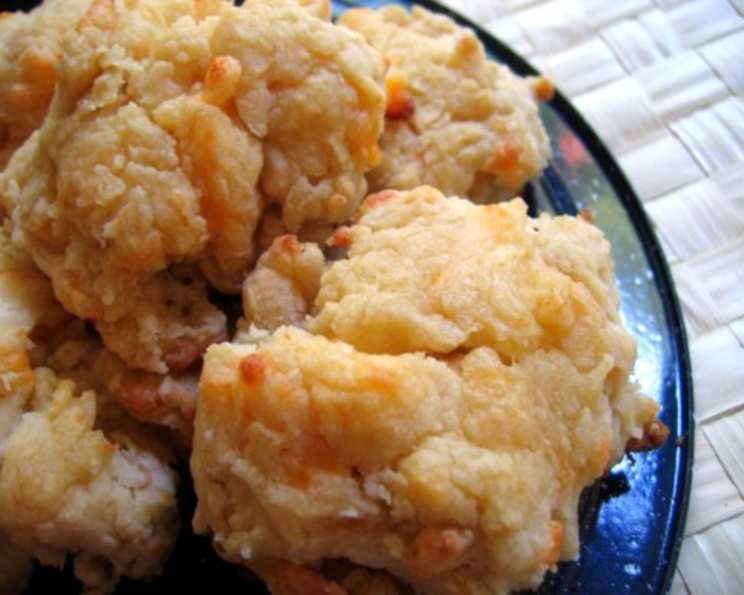
Red Lobster’s Irresistible Cheddar Bay Biscuits: A Culinary Journey
The scent of garlic butter and warm, cheesy goodness always transports me back to childhood family vacations. We’d pile into the minivan, destination unknown, but the excitement was always palpable. And no road trip was complete without a stop at Red Lobster. While the seafood was certainly a draw, it was those Cheddar Bay Biscuits, served warm in a basket, that truly stole the show. They were the perfect beginning to every meal, and secretly, sometimes the best part. Now, armed with a reliable recipe, I can recreate that comforting memory in my own kitchen.
Recipe Overview
- Prep Time: 5 minutes
- Cook Time: 8-10 minutes
- Total Time: 13-15 minutes
- Yields: 10 large biscuits
- Serves: 4-6
- Dietary Type: Vegetarian
Ingredients
- 2 cups buttermilk baking mix (such as Bisquick or Jiffy Mix; a small box typically contains 2 cups)
- 2/3 cup milk
- 1/2 cup shredded cheddar cheese (extra sharp is recommended for a bolder flavor)
- 1/4 cup butter, melted
- 1/4 – 1/2 teaspoon garlic powder (adjust to your taste)
Equipment Needed
- Oven
- Cookie sheet (ungreased)
- Mixing bowl
- Wooden spoon
- Measuring cups and spoons
- Small bowl for garlic butter
Instructions
-
Begin by preheating your oven to 450°F (232°C). This high temperature is crucial for achieving that perfect golden-brown exterior and fluffy interior.
-
In a mixing bowl, combine the buttermilk baking mix, milk, and shredded cheddar cheese. Use a wooden spoon to gently combine the ingredients until a soft dough forms. Avoid overmixing, as this can lead to tough biscuits.
-
Once the dough is just combined, beat it vigorously for 30 seconds. This step helps develop the gluten and creates a slightly chewier texture.
-
Drop the dough by heaping tablespoonfuls onto an ungreased cookie sheet. Spacing the biscuits slightly apart allows for even browning.
-
Bake in the preheated oven for 8-10 minutes, or until the biscuits are golden brown on top. Keep a close eye on them during the last few minutes of baking to prevent burning.
-
While the biscuits are baking, prepare the garlic butter topping. In a small bowl, combine the melted butter and garlic powder. Stir well to ensure the garlic powder is evenly distributed.
-
As soon as the biscuits come out of the oven, brush them generously with the garlic butter mixture. This is best done while they are still on the cookie sheet. The heat from the biscuits will help the butter melt and infuse into the dough.
-
Serve the biscuits warm and enjoy!
Expert Tips & Tricks
- Cheese Choice: While cheddar cheese is the classic choice, feel free to experiment with other cheeses like Monterey Jack, Colby Jack, or even a sharp provolone. A combination of cheeses can also add complexity to the flavor.
- Garlic Intensity: Start with 1/4 teaspoon of garlic powder and adjust to your preference. For a more pronounced garlic flavor, you can use fresh minced garlic instead of garlic powder. Simply sauté the minced garlic in the melted butter for a minute or two before brushing it onto the biscuits.
- Baking Mix Matters: Different brands of buttermilk baking mix can have slightly different textures and flavors. You might need to adjust the amount of milk slightly to achieve the desired dough consistency.
- Don’t Overmix: Overmixing the dough develops the gluten too much, resulting in tough, dense biscuits. Mix only until the ingredients are just combined.
- Cold Butter Trick: For even flakier biscuits, try grating cold butter into the baking mix before adding the milk. This creates pockets of butter that melt during baking, resulting in a more tender and layered texture.
- Freezing for Later: These biscuits can be made ahead of time and frozen. Bake them until they are just lightly golden, then let them cool completely. Wrap them tightly in plastic wrap and foil, and freeze for up to 2 months. To reheat, bake them from frozen in a 350°F (175°C) oven for 10-15 minutes, or until heated through. Brush with garlic butter before serving.
- Brush Immediately: The garlic butter should be applied as soon as the biscuits come out of the oven. This allows the butter to melt into the warm biscuits and ensures maximum flavor penetration.
Serving & Storage Suggestions
These Cheddar Bay Biscuits are best served warm, straight from the oven. They make a delicious accompaniment to seafood dishes, soups, salads, or even just as a snack.
- Serving: Arrange the warm biscuits in a basket lined with a cloth napkin for an authentic Red Lobster feel. Offer extra garlic butter on the side for dipping.
- Room Temperature: Biscuits can be stored at room temperature in an airtight container for up to 2 days, but they are best enjoyed fresh.
- Refrigerator: Store leftover biscuits in an airtight container in the refrigerator for up to 4 days. Reheat them in a 350°F (175°C) oven for a few minutes, or microwave them briefly.
- Freezer: For longer storage, freeze the baked biscuits in an airtight container for up to 2 months. Thaw them in the refrigerator overnight before reheating.
Nutritional Information
| Nutrient | Amount per Serving | % Daily Value |
|---|---|---|
| Calories | 459.2 kcal | N/A |
| Calories from Fat | 247 g | 54% |
| Total Fat | 27.5 g | 42% |
| Saturated Fat | 13.7 g | 68% |
| Cholesterol | 52.3 mg | 17% |
| Sodium | 856.8 mg | 35% |
| Total Carbohydrate | 42.7 g | 14% |
| Dietary Fiber | 1.4 g | 5% |
| Sugars | 7.5 g | N/A |
| Protein | 10.1 g | 20% |
Note: Nutritional information is an estimate and may vary based on specific ingredients and preparation methods.
Variations & Substitutions
- Spicy Biscuits: Add a pinch of cayenne pepper or red pepper flakes to the dough for a little heat.
- Herb Biscuits: Incorporate chopped fresh herbs like parsley, chives, or dill into the dough for a more aromatic flavor.
- Gluten-Free Biscuits: Use a gluten-free baking mix in place of the buttermilk baking mix. You may need to adjust the amount of liquid to achieve the desired dough consistency.
- Vegan Biscuits: Substitute the milk with plant-based milk like almond or soy milk. Use vegan butter for the garlic butter topping. You may also need to find a vegan cheese substitute.
- Add-Ins: Mix in cooked crumbled bacon, chopped green onions, or sun-dried tomatoes for extra flavor and texture.
- Buttermilk Substitute: If you don’t have buttermilk on hand, you can make a substitute by adding 1 tablespoon of lemon juice or white vinegar to a liquid measuring cup, then filling it with milk to equal 1 cup. Let it sit for 5 minutes before using.
- Different Cheeses: Experiment with various cheeses. Pepper jack for a little spice, or Parmesan for a more savory flavor.
FAQs (Frequently Asked Questions)
Q: Can I make the dough ahead of time?
A: Yes, you can prepare the dough ahead of time and store it in the refrigerator for up to 24 hours. Be sure to cover it tightly to prevent it from drying out.
Q: Why are my biscuits not rising properly?
A: Ensure your baking powder is fresh and that you are not overmixing the dough. Also, make sure your oven is preheated to the correct temperature.
Q: Can I use a different type of baking mix?
A: While Bisquick or Jiffy Mix are recommended, you can experiment with other baking mixes, but the results may vary slightly.
Q: How do I prevent the biscuits from drying out?
A: Brush the biscuits generously with garlic butter immediately after baking. This will help to keep them moist and flavorful. Storing the biscuits in an airtight container will also prevent them from drying out.
Q: Can I add more cheese to the recipe?
A: Absolutely! Feel free to add more cheese to the dough to your liking. Just be mindful of the dough consistency, as too much cheese can make it dry.
Final Thoughts
These Cheddar Bay Biscuits are more than just a side dish; they’re a nostalgic reminder of simpler times and shared family moments. This recipe is a foolproof way to recreate that magic in your own kitchen. Don’t be afraid to experiment with different cheeses, herbs, and spices to create your own unique version. So, gather your ingredients, preheat your oven, and get ready to enjoy a batch of warm, cheesy, garlicky goodness that will transport you back to your favorite Red Lobster memory. Feel free to pair these with a bowl of creamy tomato soup or a hearty clam chowder. I hope you enjoy them as much as my family does!