
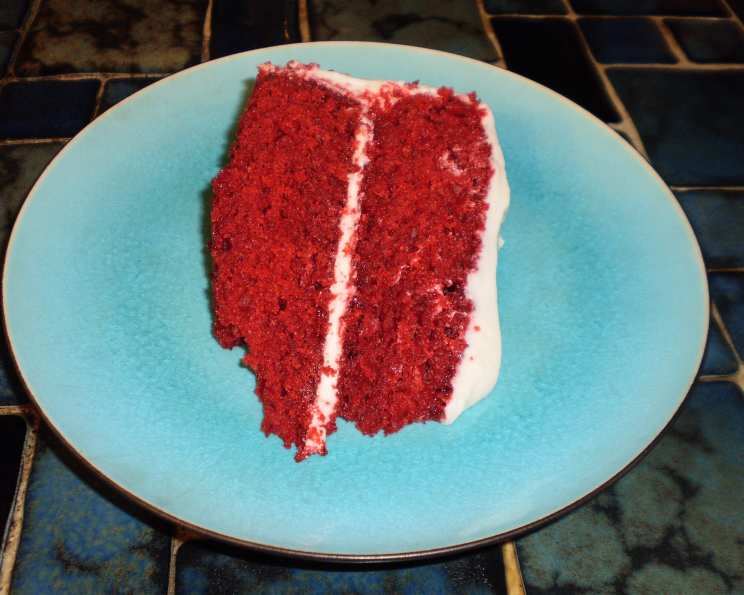
Red Velvet Cake from the Bubble Room: A Taste of Captiva Magic
There’s a specific scent memory deeply etched in my mind: a blend of saltwater taffy, sunscreen, and something undeniably… cake-like. It floods back every time I even think about red velvet. It was the summer I turned ten, and my family vacationed on Captiva Island. The Bubble Room, with its whimsical décor and towering slices of cake, felt like stepping into a dream. That first bite of red velvet, impossibly moist and rich, cemented a lifelong love affair with this classic dessert. Decades later, I still chase that perfect bite, and this recipe comes as close as I’ve ever gotten to recreating that magical memory.
Recipe Overview
- Prep Time: 15 minutes
- Cook Time: 20-30 minutes
- Total Time: 1 hour 45 minutes (includes cooling and refrigeration)
- Servings: 12
- Yield: 1 three-layer cake
- Dietary Type: Not specified
Ingredients
- 2 ½ cups self-rising flour
- 1 teaspoon baking soda
- 1 ½ cups granulated sugar
- 1 tablespoon unsweetened cocoa powder
- 1 cup buttermilk
- 1 ½ cups vegetable oil
- 2 teaspoons vanilla extract
- ¼ cup (two 1 oz. bottles) red food coloring
- 1 teaspoon white vinegar
- 2 large eggs
- ½ cup chopped pecans (optional, for filling)
For the Frosting:
- 1 cup (2 sticks) unsalted butter, softened
- 8 ounces cream cheese, softened
- 4 cups confectioners’ sugar
- 1 ½ cups chopped pecans (optional, for frosting)
Equipment Needed
- Three 9-inch cake pans
- Electric mixer
- Mixing bowls
- Measuring cups and spoons
- Non-stick cooking spray
- Wire racks
- Toothpick
Instructions
- Preheat your oven to 350 degrees Fahrenheit (175 degrees Celsius).
- In a large mixing bowl, combine all the dry ingredients: the self-rising flour, baking soda, granulated sugar, and unsweetened cocoa powder. Whisk together to ensure even distribution. This step is crucial to prevent pockets of baking soda or cocoa in the final cake.
- In a separate mixing bowl, combine all the wet ingredients: the buttermilk, vegetable oil, vanilla extract, red food coloring, and white vinegar. Whisk well until thoroughly combined. Don’t be alarmed by the amount of food coloring; it’s essential for that signature red velvet hue.
- Using an electric mixer, slowly add the dry mixture to the wet mixture. Begin mixing on low speed to prevent flour from flying everywhere. Gradually increase the speed to medium and beat for 5 minutes. This extended beating time helps to develop the gluten in the flour, contributing to the cake’s tender crumb.
- Spray three 9-inch cake pans with non-stick cooking spray. Ensure you coat the bottoms and sides of the pans evenly to prevent the cakes from sticking. You can also dust the pans with flour after spraying for extra insurance.
- Pour equal amounts of batter into each of the three pans. Use a kitchen scale or measuring cup to ensure even distribution. This will help the cake layers bake uniformly.
- Bake for 20 to 30 minutes. Start checking for doneness around 20 minutes. Insert a toothpick into the center of each cake; if it comes out clean or with just a few moist crumbs attached, the cakes are done. If the toothpick comes out with wet batter, continue baking for a few more minutes and check again. Remember that oven temperatures can vary, so adjust baking time as needed.
- Cool the layers in the pans on wire racks for 10 minutes. This allows the cakes to set slightly before inverting them.
- Carefully remove the layers from the pans. Gently loosen the edges with a knife if necessary. Place the layers on wire racks to cool completely. Make sure the cakes are completely cool before frosting, or the frosting will melt.
- To make the frosting, in a large mixing bowl, combine the softened butter, cream cheese, and confectioners’ sugar. Beat with an electric mixer until light and fluffy. This may take several minutes. Be patient and scrape down the sides of the bowl as needed to ensure everything is incorporated evenly. If desired, add 1 ½ cups of pecans.
- Frost the cake layers with the frosting. Create a generous layer of frosting between each cake layer and over the entire cake. Decorate the top with the remaining ½ cup of pecans, if desired.
- Refrigerate the cake for at least 1 hour before serving, but it is best if made the day before. This allows the flavors to meld and the frosting to set properly. Store the cake in the refrigerator.
Expert Tips & Tricks
- For a more intense red color: Use gel food coloring instead of liquid. Gel color is more concentrated and won’t thin out the batter.
- To prevent a dome: Use baking strips wrapped around the cake pans. These strips help to insulate the sides of the pan, promoting even baking and preventing a dome from forming in the center.
- Make your own buttermilk: If you don’t have buttermilk on hand, you can easily make your own by adding 1 tablespoon of white vinegar or lemon juice to 1 cup of milk. Let it sit for 5-10 minutes until it curdles slightly.
- Test your baking soda: To ensure your baking soda is still active, place a small amount in a bowl and add a few drops of vinegar. If it fizzes vigorously, it’s good to use. If not, replace it with fresh baking soda.
- Room temperature ingredients: Always use room temperature butter and cream cheese for the frosting. This will help to create a smooth and creamy texture.
Serving & Storage Suggestions
Serve this Red Velvet Cake chilled for the best flavor and texture. A slice pairs beautifully with a scoop of vanilla ice cream or a dollop of whipped cream. For a more sophisticated presentation, dust the plate with cocoa powder or drizzle with melted white chocolate.
Store leftover cake in an airtight container in the refrigerator for up to 5 days. You can also freeze individual slices wrapped tightly in plastic wrap and aluminum foil for up to 2 months. Thaw in the refrigerator overnight before serving. This cake is best enjoyed within a few days of baking, as it tends to dry out over time.
Nutritional Information
| Nutrient | Amount per Serving | % Daily Value |
|---|---|---|
| Calories | 453 kcal | N/A |
| Total Fat | 28.5 g | 43% |
| Saturated Fat | 4 g | 19% |
| Cholesterol | 31.8 mg | 10% |
| Sodium | 469.3 mg | 19% |
| Total Carbohydrate | 45.7 g | 15% |
| Dietary Fiber | 0.8 g | 3% |
| Sugars | 26.1 g | N/A |
| Protein | 4.4 g | 8% |
Note: Nutritional information is an estimate and may vary based on specific ingredients and serving sizes.
Variations & Substitutions
- Gluten-Free Red Velvet Cake: Substitute the self-rising flour with a gluten-free all-purpose flour blend. You may need to add a binding agent like xanthan gum to help with the cake’s structure.
- Dairy-Free Red Velvet Cake: Replace the buttermilk with a dairy-free alternative like almond milk or soy milk. Use a dairy-free cream cheese and butter substitute for the frosting.
- Chocolate Red Velvet Cake: Add 2 ounces of melted dark chocolate to the batter for a richer, more intense chocolate flavor.
- Spice it up: Add a teaspoon of cinnamon or nutmeg to the dry ingredients for a warm, seasonal twist.
- Nuttier Cake: Replace the pecans with walnuts or toasted hazelnuts for a different nutty flavor.
FAQs (Frequently Asked Questions)
Q: Why is vinegar added to Red Velvet Cake?
A: The vinegar reacts with the baking soda to create carbon dioxide, which helps the cake rise and gives it a light, airy texture. It also enhances the red color.
Q: Can I use regular all-purpose flour instead of self-rising flour?
A: Yes, but you’ll need to add baking powder and salt to the recipe. For every cup of all-purpose flour, add 1 ½ teaspoons of baking powder and ¼ teaspoon of salt.
Q: Why does the recipe call for so much red food coloring?
A: The red food coloring is what gives Red Velvet Cake its signature vibrant color. The amount specified is necessary to achieve that classic look.
Q: Can I make this cake ahead of time?
A: Absolutely! In fact, it’s recommended to make the cake a day in advance. This allows the flavors to meld and the cake to become even more moist.
Q: How do I prevent my cake layers from sticking to the pan?
A: Make sure to grease and flour your cake pans thoroughly. You can also use parchment paper rounds on the bottom of the pans for extra protection.
Final Thoughts
This Red Velvet Cake recipe is more than just a dessert; it’s a journey back to carefree summer days and the simple joy of a perfect slice of cake. Don’t be intimidated by the slightly longer ingredient list; the result is well worth the effort. I encourage you to give it a try, share it with loved ones, and perhaps even create your own cherished memories around this classic treat. And if you’re feeling adventurous, why not pair it with a bold cup of coffee or a sweet dessert wine? Happy baking!