
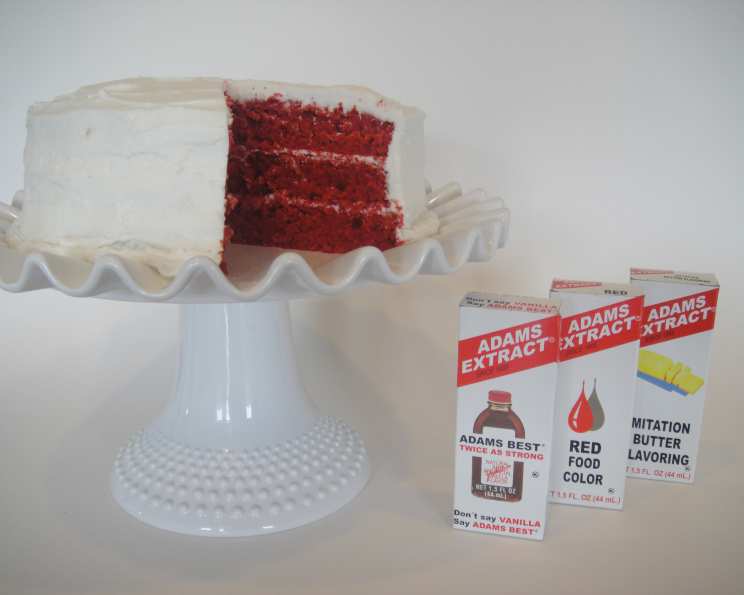
Red Velvet Cake: Unveiling the Legend
My earliest memory of Red Velvet Cake isn’t from a fancy bakery or a meticulously decorated patisserie. It’s from a church potluck, where a slightly lopsided, intensely red cake sat nestled among casseroles and pies. I remember being mesmerized by its vibrant color, a stark contrast to the beige and brown surrounding it. The tang of the cream cheese frosting, the slight cocoa flavor, and the moist, tender crumb – it was unlike anything I’d ever tasted. It felt…special, a cake with a secret. And, as I later learned, a legend to match.
Recipe Overview
- Prep Time: 30 minutes
- Cook Time: 25 minutes
- Total Time: 55 minutes
- Servings: 12
- Yield: 1 cake
- Dietary Type: Not specified
Ingredients
For the Cake:
- 1/2 cup shortening
- 1 1/2 cups sugar
- 2 eggs
- 1 teaspoon Adams Best Vanilla
- 1 teaspoon Adams Butter Flavor Extract
- 1 (1 1/2 ounce) bottle Adams Red Food Coloring
- 3 tablespoons cocoa
- 2 1/2 cups sifted cake flour
- 1 cup buttermilk
- 1 teaspoon salt
- 1 tablespoon vinegar
- 1 teaspoon baking soda
For the Frosting:
- 3 tablespoons flour
- 1/2 teaspoon salt
- 1 cup milk
- 1 cup shortening
- 1 cup sugar
- 2 teaspoons Adams Best Vanilla
- 1/4 teaspoon Adams Butter Flavor Extract
Equipment Needed
- Two 9-inch or 10-inch round cake pans
- Mixing bowls
- Electric mixer (stand or hand-held)
- Measuring cups and spoons
- Rubber spatula
- Saucepan
- Whisk
- Cooling rack
Instructions
-
Preheat your oven to 350°F (175°C). Grease and flour two 9-inch or 10-inch round cake pans. This ensures the cakes release cleanly after baking.
-
In a large mixing bowl, cream together the shortening and sugar until light and fluffy. This step is crucial for creating a tender crumb. Use an electric mixer for best results.
-
Beat in the eggs one at a time, then stir in the vanilla extract and butter flavor extract. Ensure each egg is fully incorporated before adding the next.
-
In a separate small bowl, make a paste of the cocoa and red food coloring. Mix thoroughly until a smooth, deep red paste forms. This will intensify the red color of the cake. Add this paste to the creamed mixture and blend well.
-
In another bowl, sift together the cake flour and salt. Sifting ensures a light and airy texture.
-
Alternately add the flour mixture and buttermilk to the creamed mixture, beginning and ending with the flour. Mix until just combined. Be careful not to overmix, as this can lead to a tough cake.
-
In a small bowl, mix together the baking soda and vinegar. The mixture will fizz – this is normal! Add this to the batter and blend well. The vinegar and baking soda react to create air bubbles, contributing to the cake’s lightness.
-
Divide the batter evenly between the prepared cake pans.
-
Bake for 20-25 minutes, or until a wooden skewer inserted into the center comes out clean. Check for doneness around the 20-minute mark and adjust baking time as needed based on your oven.
-
Let the cakes cool in the pans for 10 minutes before inverting them onto a wire rack to cool completely. Ensure the cakes are completely cool before frosting, or the frosting will melt.
-
While the cakes are cooling, prepare the frosting. In a saucepan, cook the milk, flour, and salt over medium heat, stirring constantly with a whisk, until the mixture thickens into a paste-like consistency. This will form the base of your frosting. Remove from heat and let cool completely.
-
In a separate bowl, cream together the shortening and sugar very well until light and fluffy. This step is important for a smooth and creamy frosting.
-
Add the vanilla extract and butter flavor extract to the creamed mixture.
-
Combine the cooled milk mixture with the creamed shortening mixture and beat well until light and fluffy.
-
Once the cakes are completely cooled, frost the top of one cake layer with the frosting, then top with the second cake layer and frost the entire cake.
-
(Optional) Tell the urban legend of the Red Velvet Cake while serving to add a touch of mystique!
Expert Tips & Tricks
- Cake flour is essential for the delicate crumb of Red Velvet Cake. Don’t substitute all-purpose flour unless absolutely necessary. If you must substitute, use 2 tablespoons less all-purpose flour per cup.
- Sifting the flour is also crucial for a light texture.
- Don’t overmix the batter. Overmixing develops gluten, resulting in a tough cake. Mix until just combined.
- For an even more intense red color, you can use a gel food coloring. Start with a small amount and add more until you reach your desired shade.
- Level your cake layers for a professional look. Use a serrated knife to carefully trim off any domed tops.
- If you’re short on time, you can use a store-bought cream cheese frosting. However, the homemade frosting in this recipe is truly exceptional.
- The Adams extracts are the preferred brand, especially if you want to honor the vintage recipe and its roots, however good quality alternatives can be used, especially if you do not have access to that brand.
Serving & Storage Suggestions
Serve the Red Velvet Cake chilled or at room temperature. For an elegant presentation, garnish with fresh berries or a dusting of cocoa powder.
Storage:
- Room Temperature: Red Velvet Cake can be stored at room temperature for up to 2 days in an airtight container.
- Refrigerator: For longer storage, keep the cake in the refrigerator for up to 5 days.
- Freezer: To freeze, wrap the cake tightly in plastic wrap and then in aluminum foil. It can be frozen for up to 2 months. Thaw overnight in the refrigerator before serving.
Nutritional Information
| Nutrient | Amount per Serving | % Daily Value |
|---|---|---|
| Calories | 541 kcal | 27% |
| Total Fat | 29g | 45% |
| Saturated Fat | 15g | 75% |
| Cholesterol | 70mg | 23% |
| Sodium | 440mg | 18% |
| Total Carbohydrate | 65g | 22% |
| Dietary Fiber | 1g | 4% |
| Sugars | 43g | – |
| Protein | 4g | 8% |
Note: Nutritional information is an estimate and may vary based on specific ingredients and portion sizes.
Variations & Substitutions
- Green Velvet Cake: Substitute green food coloring for St. Patrick’s Day or any occasion where you want a festive green cake.
- Orange Velvet Cake: Mix red and yellow food coloring for an orange cake perfect for Halloween.
- Chocolate Velvet Cake: Increase the amount of cocoa powder to 1/4 cup for a richer chocolate flavor.
- Gluten-Free Red Velvet Cake: Substitute a gluten-free cake flour blend for the cake flour. Be sure to use a blend that contains xanthan gum for binding.
- Dairy-Free Frosting: Use a dairy-free shortening and a plant-based milk alternative to make a dairy-free frosting. Be sure to choose a plant-based milk that is unsweetened and unflavored.
- Cream Cheese Frosting: For a more traditional Red Velvet Cake experience, use a classic cream cheese frosting. Replace the frosting recipe provided with your favorite cream cheese frosting recipe.
FAQs (Frequently Asked Questions)
Q: Why is it called Red Velvet Cake?
A: The name comes from the cake’s reddish-brown hue and its soft, velvety texture, achieved through the reaction of acidic ingredients like buttermilk and vinegar with cocoa powder.
Q: Can I use all-purpose flour instead of cake flour?
A: While it’s not ideal, you can substitute all-purpose flour. However, the cake will be slightly denser. For best results, use 2 tablespoons less all-purpose flour per cup.
Q: Why do I need to add vinegar and baking soda?
A: The vinegar and baking soda react together to create carbon dioxide, which helps to leaven the cake and give it a light and airy texture.
Q: Can I make the cake layers ahead of time?
A: Yes! You can bake the cake layers a day or two in advance. Wrap them tightly in plastic wrap and store them at room temperature or in the refrigerator.
Q: My frosting is too thin. How can I fix it?
A: Add powdered sugar, one tablespoon at a time, until the frosting reaches your desired consistency. Make sure to beat well after each addition. Alternatively, refrigerate the frosting for 30 minutes to firm it up.
Final Thoughts
Red Velvet Cake, with its captivating color and intriguing history, is more than just a dessert; it’s a conversation starter, a nostalgic indulgence, and a culinary adventure. Don’t be intimidated by the ingredient list or the slightly unusual steps. This recipe, passed down through generations, offers a truly rewarding baking experience. So, preheat your oven, gather your ingredients, and prepare to be transported to a world of velvety textures, tangy flavors, and urban legends. And, most importantly, share this delicious piece of folklore with those you love. The recipe, after all, is just the beginning of the story.