
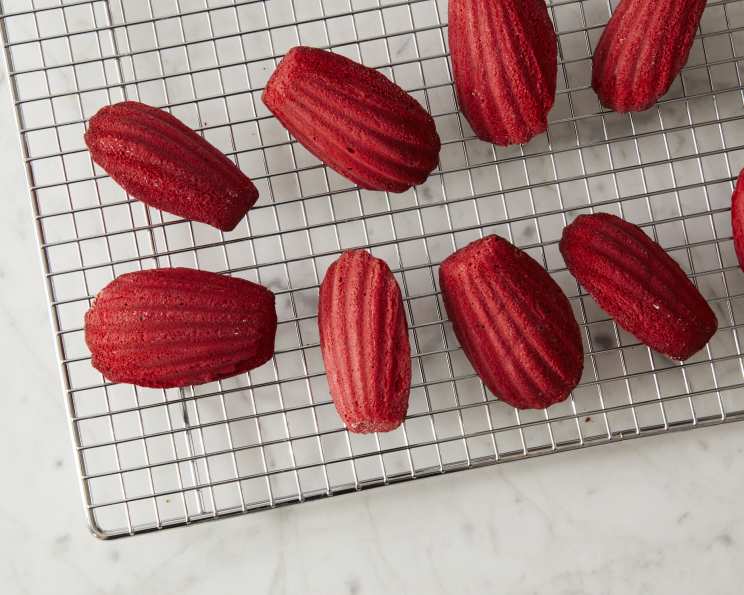
Red Velvet Madeleines: A Taste of Elegance
There’s something undeniably romantic about madeleines. Maybe it’s the delicate shell shape, or perhaps it’s the memory of dipping them into warm milk as a child. For me, the magic truly sparked when I decided to give the classic French treat a Southern twist. The result? Red Velvet Madeleines, little bites of heaven that combine the best of both worlds – the airy texture of a madeleine with the rich, cocoa-tinged flavor of red velvet cake. These weren’t just desserts; they were edible jewels that transformed an ordinary afternoon tea into something extraordinary.
Recipe Overview
- Prep Time: 20 minutes
- Cook Time: 8-10 minutes
- Total Time: 30 minutes
- Yields: 24 madeleines
- Serves: 12
- Dietary Type: Vegetarian
Ingredients
- ¾ cup granulated sugar
- 3 large eggs
- 2 egg yolks
- 1 teaspoon vanilla extract
- ¾ cup butter, melted
- 2 tablespoons red food coloring
- 1 ⅓ cups cake flour
- 2 tablespoons unsweetened cocoa powder
- ½ teaspoon baking powder
- ¼ teaspoon salt
- Powdered sugar (optional)
Equipment Needed
- Electric mixer
- Two shiny madeleine pans
- Sifter
- Mixing bowls
- Wire racks
Instructions
-
Preheat your oven to 400 degrees Fahrenheit (200 degrees Celsius). It’s crucial to have a hot oven to get that signature madeleine “hump.”
-
Lightly grease two shiny madeleine pans. Using a pastry brush or a non-stick cooking spray ensures the madeleines release cleanly after baking. Avoid using too much grease, as it can affect the texture.
-
In a large mixing bowl, beat the sugar, eggs, egg yolks, and vanilla extract with an electric mixer for 5 minutes on medium-high speed, or until the mixture looks thick and pale. This step incorporates air into the batter, contributing to the light and airy texture of the madeleines. Don’t rush this – the pale and thick consistency is key!
-
Add the melted butter and red food coloring to the egg mixture. Beat until just blended. Be careful not to overmix at this stage, as it can deflate the batter. The red food coloring gives these madeleines their signature red velvet hue, but you can adjust the amount to your liking.
-
In a separate bowl, sift together the cake flour, cocoa powder, baking powder, and salt. Sifting ensures there are no lumps and evenly distributes the dry ingredients, resulting in a smoother batter.
-
Fold the dry ingredients into the egg mixture. Use a rubber spatula and gently fold until just combined. Avoid overmixing; a few streaks of flour are okay. Overmixing develops the gluten in the flour, resulting in tough madeleines.
-
Fill each cup of the madeleine pans about ¾ full (about 1 tablespoon per madeleine). A small cookie scoop can help with portioning. Be careful not to overfill, as the madeleines will spread during baking.
-
Bake for 8-10 minutes, or until the madeleines spring back when lightly touched. Baking time can vary depending on your oven, so keep a close eye on them. The edges should be lightly golden brown. A toothpick inserted into the center should come out clean.
-
Immediately remove the madeleines from the pans and cool on wire racks. This prevents them from steaming and becoming soggy.
-
Cool completely, about 20 minutes. Patience is key! Letting them cool completely allows the flavors to develop fully.
-
Dust with powdered sugar just before serving (optional). This adds a touch of sweetness and elegance.
Expert Tips & Tricks
- Chill the batter: For a more pronounced hump, chill the madeleine batter in the refrigerator for at least 30 minutes before baking. This allows the gluten to relax and the butter to solidify, resulting in a better rise.
- Use a shiny madeleine pan: Shiny pans conduct heat more evenly, contributing to a better bake and that characteristic hump.
- Don’t overmix: Overmixing develops gluten, leading to tough madeleines. Gently fold the dry ingredients into the wet ingredients until just combined.
- Melt the butter, then cool slightly: The melted butter should be warm but not hot when added to the batter. This prevents the eggs from cooking.
- For a deeper red color: Use gel food coloring instead of liquid food coloring. Gel coloring is more concentrated and won’t thin out the batter as much.
Serving & Storage Suggestions
Serve these Red Velvet Madeleines warm or at room temperature. A dusting of powdered sugar adds a touch of elegance. They are delicious on their own or served with a cup of coffee or tea. For a special occasion, pair them with a scoop of vanilla ice cream or a dollop of whipped cream.
Store leftover madeleines in an airtight container at room temperature for up to 2 days. For longer storage, you can freeze them for up to 2 months. Thaw them at room temperature before serving. Reheating in a low oven (200 degrees Fahrenheit) for a few minutes can restore their warmth and slightly crisp texture.
Nutritional Information
| Nutrient | Amount per Serving | % Daily Value |
|---|---|---|
| Calories | 234 kcal | N/A |
| Total Fat | 13.6g | 20% |
| Saturated Fat | 8g | 40% |
| Cholesterol | 104.7mg | 34% |
| Sodium | 184.5mg | 7% |
| Total Carbohydrate | 25.2g | 8% |
| Dietary Fiber | 0.6g | 2% |
| Sugars | 12.7g | N/A |
| Protein | 3.5g | 7% |
Note: Nutritional information is an estimate and may vary based on specific ingredients and portion sizes.
Variations & Substitutions
- Chocolate Madeleines: Add ½ cup of semi-sweet chocolate chips to the batter for a richer chocolate flavor.
- Lemon Madeleines: Zest one lemon and add it to the batter for a bright, citrusy flavor. You can also substitute the vanilla extract with lemon extract.
- Gluten-Free Madeleines: Substitute the cake flour with a gluten-free all-purpose flour blend. Be sure to add a binder like xanthan gum for the best results.
- Dairy-Free Madeleines: Use a dairy-free butter substitute, such as coconut oil or vegan butter sticks.
FAQs (Frequently Asked Questions)
Q: Why didn’t my madeleines develop a hump?
A: The hump is caused by a combination of factors, including a hot oven, chilled batter, and the correct amount of baking powder. Make sure your oven is preheated to the correct temperature, the batter is chilled, and you are using fresh baking powder.
Q: My madeleines are dry. What did I do wrong?
A: Overbaking is the most common cause of dry madeleines. Reduce the baking time slightly and make sure you are not overmixing the batter.
Q: Can I make the batter ahead of time?
A: Yes, you can make the batter up to 24 hours in advance. Store it in an airtight container in the refrigerator. Let the batter come to room temperature for about 30 minutes before baking.
Q: How do I prevent the madeleines from sticking to the pan?
A: Lightly grease the madeleine pans with butter or cooking spray. You can also dust them with flour or cocoa powder for extra insurance.
Q: Can I freeze the madeleines?
A: Yes, madeleines freeze well. Let them cool completely before wrapping them tightly in plastic wrap and placing them in a freezer-safe bag. They can be frozen for up to 2 months.
Final Thoughts
These Red Velvet Madeleines are more than just a dessert; they’re an experience. The subtle cocoa notes, the delicate crumb, and the beautiful red hue make them a treat for all the senses. I encourage you to try this recipe and experience the joy of creating these elegant little cakes in your own kitchen. Don’t be afraid to experiment with variations and make them your own. And if you do, please share your creations – I’d love to see what you come up with! Perhaps a glass of chilled sparkling rosé would complete the picture perfectly. Happy baking!