
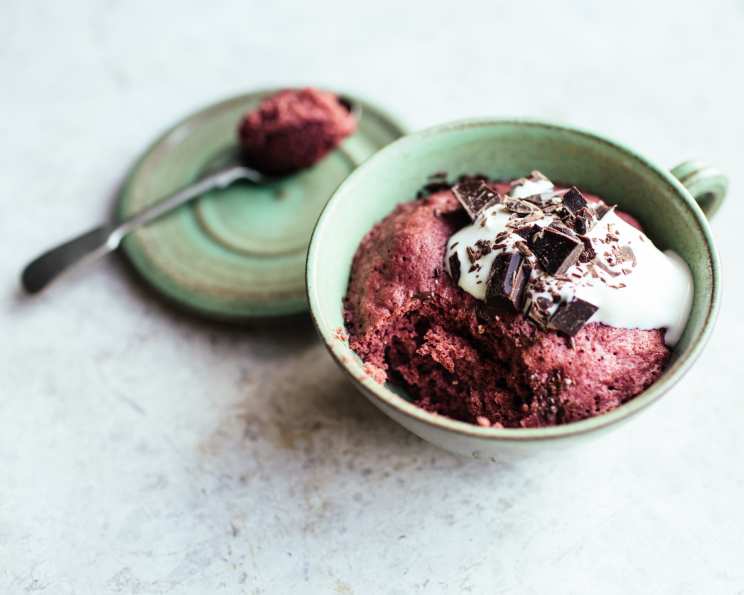
Red Velvet Mug Cake: A Single-Serving Slice of Heaven
I remember my college dorm room, late nights fueled by instant ramen and a yearning for something, anything, remotely comforting. Baking a whole cake was out of the question, not just because of the shared kitchen (always a gamble) but also the sheer volume of temptation it would bring. That’s when I discovered the magic of mug cakes – instant gratification in a single serving. The first time I tasted a red velvet version, warm and slightly gooey, it was like a hug in a mug. It instantly transformed my study session, and it’s been my go-to for a quick, satisfying treat ever since.
Recipe Overview
- Prep Time: 2 minutes
- Cook Time: 1 minute
- Total Time: 3 minutes
- Servings: 1
- Yield: 1 mug cake
- Dietary Type: Vegetarian
Ingredients
- 3 tablespoons red velvet cake mix
- ½ teaspoon baking powder
- 1 tablespoon cold water
- Optional: chocolate chips or chocolate syrup
Equipment Needed
- Microwave-safe mug
- Mini whisk or fork
Instructions
- In a microwaveable mug, combine 3 tablespoons of red velvet cake mix and ½ teaspoon of baking powder.
- Use a mini whisk (a fork works too!) to thoroughly break up any clumps. This ensures a smoother batter and even baking.
- Add 1 tablespoon of cold water to the mug.
- Whisk together until completely combined. The mixture will be quite thick, almost like a paste. Don’t worry, this is normal.
- If desired, gently fold in chocolate chips into the batter before microwaving.
- Microwave on high for 1 minute. This is your starting point.
- Check for doneness. If the cake mix is still shimmery or appears wet in the center, microwave for an additional 10-20 seconds.
- Remember that microwaves vary greatly in power, so test and tune the cooking time to find what works best for your microwave.
- If using, drizzle chocolate syrup over the warm mug cake just before serving.
Expert Tips & Tricks
- Cake mix quality matters: Use a high-quality red velvet cake mix for the best flavor. Some cheaper mixes can taste artificial.
- Don’t overmix: Overmixing the batter can result in a tough mug cake. Mix just until the ingredients are combined.
- Customize your add-ins: Get creative with your add-ins! Try white chocolate chips, chopped nuts, or even a swirl of cream cheese frosting.
- For a richer flavor: Add a tiny pinch of salt to the batter to enhance the sweetness and chocolate notes.
- Troubleshooting a dry cake: If your mug cake comes out dry, try adding a teaspoon of applesauce or Greek yogurt to the batter for extra moisture.
Serving & Storage Suggestions
Serve your red velvet mug cake immediately while it’s warm and gooey. The heat intensifies the flavors and creates a delightful experience. You can enjoy it plain, topped with a dollop of whipped cream, a scoop of vanilla ice cream, or a drizzle of chocolate or cream cheese frosting.
Because this is a single-serving recipe, leftovers are unlikely! However, if you do have any remaining cake, it’s best enjoyed within a few hours. Mug cakes tend to dry out quickly. You can store it in an airtight container at room temperature for a day, but the texture will be slightly different. Reheating is not generally recommended as it can make the cake even drier.
Nutritional Information
| Nutrient | Amount per Serving | % Daily Value |
|---|---|---|
| Calories | 250 kcal | 13% |
| Total Fat | 8g | 10% |
| Saturated Fat | 4g | 20% |
| Cholesterol | 0mg | 0% |
| Sodium | 250mg | 11% |
| Total Carbohydrate | 40g | 15% |
| Dietary Fiber | 1g | 4% |
| Sugars | 25g | – |
| Protein | 2g | 4% |
Note: Nutritional information is an estimate and may vary based on specific ingredients and portion sizes.
Variations & Substitutions
- Gluten-Free: Use a gluten-free red velvet cake mix. Ensure all other ingredients are also gluten-free.
- Dairy-Free: While the basic recipe is low in dairy, check the cake mix ingredients for any dairy derivatives. You can also top it with dairy-free whipped cream or ice cream.
- Vegan: Finding a vegan red velvet cake mix can be tricky. Look for brands that use plant-based ingredients. You might also need to substitute the water with plant-based milk for added richness.
- Peanut Butter Swirl: Add a teaspoon of peanut butter to the batter and swirl it in before microwaving for a peanut butter red velvet treat.
- Espresso Kick: Add a half-teaspoon of instant espresso powder to the batter for a mocha-inspired red velvet mug cake.
FAQs (Frequently Asked Questions)
Q: My mug cake is overflowing in the microwave. What am I doing wrong?
A: This usually indicates that your mug is too small, or you’re using too much baking powder. Try using a larger mug or slightly reducing the amount of baking powder.
Q: Can I use a different type of cake mix?
A: Absolutely! While this recipe is specifically for red velvet, you can experiment with other cake mix flavors like chocolate, vanilla, or funfetti. Just keep in mind that the cooking time might need slight adjustments.
Q: My mug cake is gummy and not fully cooked. What should I do?
A: This means your mug cake needs more time in the microwave. Microwave in additional 10-second increments until the cake is cooked through. Remember that microwaves vary, so you may need to experiment.
Q: Can I make this in the oven instead of the microwave?
A: While this recipe is designed for the microwave, you could technically bake it in a small ramekin in a preheated oven at 350°F (175°C) for about 15-20 minutes, or until a toothpick inserted into the center comes out clean. However, the texture will be different.
Q: Can I add cream cheese frosting to this mug cake?
A: Yes, absolutely! Cream cheese frosting is a classic pairing with red velvet. Simply whisk together softened cream cheese, powdered sugar, and a touch of vanilla extract, and spread it over the warm mug cake.
Final Thoughts
So there you have it – a red velvet mug cake recipe that’s quick, easy, and utterly satisfying. It’s the perfect solution for those moments when you crave a sweet treat without the fuss of baking an entire cake. I encourage you to give this recipe a try and make it your own. Experiment with different add-ins and toppings, and don’t be afraid to share your creations with friends and family. Maybe enjoy it with a cup of coffee or a scoop of vanilla ice cream! Happy baking!