
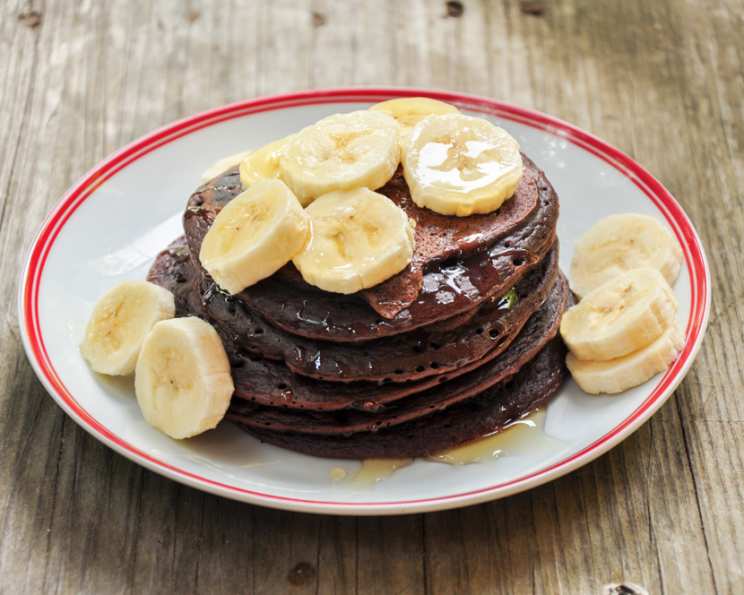
Red Velvet Pancakes: A Decadent Breakfast Indulgence
The memory is etched in my mind: a snow-dusted morning, a crackling fireplace, and the irresistible aroma wafting from the kitchen. My grandmother, a master of comfort food, always made Red Velvet pancakes on Christmas morning. Their vibrant color and impossibly fluffy texture were a welcome sight, a promise of joy and warmth that chased away the winter chill. These pancakes weren’t just breakfast; they were a symbol of love, tradition, and the magic of the holidays.
Recipe Overview
- Prep Time: 10 minutes
- Cook Time: 15 minutes
- Total Time: 25 minutes
- Servings: 4
- Yields: About 8 Pancakes
- Dietary Type: Not specified (Contains Gluten, Dairy, and Eggs)
Ingredients
- 1 cup all-purpose flour
- 1 teaspoon baking powder
- ¼ teaspoon baking soda
- ¼ teaspoon salt
- 2 tablespoons sugar
- 2 tablespoons unsweetened cocoa powder
- 1 egg
- ¾ cup buttermilk
- ¼ cup sour cream
- 1 tablespoon red food coloring
- 1 teaspoon pure vanilla extract
- 3 tablespoons butter, melted
Equipment Needed
- Large bowl
- Whisk
- Nonstick pan or griddle
- Measuring cups and spoons
- Spatula
Instructions
-
In a large bowl, whisk together the all-purpose flour, baking powder, baking soda, salt, sugar, and cocoa powder. Ensure the ingredients are thoroughly combined to avoid clumps in the batter.
-
In another large bowl, beat the egg with the buttermilk, sour cream, red food coloring, and vanilla extract until the mixture is smooth and evenly colored. This step is crucial for achieving the signature red velvet hue.
-
Gradually whisk the dry ingredients into the wet ingredients, adding the melted butter in a slow, steady stream as you combine them. Continue whisking until all lumps are gone, but be careful not to overmix. A few small lumps are acceptable; overmixing can result in tough pancakes.
-
Heat a large nonstick pan or griddle over medium heat. A lightly oiled surface will also work, but a nonstick pan helps prevent sticking and ensures even browning. The pan is ready when a drop of water sizzles and evaporates quickly.
-
Pour ¼ cup of batter onto the hot pan for each pancake. Leave enough space between pancakes to allow for spreading during cooking.
-
Cook for approximately 2-3 minutes per side, or until the bottoms are set and bubbles are forming on top. This is the sign that they are ready to be flipped.
-
Flip the pancakes gently with a spatula and cook for another 2-3 minutes, or until they are firm and fluffy all the way through. A gentle press with your finger should reveal a springy texture.
-
Serve warm with your favorite toppings, such as cream cheese frosting, maple syrup, whipped cream, or fresh berries.
Expert Tips & Tricks
- Buttermilk Substitute: If you don’t have buttermilk on hand, you can make a quick substitute by adding 1 tablespoon of lemon juice or white vinegar to a measuring cup, then filling it with milk to reach ¾ cup. Let it sit for 5 minutes before using.
- Cocoa Powder Note: Use a high-quality unsweetened cocoa powder for the best flavor and color. Dutch-processed cocoa powder will give a darker color and milder flavor, while natural cocoa powder will provide a more pronounced chocolate taste.
- Food Coloring: The amount of red food coloring can be adjusted to achieve your desired shade of red. Gel food coloring is more concentrated and provides a more vibrant color than liquid food coloring.
- Preventing Sticking: Ensure your pan is properly heated before adding the batter to prevent sticking. A light coating of cooking spray or melted butter can also help.
- Keeping Pancakes Warm: To keep pancakes warm while cooking subsequent batches, place them on a baking sheet in a warm oven (around 200°F or 95°C).
Serving & Storage Suggestions
Serve these Red Velvet Pancakes immediately while they are warm and fluffy. They pair beautifully with a tangy cream cheese frosting, a drizzle of maple syrup, a dollop of whipped cream, or a scattering of fresh berries. For a truly decadent experience, consider adding chocolate shavings or a dusting of cocoa powder.
Leftover pancakes can be stored in an airtight container in the refrigerator for up to 3 days. To reheat, simply microwave them for 30-60 seconds, or toast them in a toaster oven until warmed through. Pancakes can also be frozen for longer storage. Place cooled pancakes in a single layer on a baking sheet and freeze for about 30 minutes. Once frozen, transfer them to a freezer bag or airtight container. They can be stored in the freezer for up to 2 months. To reheat frozen pancakes, thaw them in the refrigerator overnight or microwave them directly from frozen.
Nutritional Information
| Nutrient | Amount per Serving | % Daily Value |
|---|---|---|
| Calories | 350 kcal | 18% |
| Total Fat | 18g | 28% |
| Saturated Fat | 11g | 55% |
| Cholesterol | 85mg | 28% |
| Sodium | 500mg | 21% |
| Total Carbohydrate | 40g | 13% |
| Dietary Fiber | 2g | 8% |
| Sugars | 12g | N/A |
| Protein | 8g | 16% |
Note: Nutritional information is an estimate and may vary based on specific ingredients and portion sizes.
Variations & Substitutions
- Gluten-Free: Substitute the all-purpose flour with a gluten-free all-purpose flour blend. Ensure the blend contains xanthan gum or another binding agent.
- Dairy-Free: Replace the buttermilk with a dairy-free buttermilk substitute (see tips above using non-dairy milk and lemon juice/vinegar). Use dairy-free sour cream and melted dairy-free butter.
- Vegan: Replace the egg with a flax egg (1 tablespoon ground flaxseed mixed with 3 tablespoons water, let sit for 5 minutes). Use dairy-free buttermilk substitute, dairy-free sour cream, and dairy-free butter.
- Chocolate Chip Red Velvet Pancakes: Fold in ½ cup of chocolate chips (milk, dark, or white) into the batter before cooking.
- Peppermint Red Velvet Pancakes: Add ¼ teaspoon of peppermint extract to the batter for a festive holiday twist.
FAQs (Frequently Asked Questions)
Q: Why are my pancakes flat and not fluffy?
A: Overmixing the batter can develop the gluten in the flour, resulting in flat pancakes. Gently whisk until just combined, leaving a few small lumps. Also, ensure your baking powder and baking soda are fresh.
Q: How can I prevent my pancakes from sticking to the pan?
A: Use a good quality nonstick pan or griddle. Ensure the pan is properly heated before adding the batter. You can also lightly grease the pan with cooking spray or melted butter.
Q: Can I make the batter ahead of time?
A: It’s best to cook the pancakes immediately after making the batter. However, you can prepare the dry and wet ingredients separately and combine them just before cooking. If you must make the batter ahead of time, store it in the refrigerator for no more than 30 minutes.
Q: What is the best way to serve these pancakes?
A: Red Velvet Pancakes are delicious with cream cheese frosting, maple syrup, whipped cream, fresh berries, or chocolate shavings.
Q: Can I freeze these pancakes?
A: Yes, you can freeze cooked pancakes. Place them in a single layer on a baking sheet and freeze for about 30 minutes. Once frozen, transfer them to a freezer bag or airtight container. They can be stored in the freezer for up to 2 months.
Final Thoughts
These Red Velvet Pancakes are more than just a breakfast dish; they’re an experience. The vibrant color, the delicate chocolate flavor, and the fluffy texture create a truly indulgent treat. I encourage you to try this recipe and create your own memories with these decadent pancakes. Feel free to experiment with different toppings and variations to personalize the recipe to your taste. And don’t hesitate to share your creations and feedback – I’d love to hear about your Red Velvet Pancake adventures! Pair them with a steaming mug of coffee or hot chocolate for the perfect start to your day.