
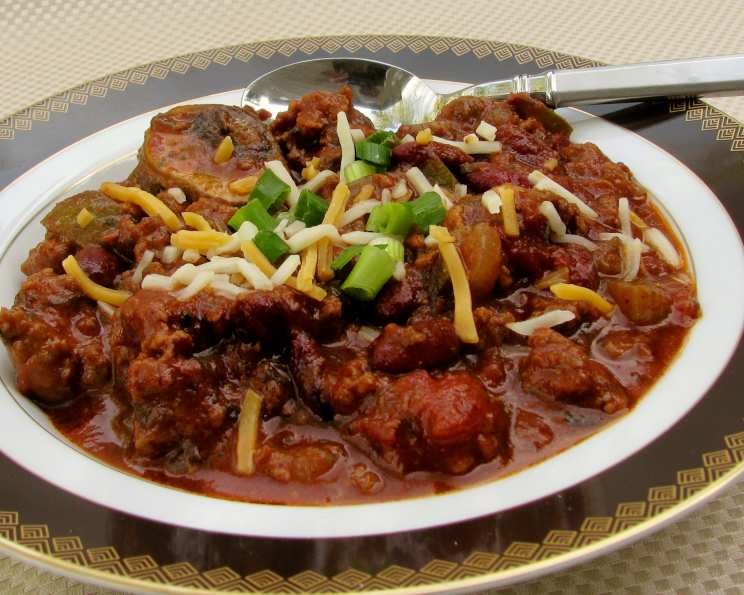
Redskins Tailgate Chili: A Championship Recipe
The air is crisp, the leaves are turning, and the roar of the crowd is building – it must be football season! For me, nothing screams “game day” like the comforting aroma of chili simmering on the stove. My dad, a lifelong Washington fan, had a well-worn chili recipe he guarded fiercely. Every Sunday, that pot of chili was the centerpiece of our football gatherings, a warm and spicy beacon that brought family and friends together, win or lose (though wins definitely tasted better!). This recipe evokes those memories, updated and perfected, but still holding onto the hearty spirit of those gridiron Sundays.
Recipe Overview
- Prep Time: 30 minutes
- Cook Time: 2 hours 10 minutes
- Total Time: 2 hours 40 minutes
- Servings: 8
- Yield: About 8 cups
- Dietary Type: Adaptable (see Variations)
Ingredients
- 1 lb ground beef
- 2 Italian sausage links, casings removed
- 1 large onion, chopped
- 1 bell pepper, chopped
- 3 garlic cloves, minced
- 8 ounces mushrooms, sliced
- 2 tablespoons chili powder
- 1 teaspoon oregano
- 2 tablespoons parsley, chopped
- 1 tablespoon hot sauce (or more, to taste)
- 1 (16 ounce) can whole tomatoes, undrained
- 1 (16 ounce) can red kidney beans, undrained
- 1 (6 ounce) can tomato paste
- 1 bottle (12 ounce) dark beer (such as Newcastle, Guinness, or Beck’s Dark)
- 2 cups shredded cheddar cheese, for garnish
- 1 (8 ounce) jar sliced jalapenos, for garnish
Equipment Needed
- Large skillet
- Large pot or Dutch oven
- Knife
- Cutting board
- Measuring spoons and cups
- Ladle
Instructions
- Start by removing the Italian sausage from its casing. This ensures the sausage crumbles nicely and distributes evenly throughout the chili.
- In a large skillet over medium-high heat, begin to brown the sausage and ground beef. Break the meat apart with a spoon or spatula as it cooks.
- Once the meats are browned, drain off any excess grease. This step is crucial to avoid a greasy final product. Remove the meat from the skillet and place it in a large pot or Dutch oven.
- In the same skillet, add the chopped onion and bell pepper. Brown them until softened, about 5-7 minutes. Add the sliced mushrooms and cook until they release their moisture and begin to brown, another 3-5 minutes.
- Add the minced garlic for the last two minutes of cooking, stirring constantly to prevent burning. Burnt garlic can ruin the entire flavor profile of the chili.
- Transfer the browned onion, pepper, mushrooms, and garlic mixture to the large pot with the cooked meats.
- Add the can of whole tomatoes to the pot. Bring the mixture to a simmer over medium heat. Be sure to break up the tomatoes well with a spoon or by using an immersion blender for a smoother consistency.
- Stir in the chili powder, oregano, parsley, and hot sauce. Adjust the amount of hot sauce to your desired spice level.
- Remove the pot from the heat and allow the chili to cool completely. Then, cover the pot and refrigerate overnight. This allows the flavors to meld and deepen, resulting in a richer, more complex chili.
- The next day, light the burner and place the pot of chili over medium heat.
- Add the can of red kidney beans (undrained) to the pot. Bring the chili to a boil, then reduce the heat to medium-low and begin to simmer.
- Now, add the tomato paste and the dark beer. Stir well to ensure the tomato paste is fully incorporated.
- Simmer the chili uncovered, stirring occasionally, until the mixture reduces to your desired thickness. This may take up to 2 hours. If the chili becomes too thick during the simmering process, simply add a little more beer to loosen it up.
- To serve, scoop the chili into bowls and top with a few slices of jalapeno and a sprinkle or two of cheddar cheese.
Expert Tips & Tricks
- Spice it up (or down): Adjust the amount of hot sauce or add a pinch of cayenne pepper for extra heat. For a milder chili, omit the hot sauce entirely and use a mild chili powder.
- Meat matters: Feel free to substitute ground turkey or chicken for the beef and sausage. For a vegetarian option, use plant-based ground “beef” and omit the sausage.
- Bean there, done that: Experiment with different types of beans, such as pinto beans, black beans, or cannellini beans.
- Flavor boost: A spoonful of unsweetened cocoa powder or a splash of balsamic vinegar can add depth and complexity to the chili’s flavor.
- Slow cooker success: This recipe can easily be adapted for a slow cooker. Simply combine all ingredients in the slow cooker and cook on low for 6-8 hours, or on high for 3-4 hours.
Serving & Storage Suggestions
Serve this chili hot in bowls, garnished with shredded cheddar cheese and sliced jalapenos. Other great toppings include sour cream, chopped green onions, avocado, or tortilla chips.
Leftover chili can be stored in an airtight container in the refrigerator for up to 3-4 days. For longer storage, freeze the chili in freezer-safe containers for up to 2-3 months. To reheat, thaw the chili in the refrigerator overnight and then heat it on the stovetop or in the microwave until warmed through.
Nutritional Information
| Nutrient | Amount per Serving | % Daily Value |
|---|---|---|
| Calories | 440.6 kcal | N/A |
| Calories from Fat | 221 g | 50% |
| Total Fat | 24.6 g | 37% |
| Saturated Fat | 11.5 g | 57% |
| Cholesterol | 80 mg | 26% |
| Sodium | 720.4 mg | 30% |
| Total Carbohydrate | 27.3 g | 9% |
| Dietary Fiber | 8.2 g | 33% |
| Sugars | 7.8 g | N/A |
| Protein | 29.8 g | 59% |
Note: Nutritional information is an estimate and may vary based on specific ingredients and preparation methods.
Variations & Substitutions
- Vegetarian Chili: Omit the ground beef and sausage. Add an extra can of beans or use a plant-based ground meat substitute. Consider adding more vegetables like corn, zucchini, or diced sweet potatoes.
- Spicy Chipotle Chili: Add 1-2 canned chipotle peppers in adobo sauce, finely chopped, to the chili.
- White Chicken Chili: Substitute the ground beef and sausage with shredded cooked chicken and use white beans instead of kidney beans. Add a can of diced green chiles for extra flavor.
- Paleo-Friendly Chili: Omit the beans and use cauliflower rice as a thickener.
- Gluten-Free Chili: Ensure your beer and hot sauce are gluten-free.
FAQs (Frequently Asked Questions)
Q: Can I make this chili in advance?
A: Absolutely! In fact, the flavor improves with time. Make it a day or two ahead and store it in the refrigerator until ready to serve.
Q: Can I freeze this chili?
A: Yes, this chili freezes beautifully. Store it in freezer-safe containers for up to 2-3 months.
Q: I don’t have dark beer. Can I use something else?
A: If you don’t have dark beer on hand, you can substitute it with beef broth or even a little bit of coffee for a similar depth of flavor.
Q: Can I use dry beans instead of canned?
A: Yes, but you’ll need to soak the dry beans overnight and cook them until tender before adding them to the chili.
Q: What’s the best way to thicken the chili if it’s too thin?
A: If your chili is too thin, you can simmer it uncovered for a longer period of time to allow the liquid to evaporate. Alternatively, you can mix a tablespoon of cornstarch with a tablespoon of cold water to form a slurry, and then stir it into the chili during the last 30 minutes of cooking.
Final Thoughts
This Redskins Tailgate Chili is more than just a recipe; it’s a tradition in the making. Whether you’re cheering on your favorite team or simply looking for a hearty and delicious meal, this chili is sure to be a crowd-pleaser. So gather your friends and family, fire up the stove (or the slow cooker!), and get ready to enjoy a bowl of pure comfort. Don’t be afraid to get creative with the toppings and variations – make it your own and share your creations! And of course, let me know what you think – I’d love to hear your feedback!