
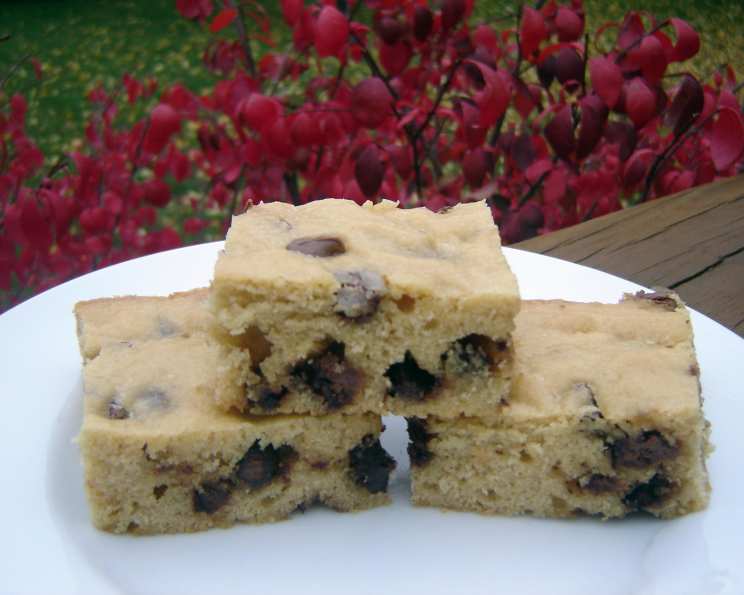
Reese’s Peanut Butter Bars: A Sweet Symphony of Chocolate and Peanut Butter
The memory is etched in my mind: a school bake sale, tables laden with cookies and brownies, but my eyes were glued to a pan of golden-brown bars studded with chocolate chips. It wasn’t just their appearance; it was the unmistakable aroma of peanut butter that drew me in. One bite, and I was hooked. The rich, slightly salty peanut butter base, combined with the sweet, melting chocolate, was a revelation. This recipe is my tribute to that perfect bar – a simple yet unforgettable treat.
Recipe Overview
- Prep Time: 15 minutes
- Cook Time: 35 minutes
- Total Time: 50 minutes
- Servings: 24 bars
- Yields: 24 bars
- Dietary Type: Not Gluten-Free
Ingredients
- ½ cup butter or margarine
- ¾ cup Reese’s creamy peanut butter
- 1 ¾ cups sugar
- 1 ½ teaspoons vanilla extract
- 4 eggs, slightly beaten
- 1 ½ cups flour
- ½ teaspoon baking powder
- ¼ teaspoon salt
- 2 cups milk chocolate chips (11-12 oz package)
Equipment Needed
- 13×9 inch baking pan
- Mixing bowls
- Measuring cups and spoons
- Spatula or wooden spoon
- Wire rack
Instructions
- Begin by preheating your oven to 350°F (175°C). This ensures even baking and prevents the bars from becoming too dry.
- Prepare your 13×9 inch baking pan by greasing it thoroughly. This step is crucial to prevent the bars from sticking and ensuring easy removal after baking. You can use butter, shortening, or a non-stick cooking spray.
- In a microwave-safe bowl or in a saucepan over low heat, melt ½ cup of butter or margarine. If microwaving, do so in 30-second intervals, stirring in between, until fully melted.
- Once the butter is melted, add ¾ cup of Reese’s creamy peanut butter to the bowl or saucepan. Stir until the peanut butter is completely melted and incorporated into the butter, creating a smooth and creamy mixture.
- Remove the mixture from the heat. Add 1 ¾ cups of sugar and 1 ½ teaspoons of vanilla extract. Stir well to combine all the ingredients.
- Add 4 eggs, slightly beaten, to the peanut butter mixture. Using a spoon or spatula, stir until all the ingredients are well blended. Ensure the eggs are fully incorporated to prevent a grainy texture in the final product.
- In a separate bowl, whisk together 1 ½ cups of flour, ½ teaspoon of baking powder, and ¼ teaspoon of salt. This ensures the baking powder and salt are evenly distributed throughout the flour, resulting in a consistent rise and flavor.
- Gradually add the dry ingredients to the wet ingredients, stirring until just blended. Be careful not to overmix, as this can result in tough bars.
- Stir in 2 cups of milk chocolate chips. Distribute them evenly throughout the batter. Feel free to use other types of chocolate chips, such as dark chocolate or semi-sweet, for a different flavor profile.
- Spread the batter evenly into the prepared 13×9 inch pan. Ensure the batter reaches all corners of the pan for uniform baking.
- Bake for 35 minutes, or until the top is golden brown and the edges are firm. A toothpick inserted into the center should come out with moist crumbs attached, but not wet batter. Keep in mind that oven temperatures may vary, so keep a close eye on the bars during the last few minutes of baking.
- Once baked, remove the pan from the oven and place it on a wire rack. Allow the bars to cool completely in the pan. This is crucial for the bars to set properly and prevent them from crumbling when cut.
- Once the bars are completely cool, cut them into squares or bars of your desired size. Use a sharp knife for clean cuts.
Expert Tips & Tricks
- For extra fudgy bars: Slightly underbake them – about 2-3 minutes less than the recommended time. The center will be softer and more decadent.
- For a richer peanut butter flavor: Use natural peanut butter (the kind you have to stir) instead of the processed variety. Just be sure to stir it well before adding it to the recipe.
- Prevent sticking: Line the baking pan with parchment paper before greasing it. This creates a sling that makes it even easier to remove the bars.
- Add a drizzle: After the bars have cooled and been cut, melt a little extra chocolate and drizzle it over the top for an extra touch of elegance.
- Fix a dry batter: If your batter seems too dry, add a tablespoon or two of milk until it reaches the right consistency.
Serving & Storage Suggestions
These Reese’s Peanut Butter Bars are best served at room temperature. To elevate their presentation, consider arranging them on a platter with a dusting of powdered sugar or cocoa powder. For a delightful pairing, serve them with a glass of cold milk or a scoop of vanilla ice cream.
To store leftovers, place the bars in an airtight container. They will keep at room temperature for up to 3 days, in the refrigerator for up to a week, or in the freezer for up to 2 months. To reheat, thaw frozen bars in the refrigerator overnight or microwave them briefly until softened.
Nutritional Information
| Nutrient | Amount per Serving | % Daily Value |
|---|---|---|
| Calories | 192 kcal | N/A |
| Total Fat | 9.5 g | 14% |
| Saturated Fat | 3.9 g | 19% |
| Cholesterol | 46 mg | 15% |
| Sodium | 110 mg | 4% |
| Total Carbohydrate | 23.6 g | 7% |
| Dietary Fiber | 0.8 g | 3% |
| Sugars | 16.6 g | N/A |
| Protein | 4.1 g | 8% |
Note: Nutritional information is an estimate and may vary based on specific ingredients and portion sizes.
Variations & Substitutions
- Gluten-Free: Substitute the all-purpose flour with a gluten-free blend. Ensure the blend contains xanthan gum for binding.
- Dark Chocolate: Replace the milk chocolate chips with dark chocolate chips for a richer, less sweet flavor.
- Peanut-Free: Substitute the Reese’s peanut butter with sunflower seed butter (sunbutter) for a peanut-free alternative.
- Nutty Variation: Add chopped peanuts or walnuts to the batter for extra crunch and flavor.
- White Chocolate Macadamia: Use white chocolate chips and chopped macadamia nuts for a completely different flavor profile.
FAQs (Frequently Asked Questions)
Q: Can I use crunchy peanut butter?
A: While creamy peanut butter is recommended for a smooth texture, you can use crunchy peanut butter if you prefer the added texture.
Q: Can I make these bars ahead of time?
A: Absolutely! These bars can be made a day or two in advance and stored in an airtight container at room temperature.
Q: Why did my bars turn out dry?
A: Overbaking is the most common cause of dry bars. Make sure to check for doneness at the 30-minute mark and adjust baking time accordingly.
Q: Can I freeze these bars?
A: Yes, these bars freeze well. Wrap them individually or in small batches in plastic wrap, then place them in a freezer-safe bag or container.
Q: What if I don’t have a 13×9 inch pan?
A: A slightly smaller pan will work, but the bars will be thicker and may require a longer baking time. Adjust accordingly. A larger pan will result in thinner bars, which may bake faster.
Final Thoughts
These Reese’s Peanut Butter Bars are more than just a dessert; they’re a taste of nostalgia, a sweet reminder of simpler times. Don’t hesitate to try this recipe and bring a smile to your loved ones’ faces. Feel free to experiment with variations, and most importantly, have fun in the kitchen! Share your creations and let me know how they turned out. These bars pair wonderfully with a strong cup of coffee or a scoop of vanilla ice cream. Happy baking!