
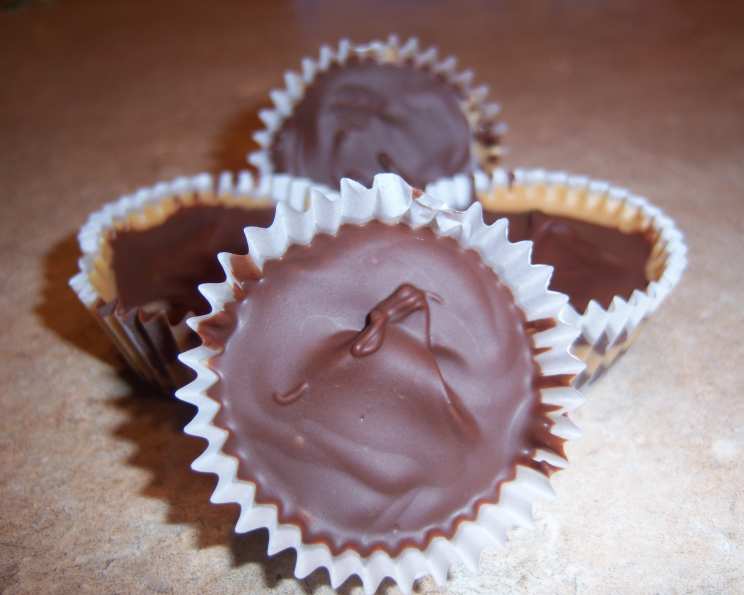
Deconstructing Deliciousness: Mastering the Art of Homemade Reese’s Peanut Butter Cups
I remember the thrill of discovering a Reese’s Peanut Butter Cup hidden at the bottom of my trick-or-treat bag every Halloween. The crinkly orange wrapper, the perfect ratio of chocolate to peanut butter, that slight saltiness that just made everything sing – it was pure childhood magic. Even now, years later, that first bite instantly transports me back to crisp autumn evenings and the pure, unadulterated joy of indulging in a simple, perfectly balanced treat. Today, we’re going to recreate that magic in your own kitchen.
Recipe Overview
- Prep Time: 15 minutes
- Cook Time: 5 minutes
- Total Time: 20 minutes
- Servings: 12 Large / 24 Tiny
- Yield: 12-24 Cups
- Dietary Type: Can be Gluten-Free
Ingredients
- 6 ounces semi-sweet chocolate chips
- 4 Nestle’s milk chocolate candy bars (standard size)
- 1 1/4 cups peanut butter
Equipment Needed
- Double boiler (or heat-safe bowl and saucepan)
- Small muffin tin
- Muffin tin liners (small or regular cut down to 1″ depth)
- Spoon
- Refrigerator
Instructions
-
Prepare your double boiler. If you don’t have a double boiler, you can create one by placing a heat-safe bowl over a saucepan filled with about an inch of simmering water. Ensure the bottom of the bowl doesn’t touch the water. The gentle heat from the steam will melt the chocolate without burning it.
-
In the top of the double boiler, combine the chocolate chips, Nestle’s milk chocolate candy bars (broken into pieces), and 1/4 cup of peanut butter.
-
Over HOT, but not boiling, water, gently stir the chocolate and peanut butter mixture until it is completely smooth and melted. Be patient and stir frequently to prevent the chocolate from seizing. A silicone spatula works best for scraping the sides of the bowl.
-
Prepare your muffin tin. You’ll need either small muffin tin liners, or regular cupcake liners cut down to approximately 1 inch in depth. This is crucial for achieving the classic Reese’s cup shape.
-
Spoon HALF of the melted chocolate mixture equally into the prepared liners. Aim for an even distribution, leaving enough space for the peanut butter layer and the final chocolate topping.
-
Melt the remaining 1 cup of peanut butter over hot water using the double boiler method. Stir frequently until it’s completely smooth and easily pourable.
-
Spoon the melted peanut butter equally over the chocolate layer in each cup. Try to keep the peanut butter contained within the chocolate base.
-
Top with the remaining chocolate mixture, ensuring each cup is evenly covered.
-
Refrigerate the filled muffin tin until the peanut butter cups are fully set and firm to the touch. This usually takes about 30-60 minutes. You can test one by gently pressing on the center; it should feel solid.
-
Once set, gently peel away the liners and enjoy your homemade Reese’s Peanut Butter Cups!
Expert Tips & Tricks
-
Chocolate Tempering (Optional): For a truly professional sheen and snap to your chocolate, consider tempering it. This involves carefully heating and cooling the chocolate to specific temperatures. There are plenty of online tutorials that can guide you through the process. Untempered chocolate will still taste great, but it might be slightly softer and melt more easily at room temperature.
-
Peanut Butter Consistency: The peanut butter you use will affect the final texture. Creamy peanut butter is recommended for the smoothest filling. If you’re using natural peanut butter, make sure to stir it well before measuring, as the oil tends to separate.
-
Salt Enhancement: A tiny pinch of sea salt sprinkled on top of the peanut butter layer before adding the final chocolate coating can really elevate the flavor. The salt enhances the sweetness and complements the richness of the peanut butter.
-
Troubleshooting Seized Chocolate: If your chocolate seizes (becomes grainy and stiff), don’t panic! Try adding a teaspoon or two of hot water or vegetable oil and stirring vigorously. This can sometimes help to re-emulsify the chocolate.
-
Speeding Up Setting Time: If you’re in a hurry, you can place the muffin tin in the freezer for 15-20 minutes to speed up the setting process. Just be careful not to freeze them completely.
Serving & Storage Suggestions
Serve your homemade Reese’s Peanut Butter Cups chilled or at room temperature. They make a fantastic treat on their own, or you can get creative and crumble them over ice cream, add them to brownies, or use them as a topping for cakes and cupcakes.
Store leftover cups in an airtight container in the refrigerator for up to a week. They can also be frozen for longer storage (up to 2-3 months). Thaw them in the refrigerator before serving. Freezing might slightly alter the texture of the chocolate, but they’ll still taste delicious.
Nutritional Information
Here’s an estimated nutritional breakdown per cup (based on 12 servings):
| Nutrient | Amount per Serving | % Daily Value |
|---|---|---|
| Calories | 304.4 kcal | N/A |
| Calories from Fat | 199 g | 65% |
| Total Fat | 22.1 g | 34% |
| Saturated Fat | 7.4 g | 36% |
| Cholesterol | 3.4 mg | 1% |
| Sodium | 136.5 mg | 5% |
| Total Carbohydrate | 22.9 g | 7% |
| Dietary Fiber | 3 g | 11% |
| Sugars | 17.8 g | N/A |
| Protein | 8.5 g | 16% |
Note: These values are estimates and may vary depending on the specific brands and quantities of ingredients used.
Variations & Substitutions
- Dark Chocolate Delight: Substitute dark chocolate chips for semi-sweet chocolate for a richer, more intense flavor.
- White Chocolate Wonder: Use white chocolate chips instead of semi-sweet for a sweeter, creamier version.
- Nut Butter Bonanza: Experiment with different nut butters like almond butter, cashew butter, or sunflower seed butter for a unique twist.
- Cookie Butter Cups: Replace the peanut butter filling with cookie butter for a decadent and irresistible treat.
- Dairy-Free Option: Use dairy-free chocolate chips and ensure your candy bars are also dairy-free.
- Vegan Version: This is difficult, as Nestle’s milk chocolate candy bars are not vegan. You can find vegan chocolate bars available that you could substitute, however, be sure to account for differences in sweetness.
- Salted Caramel Swirl: Add a swirl of salted caramel sauce to the peanut butter layer for an extra layer of indulgence.
FAQs (Frequently Asked Questions)
Q: Can I use a microwave to melt the chocolate?
A: Yes, you can, but be very careful not to overheat it. Use 30-second intervals, stirring in between, until just melted.
Q: Can I make these without muffin liners?
A: It’s not recommended, as the cups will be difficult to remove from the muffin tin.
Q: My chocolate seized up! What do I do?
A: Try adding a teaspoon or two of hot water or vegetable oil and stirring vigorously. This can sometimes help to re-emulsify the chocolate.
Q: Can I use chunky peanut butter?
A: You can, but the texture of the filling will be less smooth. Creamy peanut butter is recommended for the best results.
Q: How long will these last?
A: Stored in an airtight container in the refrigerator, they will last for up to a week. They can also be frozen for longer storage (2-3 months).
Final Thoughts
Now it’s your turn to bring a little bit of childhood magic into your kitchen. These homemade Reese’s Peanut Butter Cups are surprisingly easy to make, and they taste even better than the store-bought version. Don’t be afraid to experiment with different variations and substitutions to create your own signature treat. And most importantly, have fun and enjoy the process! Happy baking (or should I say, candy-making)! Share your creations and feedback – I’d love to see what you come up with. Perhaps a glass of cold milk would be the perfect accompaniment to your homemade treats.