
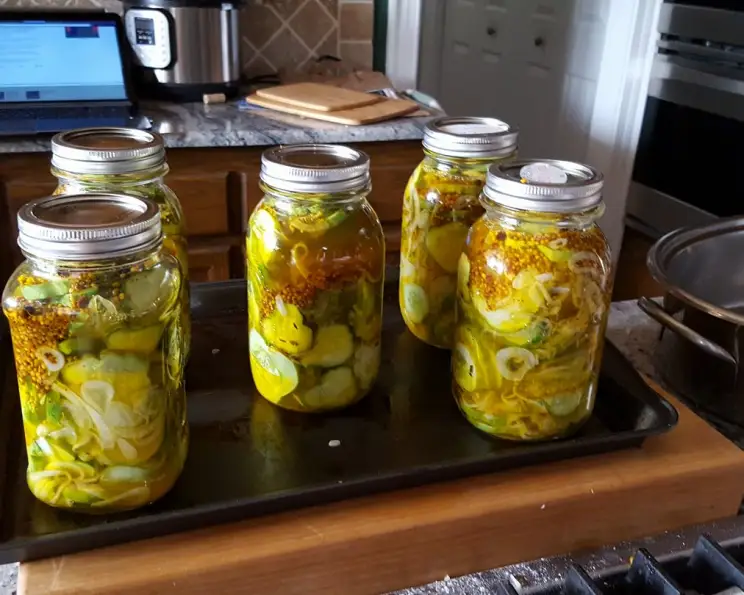
Crunchy, Tangy, Irresistible: Homemade Refrigerated Bread & Butter Pickles
The first time I tasted bread and butter pickles, I was a skeptical child at a family picnic. My grandmother, a woman who could coax flavor out of anything, had proudly presented a jar of her own creation. The wrinkly, golden slices looked alien to my young eyes. But one bite changed everything. The sweet, tangy crunch, the whisper of warm spices, the way they brightened up a humble ham sandwich – it was a revelation. From that day on, bread and butter pickles were more than just a condiment; they were a taste of home, a reminder of her love, and a testament to the magic that can happen when simple ingredients are transformed into something extraordinary.
Recipe Overview
- Prep Time: 30 minutes
- Cook Time: 15 minutes
- Total Time: 4 hours 45 minutes (includes chilling time)
- Yields: 5 Pints
- Dietary Type: Vegetarian, Gluten-Free
Ingredients
- 2 1⁄2 lbs pickling cucumbers, sliced 1/4-inch thick
- 1 lb sweet onion, thinly sliced
- 1⁄4 cup pickling salt
- 1⁄2 – 3⁄4 cup sugar (adjust to taste)
- 1 1⁄4 cups distilled white vinegar
- 1 cup apple cider vinegar
- 1⁄2 teaspoon ground turmeric
- 1 tablespoon mustard seeds
- 1 tablespoon coriander seed (or 1 teaspoon ground coriander)
- 3⁄4 teaspoon celery seed
- 1 teaspoon crushed red pepper flakes
- 1 inch cinnamon stick
- 6 allspice berries, plus a pinch of ground allspice
- 6 whole cloves, plus a pinch of ground cloves
Equipment Needed
- Large bowl
- Clean tea towel
- 4 qt or 6 qt pot
- Sterilized jars and lids
- Paper towels
Instructions
- Begin by carefully rinsing the cucumbers, scrubbing away any dirt that may have stuck to them. Slice off 1/8-inch from both ends of each cucumber and discard. This removes enzymes that can cause the pickles to soften.
- Slice the cucumbers into 1/4-inch thick slices and place them in a large bowl.
- Add the thinly sliced onions and pickling salt to the bowl. Stir well to ensure the salt is evenly distributed among the cucumber slices.
- Cover the mixture with a clean tea towel (a thin towel, not terry cloth). Then, cover the towel with a couple of inches of ice. This helps draw out excess moisture from the cucumbers, resulting in a crisper pickle.
- Place the bowl in the refrigerator and let it chill for 4 hours. This step is crucial for achieving that signature bread and butter pickle crunch.
- After 4 hours, discard the ice. Rinse the cucumber and onion slices thoroughly under cold water. This removes the salt. Drain. Rinse and drain again to ensure all the salt is gone.
- While the cucumbers are chilling, sterilize your jars and lids. There are several methods for sterilization; you can boil them in water for 10 minutes, run them through a dishwasher cycle with a sterilize setting, or bake them in the oven at 200°F for 20 minutes. Make sure the jars are still warm when you fill them.
- In a 4 qt or 6 qt pot, combine the vinegars, sugar, turmeric, mustard seeds, coriander seed (or ground coriander), celery seed, crushed red pepper flakes, cinnamon stick, allspice berries and ground allspice, and whole cloves and ground cloves.
- Bring the mixture to a boil over medium-high heat, stirring occasionally to dissolve the sugar. Once boiling, reduce the heat slightly to maintain a gentle boil.
- Once the jars are sterilized and the vinegar mixture is boiling, it’s time to assemble the pickles. First, pack each jar with the cucumber and onion mixture, leaving about an inch of headspace (the space between the vegetables and the rim of the jar).
- Pour the hot vinegar-sugar syrup over the vegetables, leaving about a half-inch of headspace. Ensure that the vegetables are fully submerged in the brine.
- Wipe the rim of each jar clean with a paper towel. This is important for achieving a proper seal.
- Place a sterilized lid on each jar and secure it with a metal screw band. The band should be tightened to fingertip tightness – not too tight, as this can prevent proper sealing.
- Store the jars in the refrigerator. These are refrigerated pickles, not canned, so they require refrigeration for safety. They will keep for about a year in the refrigerator, but they’re best enjoyed within a few months.
- Optional: For a spicy kick, consider adding 1/2 diced habanero pepper to each pint jar before adding the vinegar solution. If you add it later, allow the jar to sit for several days to allow the habanero’s flavor to infuse into the pickles.
Expert Tips & Tricks
- Adjust the sugar: The amount of sugar is a matter of personal preference. Start with 1/2 cup and taste the brine as it simmers. Add more sugar, a tablespoon at a time, until you reach your desired sweetness.
- Use fresh spices: Freshly ground spices will give your pickles a more vibrant and complex flavor. If possible, grind your own coriander, allspice, and cloves.
- Don’t overcook: Avoid prolonged boiling of the vinegar mixture, as it can cause the spices to become bitter.
- Ensure cucumbers are cool: After rinsing the cucumbers, make sure they are fully drained and as cool as possible before placing them in jars.
Serving & Storage Suggestions
These bread and butter pickles are incredibly versatile! They’re a classic addition to sandwiches and burgers, but they also shine as part of a cheese board, a relish alongside grilled meats, or even as a surprising topping for tacos. Store the refrigerated pickles in their jars in the refrigerator. They will keep for up to a year, but are best consumed within 6 months for optimal flavor and texture. Since these are not canned, they are not shelf stable and must be refrigerated.
Nutritional Information
(Estimates will vary depending on sugar content and cucumber size)
| Nutrient | Amount per Serving | % Daily Value |
|---|---|---|
| Calories | 150 kcal | 8% |
| Total Fat | 1g | 1% |
| Saturated Fat | 0g | 0% |
| Cholesterol | 0mg | 0% |
| Sodium | 1200mg | 50% |
| Total Carbohydrate | 35g | 12% |
| Dietary Fiber | 2g | 7% |
| Sugars | 25g | – |
| Protein | 1g | 2% |
Variations & Substitutions
- Spicy Pickles: As mentioned, a diced habanero is a fantastic addition for heat. You could also use jalapenos or serranos. Remove the seeds for less heat.
- Dill Pickles: For a dill-flavored pickle, add 2 tablespoons of fresh dill to each jar before filling with the brine.
- Mustard Seed Variety: Experiment with different mustard seeds, such as brown or yellow, to create unique flavor profiles.
- Sweetness Level: Adjust the amount of sugar to suit your preference. You can also use a sugar substitute, but be aware that it may affect the texture of the pickles.
- Vinegar Blend: While the recipe calls for a blend of white and apple cider vinegar, you can experiment with other vinegars like rice vinegar or white wine vinegar for a slightly different flavor.
FAQs (Frequently Asked Questions):
Q: Why do I need to use pickling cucumbers?
A: Pickling cucumbers are specifically bred to have a firmer texture and thinner skin, which makes them ideal for pickling. They hold their shape better and absorb the brine more evenly.
Q: Can I use regular table salt instead of pickling salt?
A: No, it’s best to use pickling salt (also known as canning salt). Table salt contains iodine and anti-caking agents that can darken the pickles and make the brine cloudy.
Q: How long do I need to wait before eating the pickles?
A: While you can technically eat them right away, it’s best to let the pickles sit in the refrigerator for at least 24 hours to allow the flavors to meld and develop. A week is even better!
Q: My pickles are soft. What did I do wrong?
A: Soft pickles can be caused by several factors, including using old cucumbers, not chilling them in ice water, or using too much sugar. Make sure to use fresh, firm cucumbers and follow the chilling instructions carefully.
Q: Do I need to process these pickles in a water bath canner?
A: No, this recipe is for refrigerated pickles, which means they are not processed for long-term shelf storage. They must be stored in the refrigerator at all times.
Final Thoughts
Making your own bread and butter pickles is a surprisingly simple and rewarding experience. The vibrant flavors and satisfying crunch are a far cry from store-bought versions, and you have the freedom to customize the recipe to your liking. Don’t be afraid to experiment with different spices and levels of sweetness. I encourage you to gather your ingredients, put on some music, and immerse yourself in the process. Share your creations with friends and family – they’ll be amazed by your culinary prowess. And most importantly, enjoy the tangy, sweet, and utterly irresistible flavor of homemade bread and butter pickles!