
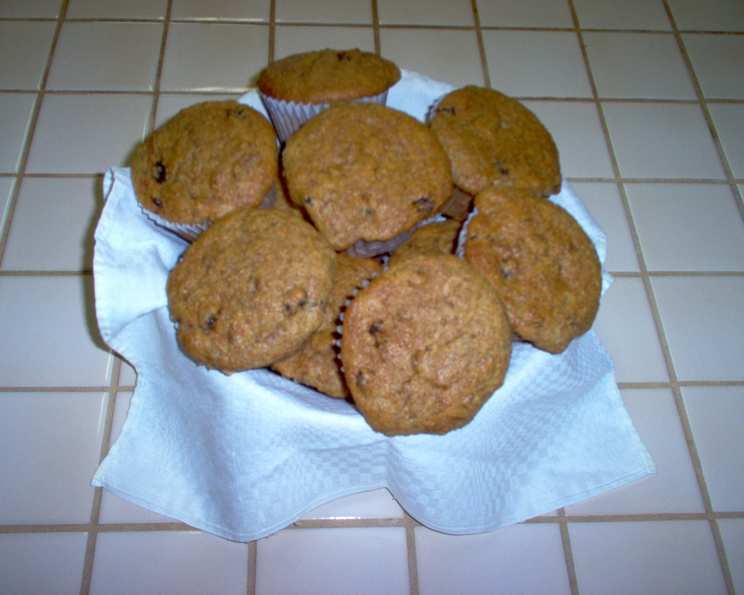
Refrigerator Buttermilk Bran Muffins: A Baker’s Best Friend
The aroma of warm muffins, fresh from the oven, is a scent that instantly transports me back to my grandmother’s kitchen. Every Sunday morning, without fail, she’d pull out a batch of these hearty, wholesome bran muffins. They weren’t fancy, but they were perfect. The slight tang of buttermilk, the subtle sweetness, and the satisfyingly chewy texture – they were the embodiment of comfort and home. I can still see her, flour dusting her apron, handing me a warm muffin with a wink. This recipe is an homage to those simple, cherished moments.
Recipe Overview
- Prep Time: 20 minutes
- Cook Time: 20-25 minutes
- Total Time: 40-45 minutes + 24 hours refrigeration
- Servings: Variable, approximately 60 muffins
- Yield: Approximately 5 dozen muffins
- Dietary Type: Vegetarian
Ingredients
- 2 cups natural wheat bran
- 2 cups all-bran cereal (ensure it’s labelled all-bran or 100% bran)
- 2 cups boiling water
- 4 cups buttermilk
- 1 cup shortening
- 2 cups granulated sugar
- 1 cup packed brown sugar
- 4 eggs
- 5 cups all-purpose flour
- 4 teaspoons baking soda
- 1 ½ teaspoons salt
- 2 cups raisins
Equipment Needed
- Very large mixing bowls (at least 2)
- Electric mixer (optional, but helpful)
- Measuring cups and spoons
- Muffin tins
- Paper baking cups
- Foil or airtight container for storing batter
Instructions
-
In a very large bowl, combine the natural wheat bran and all-bran cereal. This mixture forms the base of our hearty muffins.
-
Add the boiling water to the bran mixture. Stir to moisten thoroughly and let the mixture stand for 10 minutes. This allows the bran to soften, contributing to the muffins’ tender texture.
-
Add the buttermilk to the softened bran mixture. Stir to combine. The acidity of the buttermilk will react with the baking soda later, helping the muffins rise.
-
In another very large bowl, cream together the shortening, granulated sugar, and packed brown sugar. An electric mixer makes this step easier, but you can also do it by hand. Creaming incorporates air into the mixture, leading to a lighter muffin.
-
Beat in the eggs, one at a time, into the creamed mixture. Ensure each egg is fully incorporated before adding the next.
-
Add the bran mixture to the creamed mixture, stirring until just blended. Avoid overmixing at this stage, as it can lead to tough muffins.
-
In a separate bowl, mix together the all-purpose flour, baking soda, and salt. Then, add the raisins to this dry mixture, coating them in flour. This prevents the raisins from sinking to the bottom of the muffins during baking.
-
Add the flour mixture to the bran mixture, stirring until evenly mixed. Again, be careful not to overmix.
-
Cover the bowl tightly with foil or transfer the batter to an airtight container and refrigerate for at least 24 hours. This is a crucial step! The refrigeration allows the flavors to meld and the bran to further soften. The batter can be stored in the fridge for up to two weeks.
-
When ready to bake, preheat your oven to 375°F (190°C).
-
Spoon the batter into muffin tins lined with paper baking cups, filling them about ¾ full. The batter will thicken considerably during refrigeration, which is perfectly normal. Don’t stir it before spooning it out.
-
Bake in the preheated oven for 20-25 minutes, or until a toothpick inserted into the center comes out clean.
-
Make as many muffins as you wish, then return the remaining batter to the refrigerator.
-
Cool the muffins in the tin for a few minutes before transferring them to a wire rack to cool completely.
Expert Tips & Tricks
- Don’t overmix the batter. Overmixing develops the gluten in the flour, resulting in tough muffins. Mix only until the ingredients are just combined.
- Use room temperature eggs. Room temperature eggs emulsify better into the batter, creating a smoother, more even texture.
- Don’t skip the refrigeration step. The refrigeration period is essential for developing the flavor and texture of these muffins.
- For extra moist muffins, add a tablespoon or two of applesauce to the batter.
- Vary the mix-ins. Try adding chopped nuts, dried cranberries, or chocolate chips to the batter for a different flavor profile.
- If your oven tends to bake unevenly, rotate the muffin tin halfway through the baking time.
- To test for doneness, gently press the top of a muffin. If it springs back, it’s done.
Serving & Storage Suggestions
Serve these Refrigerator Buttermilk Bran Muffins warm or at room temperature. They are delicious on their own or with a pat of butter, a dollop of cream cheese, or a drizzle of honey. They pair perfectly with a cup of coffee or tea for a satisfying breakfast or snack.
- Room Temperature: Baked muffins can be stored in an airtight container at room temperature for up to 2 days.
- Refrigerator: For longer storage, store the baked muffins in an airtight container in the refrigerator for up to 5 days.
- Freezer: Baked muffins freeze very well. Wrap them individually in plastic wrap and then place them in a freezer bag. They can be stored in the freezer for up to 2 months. To reheat, thaw the muffins at room temperature or in the microwave.
Nutritional Information
(Estimated values per muffin; may vary based on specific ingredients and serving size)
| Nutrient | Amount per Serving | % Daily Value |
|---|---|---|
| Calories | 150 kcal | 8% |
| Total Fat | 5g | 6% |
| Saturated Fat | 1g | 5% |
| Cholesterol | 15mg | 5% |
| Sodium | 170mg | 7% |
| Total Carbohydrate | 26g | 9% |
| Dietary Fiber | 2g | 8% |
| Sugars | 14g | N/A |
| Protein | 3g | 6% |
Variations & Substitutions
- Lower Sugar: Reduce the amount of granulated sugar and brown sugar for a less sweet muffin. You can also substitute with a sugar alternative like Stevia or Monk Fruit sweetener.
- Dairy-Free: Substitute the buttermilk with a dairy-free alternative like almond milk or soy milk, adding a tablespoon of lemon juice or vinegar to curdle it. Use a dairy-free shortening.
- Gluten-Free: Substitute the all-purpose flour with a gluten-free all-purpose blend. You may need to add a binder like xanthan gum to help with the texture.
- Nutty Version: Add ½ cup of chopped walnuts, pecans, or almonds to the batter.
- Spice it Up: Add ½ teaspoon of cinnamon, nutmeg, or allspice to the dry ingredients for a warm, spiced flavor.
- Fruity Fun: Substitute the raisins with other dried fruits like cranberries, chopped dates, or apricots.
FAQs (Frequently Asked Questions)
Q: Why does the batter need to be refrigerated for so long?
A: The refrigeration period allows the bran to fully absorb the moisture, resulting in a more tender muffin. It also allows the flavors to meld together, creating a richer taste.
Q: Can I use bran flakes instead of all-bran cereal?
A: It’s best to stick to all-bran or 100% bran cereal as specified in the recipe. Bran flakes have a different texture and may not produce the same result.
Q: My batter thickened a lot in the fridge. Is that normal?
A: Yes, the batter will thicken considerably during refrigeration as the bran absorbs the liquid. Don’t worry, this is perfectly normal and expected.
Q: Can I freeze the muffin batter instead of baking it all at once?
A: While you can freeze the baked muffins, freezing the batter is not recommended. The texture may change upon thawing.
Q: The muffins are browning too quickly. What should I do?
A: If the muffins are browning too quickly, tent the muffin tin with foil during the last few minutes of baking. This will prevent them from burning.
Final Thoughts
These Refrigerator Buttermilk Bran Muffins are more than just a recipe; they’re a taste of tradition, a slice of comfort, and a testament to the simple joys of home baking. I encourage you to try this recipe and create your own cherished memories. Don’t be afraid to experiment with variations and make it your own. And please, share your creations and feedback – I’d love to hear about your baking adventures! Serve these muffins alongside a hearty bowl of oatmeal or a fresh fruit salad for a truly nourishing and delicious meal. Happy baking!