
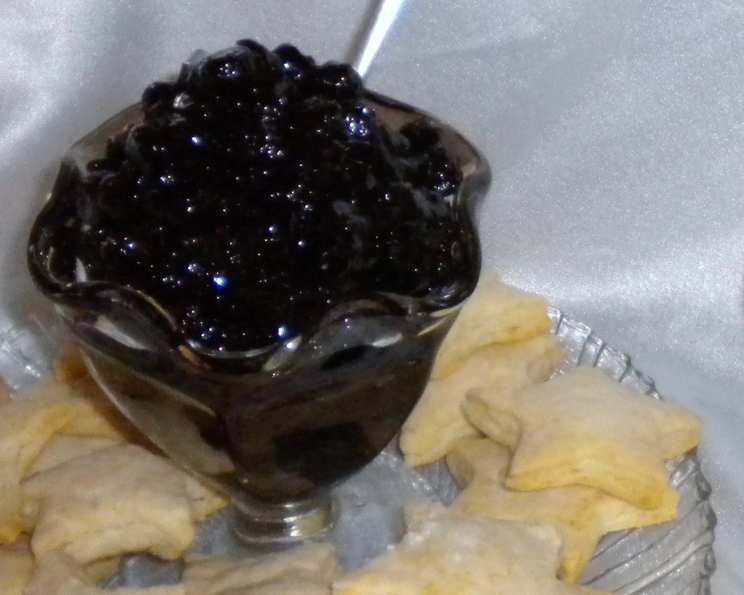
Refrigerator Jam: A Taste of Summer, All Year Round
My grandmother’s kitchen always smelled of simmering fruit and bubbling sugar. Late summer afternoons were dedicated to preserving the bounty from her garden, and I can still picture her stirring a massive pot on the stove, the air thick with the sweet scent of ripe peaches or plump blueberries. Though she made her fair share of traditional canned preserves, she always kept a jar of “Refrigerator Jam” on hand – a vibrant, fresh-tasting spread that didn’t require the fuss of canning. It was her little shortcut to sunshine during the colder months, and a simple pleasure that brings me right back to her warm kitchen.
Recipe Overview
- Prep Time: 20 minutes
- Cook Time: 1 hour to 1 hour 30 minutes
- Total Time: 1 hour 20 minutes to 1 hour 50 minutes
- Yields: Approximately 7 half-pint jars
- Dietary Type: Vegetarian, Gluten-Free, Dairy-Free
Ingredients
- 4 lbs fruit, your choice (strawberries, peaches, blueberries, plums, or a combination)
- 4 cups sugar
Equipment Needed
- Large, heavy-bottomed saucepan
- Wooden spoon or heat-resistant spatula
- Measuring cups
- Sharp knife or food processor (optional)
- Clean half-pint jars
- Clean lids
Instructions
-
Begin by thoroughly washing your chosen fruit. This is a crucial step to remove any dirt or residue.
-
Next, prepare the fruit based on its type. For fruits like peaches or plums, discard the skin. Strawberries can be hulled, and larger fruits like peaches or plums should be cut into pieces no larger than 1 inch each. If using a variety of fruits, aim for a uniform size to ensure even cooking. You can use a knife for this, or pulse the fruit a few times in a food processor, but be careful not to over-process it into a puree. We want small chunks for texture.
-
Select a large, heavy-bottomed saucepan. The heavy bottom is important to prevent the jam from scorching during the long cooking process. Add the 4 cups of sugar to the saucepan.
-
Add the prepared fruit to the saucepan with the sugar.
-
Place the saucepan over medium heat. Using a wooden spoon or heat-resistant spatula, stir constantly while the sugar melts and the fruit begins to soften. The constant stirring is vital to prevent sticking and scorching, and to help the fruit release its juices. This process can take about 10-15 minutes.
-
Once the sugar is fully dissolved and the fruit has started to soften, continue cooking, still stirring constantly. At this stage, you’re aiming to thicken the jam. This can take anywhere from an hour to an hour and a half, or even longer, depending on the type of fruit you use and its water content. Be patient! The color will deepen and the mixture will become more viscous as it cooks.
-
Test for doneness. There are a few ways to check if the jam has reached the desired consistency. One method is to place a small spoonful of the jam on a chilled plate. Let it sit for a minute, then gently push it with your finger. If it wrinkles and sets, it’s ready. Another method is to use a candy thermometer; the jam should reach a temperature of 220°F (104°C).
-
Once the jam has thickened to your liking, remove it from the heat and let it cool slightly. This allows the jam to thicken further as it cools and prevents condensation from forming in the jars.
-
While the jam is cooling slightly, prepare your jars. Ensure that your half-pint jars and lids are very clean. You can sterilize them by running them through a dishwasher cycle or by boiling them in water for 10 minutes.
-
Spoon the cooled jam into the very clean jars, leaving about 1/4 inch of headspace at the top.
-
Cover the jars with clean lids.
-
Refrigerate immediately. The jam is now ready to be enjoyed.
Expert Tips & Tricks
- Fruit Selection is Key: Different fruits have different pectin levels, which affects how well the jam sets. Fruits like apples, cranberries, and citrus fruits are naturally high in pectin, while fruits like strawberries and peaches are lower. If using low-pectin fruits, consider adding a small amount of commercial pectin or combining them with a high-pectin fruit for a better set.
- Sugar Adjustment: Feel free to adjust the amount of sugar slightly to suit your taste and the sweetness of your fruit. However, remember that sugar acts as a preservative, so reducing it significantly may shorten the jam’s shelf life.
- Flavor Boosters: Experiment with adding spices like cinnamon, cloves, or ginger for a warm, comforting flavor. A splash of lemon juice can brighten the flavors and help with setting. You can also add a touch of vanilla extract or a liqueur like amaretto for a more sophisticated taste.
- Preventing Scorching: Stir, stir, stir! I can’t stress this enough. Constant stirring is the best way to prevent the jam from sticking to the bottom of the pot and scorching. Pay extra attention during the final stages of cooking when the jam is thickening rapidly.
- Dealing with Foam: As the jam cooks, foam may form on the surface. This is normal and harmless. You can skim it off with a spoon if you prefer a clearer jam, but it’s not necessary.
Serving & Storage Suggestions
Refrigerator Jam is incredibly versatile. Spread it on toast, scones, or English muffins for a simple breakfast. Use it as a filling for cakes, tarts, or pastries. Serve it with cheese and crackers for a sophisticated appetizer. Swirl it into yogurt or oatmeal for a flavorful twist. The possibilities are endless!
Because this jam isn’t processed for long-term storage, it must be kept refrigerated. Properly stored, it will last for up to 3 weeks in the refrigerator. It is not recommended to leave it at room temperature for longer than 2 hours. For longer storage, consider freezing the jam in freezer-safe containers. It can be frozen for up to 6 months. Thaw it in the refrigerator before using.
Nutritional Information
Note: Nutritional information is an estimate and may vary based on specific ingredients and portion sizes.
| Nutrient | Amount per Serving (1 tbsp) | % Daily Value |
|---|---|---|
| Calories | 50 kcal | 3% |
| Total Fat | 0g | 0% |
| Saturated Fat | 0g | 0% |
| Cholesterol | 0mg | 0% |
| Sodium | 0mg | 0% |
| Total Carbohydrate | 13g | 4% |
| Dietary Fiber | 0g | 0% |
| Sugars | 13g | 52% |
| Protein | 0g | 0% |
Variations & Substitutions
- Spiced Plum Jam: Add a cinnamon stick, a few cloves, and a star anise to the jam while it simmers. Remove the spices before jarring.
- Strawberry Balsamic Jam: Stir in a tablespoon of balsamic vinegar towards the end of the cooking process to enhance the strawberry flavor.
- Peach and Ginger Jam: Add a knob of grated ginger to the peaches as they cook for a warm, spicy kick.
- Mixed Berry Medley: Combine strawberries, blueberries, raspberries, and blackberries for a vibrant and flavorful jam.
- Low-Sugar Option: Use a sugar substitute like Stevia or Erythritol, but be aware that this may affect the texture and shelf life of the jam.
FAQs (Frequently Asked Questions)
Q: Why is my jam not thickening?
A: Several factors can contribute to jam not thickening, including insufficient cooking time, low pectin levels in the fruit, or too much liquid. Continue cooking the jam until it reaches the desired consistency, or add a small amount of commercial pectin.
Q: Can I use frozen fruit for this recipe?
A: Yes, you can use frozen fruit, but be aware that it will release more water than fresh fruit, so you may need to cook the jam for a longer time to thicken it.
Q: Do I need to sterilize the jars for refrigerator jam?
A: While it’s not strictly necessary as with canned jams, sterilizing the jars is recommended to ensure the jam stays fresh for as long as possible.
Q: Can I double this recipe?
A: Yes, you can double the recipe, but be sure to use a large enough saucepan to prevent overflow. You may also need to increase the cooking time.
Q: What is the best way to clean sticky jam residue from my saucepan?
A: Fill the saucepan with hot, soapy water and let it soak for a few hours. The sticky residue should then be easy to scrub away. For stubborn spots, try boiling a solution of water and vinegar in the saucepan.
Final Thoughts
I hope this Refrigerator Jam recipe brings a little bit of sunshine into your kitchen, just as it did in my grandmother’s. Don’t be afraid to experiment with different fruits and flavors to create your own signature blend. Once you’ve mastered the basic technique, the possibilities are endless! Share your creations with friends and family, and let me know what flavor combinations you come up with. I’m always eager to hear about your culinary adventures!