
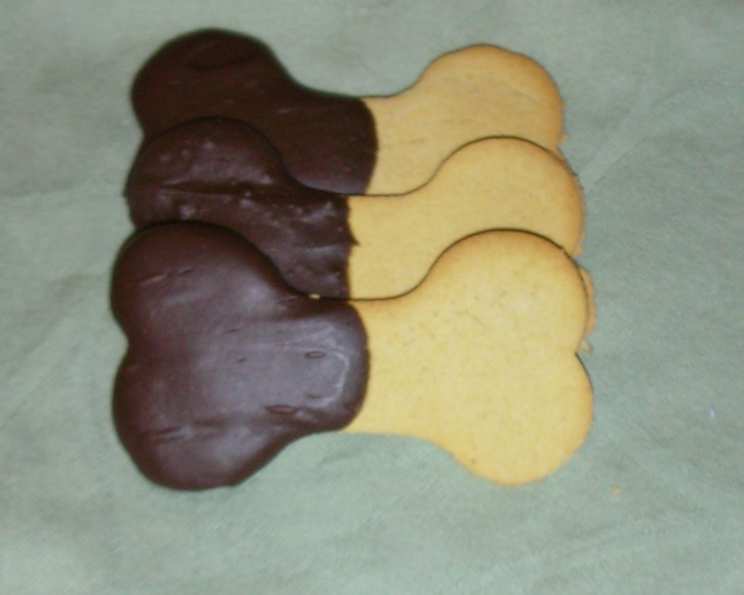
Rei’s Favorite Cookies (Dog Treats)
The rhythmic thump of a happy tail, the sparkle in bright, black eyes, the gentle nudge of a wet nose – these are the memories that flood back whenever I bake these treats. My Japanese Spitz, Rei, was the pickiest eater I knew, turning his nose up at even the most expensive dog biscuits. Then, one day, experimentation in the kitchen led to these simple cookies, and suddenly, I had a furry shadow glued to my side every time the oven turned on. They became a symbol of our bond, a testament to the lengths we go to show our love.
Recipe Overview
- Prep Time: 10 minutes
- Cook Time: 25-40 minutes
- Total Time: 35-50 minutes
- Yields: 60-70 cookies
- Dietary Type: Homemade Dog Treats
Ingredients
- 2 (4 ounce) jars baby food (I used carrots, chicken & peas)
- 2 eggs
- ½ teaspoon salt
- 400 g whole wheat flour (approx 3 cups)
Equipment Needed
- Large bowl
- Spoon or spatula
- Measuring cups and spoons
- Baking sheet
- Parchment paper
- Wire rack
Instructions
- Preheat your oven to 350°F (175°C). Line a baking sheet with parchment paper. This will prevent the cookies from sticking and makes cleanup a breeze.
- In a large bowl, combine the baby food, eggs, and salt. Use a spoon or spatula to beat the ingredients together until they are well combined. Make sure there are no large lumps of baby food remaining.
- Gradually stir in the whole wheat flour. Add it a little at a time, mixing well after each addition. The amount of flour you need may vary slightly depending on the moisture content of the baby food and the humidity in your kitchen. Continue adding flour until the dough comes together and forms a slightly sticky ball.
- On a lightly floured surface, or directly in the bowl, roll the dough into small balls, about ½ inch in diameter. These are bite-sized for most dogs, but you can adjust the size to suit your dog’s breed and preference.
- Place the dough balls onto the prepared parchment-lined baking sheet, leaving a little space between each one. This prevents them from sticking together as they bake.
- Use a spoon or fork to gently flatten each ball. This will help them bake evenly. You can create a decorative pattern with the fork if you like.
- Bake in the preheated oven for 25-40 minutes, or until the cookies are golden brown and firm to the touch. The baking time will depend on how hard and crunchy you want the cookies to be. For extra crunchy cookies, bake for a longer time. Rei, my picky eater, loved them extra crunchy, so I usually baked them for a full 40 minutes.
- Remove the baking sheet from the oven and cool the cookies thoroughly on a wire rack. This is crucial for preventing them from becoming soggy.
- Once the cookies are completely cool, store them in an airtight container. I recommend storing them in the refrigerator to prevent mold, especially if you live in a humid climate.
Expert Tips & Tricks
- Baby Food Choice: You can use any flavor of baby food that your dog enjoys, as long as it doesn’t contain any onions. Onions are toxic to dogs. Some dogs may also be sensitive to corn, so check the ingredients list carefully.
- Flour Substitution: If your dog is sensitive to wheat, you can substitute brown rice flour for the whole wheat flour. However, you may need to adjust the amount of flour slightly to achieve the right consistency. The dough should be slightly sticky.
- Baking Time Adjustment: The baking time may vary depending on your oven. Keep a close eye on the cookies during the last few minutes of baking to prevent them from burning. A slightly longer baking time at a lower temperature will yield very crunchy treats.
- Batch Size: This recipe makes a large batch of cookies, so you may want to halve the recipe if you have a smaller dog or if you don’t want to make too many treats at once.
- Texture Control: For chewier cookies, bake for a shorter time. For crispier cookies, bake for a longer time. You can also experiment with different oven temperatures to find what works best for your dog’s preferences.
Serving & Storage Suggestions
These cookies can be served as a daily treat for your furry friend or used as a reward during training sessions. Always supervise your dog while they are eating treats to prevent choking.
Store the cooled cookies in an airtight container in the refrigerator for up to 2 weeks or in the freezer for up to 2 months. Freezing the cookies helps to maintain their freshness and prevent them from becoming stale. Thaw frozen cookies in the refrigerator before serving. Make sure treats are fully thawed before giving to your dog.
Nutritional Information
Please note that this is an estimate and will vary depending on the specific ingredients used.
| Nutrient | Amount per Cookie (Approximate) |
|---|---|
| Calories | 25 kcal |
| Total Fat | 0.3 g |
| Saturated Fat | 0.1 g |
| Cholesterol | 6.2 mg |
| Sodium | 21.9 mg |
| Total Carbohydrate | 4.8 g |
| Dietary Fiber | 0.7 g |
| Sugars | 0 g |
| Protein | 1.1 g |
Variations & Substitutions
- Peanut Butter Variation: Add 2 tablespoons of natural peanut butter (xylitol-free!) to the dough for a tasty and protein-packed treat.
- Sweet Potato Variation: Use sweet potato baby food for a naturally sweet and nutritious cookie.
- Pumpkin Spice Variation: Add ½ teaspoon of pumpkin pie spice to the dough for a festive treat during the fall season.
- Gluten-Free Option: Replace the whole wheat flour with a gluten-free flour blend formulated for baking. You may need to adjust the amount of liquid slightly to achieve the right consistency. Ensure the blend contains xanthan gum or another binder.
- Vegan Dog Treats: Use flax eggs as an egg replacement. Combine 1 tablespoon of ground flaxseed with 3 tablespoons of water and let it sit for 5 minutes to thicken before adding it to the recipe.
FAQs (Frequently Asked Questions)
Q: Can I use different types of baby food?
A: Yes, you can use any type of baby food that is safe for dogs, but be sure to check the ingredients list for onions or other harmful ingredients.
Q: How do I know when the cookies are done?
A: The cookies are done when they are golden brown and firm to the touch. The baking time may vary depending on your oven, so keep a close eye on them.
Q: Can I freeze these cookies?
A: Yes, you can freeze these cookies for up to 2 months. Store them in an airtight container or freezer bag to prevent freezer burn.
Q: My dog has allergies. Can I still make these cookies?
A: Yes, you can easily adapt the recipe to accommodate your dog’s allergies. Try using brown rice flour or a gluten-free flour blend, and be sure to choose baby food flavors that are safe for your dog.
Q: How many cookies should I give my dog each day?
A: The number of cookies you should give your dog each day depends on their size, age, and activity level. Start with a small amount and adjust as needed. Always consult with your veterinarian if you have any concerns.
Final Thoughts
Creating these simple cookies for your beloved dog is more than just baking; it’s a way to show them how much you care. It’s a tangible expression of love that they can taste and enjoy. Don’t be afraid to experiment with different flavors and ingredients to find your dog’s favorite combination. And most importantly, have fun in the kitchen! I encourage you to try this recipe and share your feedback. I’m sure your canine companion will thank you with lots of tail wags and wet nose boops!