
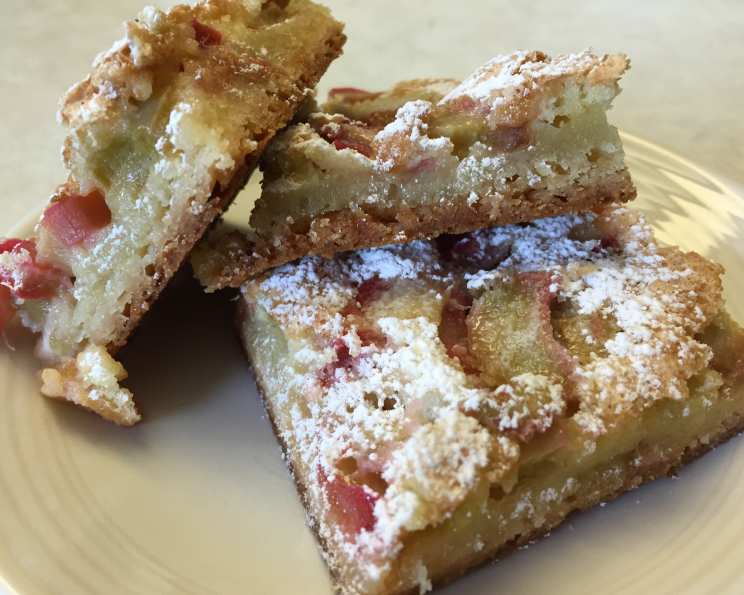
Rhubarb Dream Bars: A Culinary Ode to Spring
The first vibrant stalks of rhubarb emerging from the earth each spring always trigger a flood of memories. I remember my grandmother’s garden, bursting with its tangy bounty. She’d let me “help” her harvest, handing me a small, child-safe knife, and together we’d fill a basket with those rosy-hued stalks. The air, thick with the promise of warmer days, would mingle with the tart scent of the rhubarb, a perfume that forever evokes a sense of home and simple pleasures. These Rhubarb Dream Bars capture that feeling perfectly: a sweet, tangy, and utterly irresistible treat that embodies the spirit of spring.
Recipe Overview
- Prep Time: 20 minutes
- Cook Time: 55-60 minutes
- Total Time: 1 hour 15 minutes
- Servings: 36
- Yield: 1 large pan
- Dietary Type: Vegetarian
Ingredients
For the Crust:
- 2 cups flour
- ¾ cup powdered sugar
- 1 cup butter (or 1 cup margarine)
For the Filling:
- 4 large eggs
- 2 cups sugar
- ½ cup flour
- ½ teaspoon salt
- 4 cups thinly sliced rhubarb
Equipment Needed
- Food Processor
- 15 x 10-inch baking pan
- Mixing bowl
- Electric mixer or whisk
Instructions
- Prepare the crust: In a food processor, combine the flour, powdered sugar, and butter (or margarine). Pulse until the mixture resembles coarse crumbs.
- Press the crust: Press the crumb mixture evenly into a 15 x 10-inch baking pan. Ensure it’s firmly packed to form a solid base.
- Bake the crust: Bake the crust in a preheated oven at 350°F (175°C) for 15 minutes. The crust will be very light in color, which is exactly what you want at this stage.
- Make the filling: While the crust is baking, prepare the filling. In a large mixing bowl, combine the eggs, sugar, flour, and salt.
- Mix the filling: Using an electric mixer or whisk, beat the ingredients together until well combined and smooth. Ensure there are no lumps.
- Fold in the rhubarb: Gently fold in the thinly sliced rhubarb into the egg mixture. Distribute the rhubarb evenly throughout the filling.
- Assemble and bake: Carefully spread the rhubarb filling mixture evenly over the hot, pre-baked crust.
- Return to oven: Return the pan to the oven and bake for 40-45 minutes longer, or until the filling is set and lightly golden. The edges should be slightly firm to the touch, and the center should not jiggle excessively.
- Cool and cut: Remove the pan from the oven and let it cool completely on a wire rack before cutting into bars. This is crucial for the filling to set properly and prevent the bars from being too gooey.
Expert Tips & Tricks
- Perfectly Tender Rhubarb: For the best texture, slice the rhubarb thinly, about ¼-inch thick. This ensures it cooks evenly and becomes tender without being mushy.
- Preventing a Soggy Crust: Partially baking the crust before adding the filling is essential to prevent a soggy bottom. Don’t skip this step!
- Even Baking: To ensure even baking, rotate the pan halfway through the baking time. This will help the bars bake uniformly, especially if your oven has hot spots.
- Cutting Clean Bars: For clean, professional-looking bars, use a sharp knife and wipe it clean between each cut. Letting the bars cool completely is also key. You can even chill them in the refrigerator for an hour before cutting for extra neatness.
- Brown Butter Crust: For an even more complex flavor, try browning the butter before adding it to the crust ingredients. Cook the butter over medium heat until it turns a nutty brown color and smells fragrant. Let it cool slightly before incorporating it into the crust.
- Sweetness Adjustment: Rhubarb’s tartness can vary. If your rhubarb is particularly tart, you may want to add an extra ¼ cup of sugar to the filling. Taste the filling before baking and adjust accordingly.
Serving & Storage Suggestions
Rhubarb Dream Bars are best served at room temperature. They make a delightful afternoon treat, a sweet ending to a spring dinner, or a welcome addition to any potluck or gathering.
- Serving: Dust the bars with powdered sugar for an elegant presentation. A scoop of vanilla ice cream or a dollop of whipped cream complements the tartness of the rhubarb beautifully.
- Storage: Store leftover bars in an airtight container at room temperature for up to 2 days, or in the refrigerator for up to 5 days.
- Freezing: For longer storage, freeze the bars individually wrapped in plastic wrap and then placed in a freezer bag. They can be frozen for up to 2 months. Thaw in the refrigerator before serving.
- Reheating: If you prefer warm bars, you can gently reheat them in the oven at 300°F (150°C) for about 10 minutes, or microwave them briefly.
Nutritional Information
Please note that these values are estimates and can vary based on specific ingredients and portion sizes.
| Nutrient | Amount per Serving | % Daily Value |
|---|---|---|
| Calories | 141 kcal | 7% |
| Total Fat | 5.8 g | 8% |
| Saturated Fat | 3.4 g | 17% |
| Cholesterol | 37 mg | 12% |
| Sodium | 77 mg | 3% |
| Total Carbohydrate | 21 g | 8% |
| Dietary Fiber | 0.5 g | 2% |
| Sugars | 14 g | – |
| Protein | 1.8 g | 4% |
Variations & Substitutions
- Gluten-Free Crust: Substitute the all-purpose flour in the crust with a gluten-free all-purpose flour blend. You may need to add a tablespoon or two of cold water to help the dough come together.
- Vegan Option: Replace the butter with a vegan butter substitute. Use a flax egg (1 tablespoon ground flaxseed mixed with 3 tablespoons water, let sit for 5 minutes) for each egg in the filling.
- Add Nuts: Sprinkle chopped walnuts or pecans over the filling before baking for added texture and flavor.
- Spice it Up: Add a pinch of ground ginger or cinnamon to the filling for a warm, spicy twist.
- Berry Rhubarb Bars: Mix in a cup of fresh or frozen berries (strawberries, raspberries, or blueberries) with the rhubarb for a colorful and flavorful variation.
FAQs (Frequently Asked Questions)
Q: Can I use frozen rhubarb?
A: Yes, you can use frozen rhubarb. Thaw it completely and drain off any excess liquid before adding it to the filling.
Q: My filling is too runny. What did I do wrong?
A: Ensure you’ve measured the flour accurately in both the crust and the filling. Also, make sure you are not overmixing the filling once you add the rhubarb. Overmixing can develop gluten and cause a runny texture.
Q: How do I know when the bars are done?
A: The bars are done when the filling is set and lightly golden brown. The edges should be slightly firm to the touch, and the center should not jiggle excessively.
Q: Can I make these bars ahead of time?
A: Yes, you can make the bars a day or two ahead of time. Store them in an airtight container in the refrigerator.
Q: My crust is too hard. How can I prevent this?
A: Avoid overworking the dough when making the crust. Pulse the ingredients in the food processor until just combined. Also, don’t press the crust too firmly into the pan.
Final Thoughts
Rhubarb Dream Bars are more than just a dessert; they’re a celebration of spring’s vibrant flavors and a tribute to simple, homemade goodness. I encourage you to give this recipe a try and experience the joy of creating something truly special. Don’t hesitate to experiment with variations and substitutions to make it your own. And, of course, I’d love to hear your feedback and see your creations! Perhaps pair these delightful bars with a cup of Earl Grey tea for a perfectly balanced afternoon treat. Happy baking!