
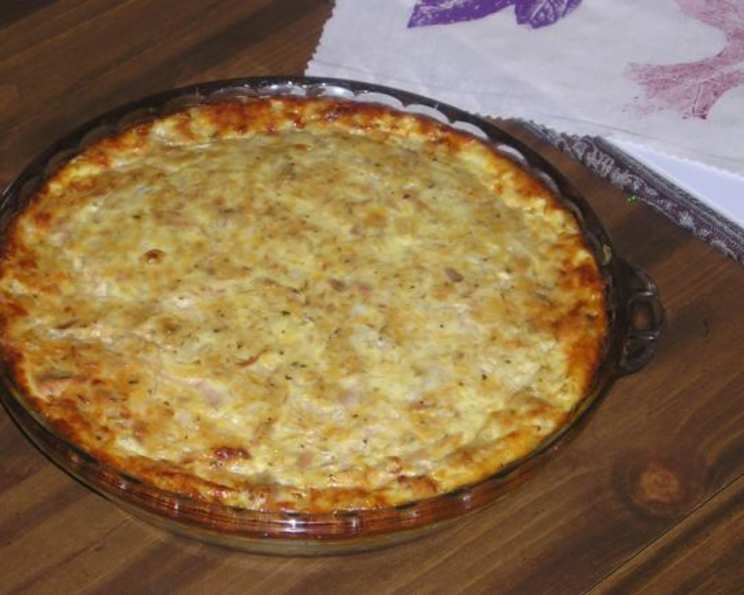
Rice and Tuna Pie: A Comfort Food Classic
The first time I tasted rice and tuna pie, I was at my grandmother’s house. She always had some culinary magic up her sleeve, and this pie was one of her simplest, yet most satisfying creations. I remember the warm, comforting aroma filling her cozy kitchen, the golden-brown crust beckoning, and the creamy, savory filling that just melted in my mouth. It wasn’t fancy, but it was pure, unadulterated comfort food – a little slice of home.
Recipe Overview
- Prep Time: 20 minutes
- Cook Time: 50-55 minutes
- Total Time: 1 hour 10 minutes
- Servings: 6
- Yield: 1 pie
- Dietary Type: Varies (see variations for gluten-free/dairy-free options)
Ingredients
For the Rice Shell:
- 2 cups cooked rice
- 2 tablespoons melted butter
- 1 tablespoon finely chopped onion
- 1/4 teaspoon dried marjoram
- 1 egg, slightly beaten
For the Filling:
- 1 (220 g) can tuna, drained and flaked
- 3 eggs, beaten
- 1 cup milk
- 1 cup grated cheese (cheddar, Monterey Jack, or your favorite)
- 1 tablespoon finely chopped onion
- 1/4 teaspoon dried marjoram
Equipment Needed
- Pie dish (9-inch recommended)
- Mixing bowls
- Measuring cups and spoons
- Fork or spoon for mixing
- Oven
Instructions
- Prepare the Rice Shell: In a mixing bowl, combine the cooked rice, melted butter, finely chopped onion, dried marjoram, and slightly beaten egg. Mix well until all ingredients are evenly distributed.
- Press into Pie Dish: Lightly butter a pie dish. Press the rice mixture firmly into the bottom and up the sides of the prepared pie dish, forming a crust. Ensure the crust is even in thickness for consistent baking.
- Layer Tuna: Distribute the drained and flaked tuna evenly over the rice shell. Spread it out so every bite will have a delicious tuna element.
- Prepare the Filling: In a separate mixing bowl, combine the beaten eggs, milk, grated cheese, finely chopped onion, and dried marjoram. Whisk thoroughly until well combined.
- Pour Filling over Tuna: Carefully pour the egg and cheese mixture over the tuna layer in the rice crust. Ensure the filling evenly covers the tuna.
- Bake: Bake in a moderate oven (approximately 350°F or 175°C) for 50-55 minutes, or until a knife inserted into the center comes out clean.
- Cool Slightly: Let the pie cool slightly before slicing and serving. This allows the filling to set a bit.
Expert Tips & Tricks
- Don’t overbake! Overbaking can result in a dry filling. Check for doneness starting at 50 minutes. The top should be golden brown and the filling set.
- Cheese Selection: Feel free to experiment with different types of cheese. Cheddar provides a classic flavor, while Monterey Jack offers a milder taste. A blend of cheeses can add complexity.
- Pre-Cooking Rice: Ensure the rice is cooked properly before assembling the pie. Undercooked rice will result in a hard crust.
- Flavor Boost: For an extra layer of flavor, consider adding a pinch of garlic powder or a dash of hot sauce to the egg mixture.
- Preventing Soggy Crust: To avoid a soggy crust, you can blind-bake the rice crust for 10-15 minutes before adding the filling. This will help it crisp up and prevent moisture from seeping through.
Serving & Storage Suggestions
Serve the rice and tuna pie warm or at room temperature. It’s delicious on its own or with a side salad.
Storage:
- Room Temperature: Do not leave at room temperature for more than 2 hours due to the dairy and egg content.
- Refrigerator: Store leftover pie in the refrigerator for up to 3 days in an airtight container.
- Freezer: For longer storage, freeze individual slices of the pie for up to 2 months. Wrap tightly in plastic wrap and then foil to prevent freezer burn.
Reheating: Reheat leftover slices in the microwave, oven, or toaster oven until warmed through.
Nutritional Information
| Nutrient | Amount per Serving | % Daily Value |
|---|---|---|
| Calories | 306.2 kcal | N/A |
| Calories from Fat | N/A | 45% |
| Total Fat | 15.2 g | 23% |
| Saturated Fat | 7.8 g | 38% |
| Cholesterol | 182.9 mg | 60% |
| Sodium | 290.2 mg | 12% |
| Total Carbohydrate | 21.8 g | 7% |
| Dietary Fiber | 0.2 g | 1% |
| Sugars | 0.4 g | 1% |
| Protein | 19.3 g | 38% |
Note: Nutritional information is an estimate and may vary based on specific ingredients used.
Variations & Substitutions
- Gluten-Free: Use gluten-free cooked rice and ensure that the cheese is gluten-free.
- Dairy-Free: Substitute the milk with a plant-based alternative like almond milk or soy milk. Use a dairy-free cheese substitute.
- Vegetarian: Replace the tuna with cooked mushrooms or a mixture of vegetables for a vegetarian option.
- Spicy: Add a pinch of red pepper flakes or a dash of your favorite hot sauce to the egg mixture for a kick.
- Herbs: Experiment with different herbs like dill, thyme, or parsley for a unique flavor profile.
- Crust Variation: Try using a pre-made pie crust (store-bought or homemade) instead of the rice crust for a different texture.
- Cheese Variety: Pepper Jack cheese can be added for a spicier pie.
FAQs (Frequently Asked Questions)
Q: Can I make this pie ahead of time?
A: Yes, you can assemble the pie ahead of time and store it in the refrigerator for up to 24 hours before baking. Add about 10 minutes to the baking time if baking from cold.
Q: Can I use brown rice instead of white rice?
A: Absolutely! Brown rice will add a nuttier flavor and slightly chewier texture to the crust. Ensure it’s fully cooked before using.
Q: What if I don’t have marjoram?
A: You can substitute marjoram with oregano or thyme. Use the same amount as specified in the recipe.
Q: Can I use a different kind of fish?
A: Yes, canned salmon or flaked cooked chicken can be used as a substitute for tuna.
Q: My crust is browning too quickly. What should I do?
A: Cover the edges of the pie crust with foil during the last 15-20 minutes of baking to prevent over-browning.
Final Thoughts
This Rice and Tuna Pie is more than just a recipe; it’s a comforting hug in a dish. I encourage you to try this simple, yet satisfying pie and make it your own. Feel free to experiment with different variations and share your feedback. Serve it with a crisp green salad or a warm bowl of soup for a complete and delightful meal. Happy cooking!