
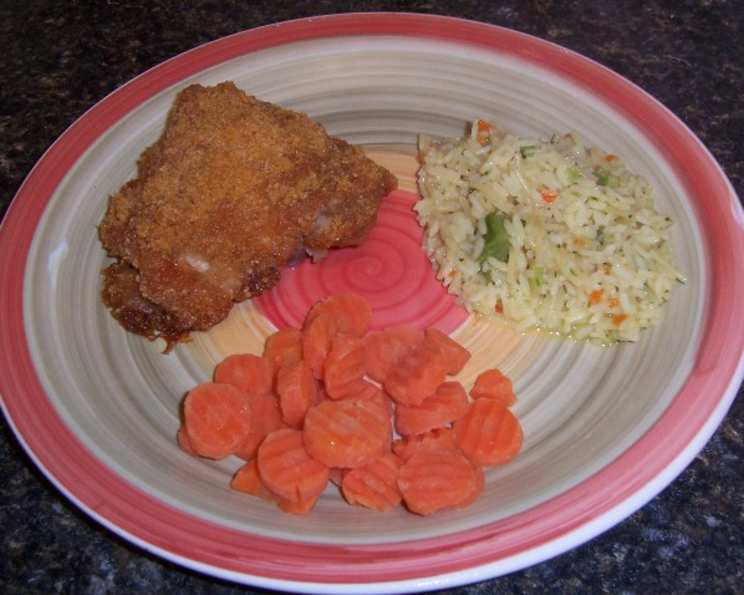
Rice Krispy Chicken: A Childhood Favorite, Elevated
The scent alone is a time machine. One whiff of this Rice Krispy Chicken baking, and I’m instantly transported back to my childhood kitchen. My mom, humming a tune, would be assembling this crispy, golden delight. It wasn’t just dinner; it was a symbol of home, comfort, and that unparalleled feeling of being utterly, completely loved. The satisfying crunch, the tender chicken within—it’s a memory I cherish and a flavor I’m excited to share.
Recipe Overview
- Prep Time: 15 minutes
- Cook Time: 1 hour
- Total Time: 1 hour 15 minutes
- Servings: 4-5
- Yields: 9 pieces
- Dietary Type: Not Gluten-Free
Ingredients
- 6 cups Rice Krispies
- 1 cup butter, melted
- Cut-up chicken (about 9 pieces, bone-in or boneless – your preference!)
Equipment Needed
- Large Ziploc bag
- Microwave-safe dish
- Another shallow dish for dipping
- Baking sheet
Instructions
-
Preheat your oven to 350 degrees Fahrenheit (175 degrees Celsius). This ensures even cooking and that beautiful golden-brown crust.
-
Prepare the Rice Krispie coating: Place the Rice Krispies in a large Ziploc bag. Seal the bag tightly, pressing out any excess air. Using a rolling pin, your hands, or even the bottom of a sturdy glass, crush the Rice Krispies until they are broken down into smaller pieces. You don’t want a fine powder, but definitely smaller than their original size. This helps them adhere to the chicken better.
-
Melt the butter: In a microwave-safe dish, melt the butter in the microwave. Use short bursts (about 30 seconds each) to avoid splattering, stirring in between until completely melted. Let it cool slightly before dipping the chicken to avoid any unwanted cooking before it hits the oven.
-
Dip and coat: Dip each piece of chicken into the melted butter, ensuring it’s well-coated. This helps the Rice Krispies stick and adds a delicious richness to the final dish.
-
Coat the chicken: Place the butter-dipped chicken piece into the Ziploc bag with the crushed Rice Krispies. Seal the bag and shake vigorously until the chicken is completely coated in the cereal. Repeat this process for each piece of chicken. Make sure the chicken is nicely covered with the Rice Krispies.
-
Bake: Place the coated chicken pieces on a baking sheet. Ensure they are spaced evenly to allow for proper air circulation and even browning.
-
Bake in the preheated oven for one hour, or until the chicken is cooked through and the Rice Krispie coating is golden brown and crispy. To ensure the chicken is fully cooked, use a meat thermometer. The internal temperature should reach 165 degrees Fahrenheit (74 degrees Celsius).
Expert Tips & Tricks
-
Crispy Factor: For an extra-crispy coating, consider lightly toasting the crushed Rice Krispies in a dry skillet over medium heat for a few minutes before coating the chicken. Watch them carefully, as they can burn quickly!
-
Butter Boost: Don’t be shy with the butter! It’s the glue that holds everything together and adds flavor. However, if you’re looking to cut back on fat, you can use a combination of melted butter and a little olive oil.
-
Even Cooking: If using bone-in chicken pieces, opt for pieces of similar size for even cooking. If using boneless chicken breasts, pound them to an even thickness.
-
Prevent Sticking: Line your baking sheet with parchment paper or a silicone baking mat to prevent sticking and make cleanup a breeze.
-
Browning Control: If the Rice Krispie coating starts to brown too quickly during baking, loosely tent the baking sheet with aluminum foil to prevent burning.
Serving & Storage Suggestions
This Rice Krispy Chicken is fantastic served hot, straight from the oven. It pairs beautifully with classic sides like mashed potatoes, roasted vegetables (broccoli, carrots, or asparagus are excellent choices), or a simple green salad. For a fun, kid-friendly meal, serve it with a side of mac and cheese or french fries.
Leftovers can be stored in an airtight container in the refrigerator for up to 3 days. The coating will lose some of its crispiness, but it will still be delicious. To reheat, bake in a preheated oven at 350 degrees Fahrenheit (175 degrees Celsius) for about 10-15 minutes, or until heated through. You can also reheat in the microwave, but be aware that the coating will become even softer. We do not recommend freezing.
Nutritional Information
Please note that these values are estimates and can vary based on specific ingredients and portion sizes.
| Nutrient | Amount per Serving | % Daily Value |
|---|---|---|
| Calories | 813 kcal | N/A |
| Calories from Fat | 571 kcal | 70% |
| Total Fat | 63.5 g | 97% |
| Saturated Fat | 34.1 g | 170% |
| Cholesterol | 207.1 mg | 69% |
| Sodium | 720.2 mg | 30% |
| Total Carbohydrate | 35.8 g | 11% |
| Dietary Fiber | 0.3 g | 1% |
| Sugars | 4 g | 16% |
| Protein | 24.4 g | 48% |
Variations & Substitutions
-
Gluten-Free Option: While traditional Rice Krispies are not gluten-free, you can substitute them with a gluten-free puffed rice cereal to make this recipe suitable for those with gluten sensitivities.
-
Spice It Up: Add a pinch of cayenne pepper, paprika, or garlic powder to the crushed Rice Krispies for a little extra flavor.
-
Herb Infusion: Mix in some dried herbs like thyme, rosemary, or oregano with the Rice Krispies for a more savory flavor profile.
-
Cheese Please: Add some grated Parmesan cheese to the Rice Krispie mixture for a cheesy, savory twist.
-
Vegan Version: Substitute the butter for a vegan butter alternative.
FAQs (Frequently Asked Questions)
Q: Can I use boneless, skinless chicken breasts?
A: Absolutely! Just be sure to pound them to an even thickness for even cooking. Adjust baking time as needed, as boneless chicken tends to cook faster.
Q: Can I prepare this ahead of time?
A: You can coat the chicken with the Rice Krispies ahead of time and store it in the refrigerator for a few hours before baking. However, for the best results, bake it immediately after coating to maintain the crispiness.
Q: My Rice Krispies are browning too quickly. What should I do?
A: Loosely tent the baking sheet with aluminum foil to prevent further browning. You can also lower the oven temperature slightly.
Q: The chicken is cooked through, but the Rice Krispies aren’t crispy enough. What can I do?
A: Increase the oven temperature slightly and bake for a few more minutes, watching carefully to prevent burning.
Q: Can I use an air fryer for this recipe?
A: Yes! Preheat your air fryer to 375 degrees Fahrenheit (190 degrees Celsius) and cook for about 15-20 minutes, flipping halfway through, until the chicken is cooked through and the coating is golden brown and crispy.
Final Thoughts
This Rice Krispy Chicken is more than just a recipe; it’s a reminder of simpler times, of home-cooked meals, and of the love that goes into creating them. I encourage you to try this recipe and create your own memories. Don’t be afraid to experiment with different spices and flavors to make it your own. Serve it with your favorite sides, gather your loved ones around the table, and enjoy! I’d love to hear your feedback and see your creations – so please share your comments and pictures. Happy cooking!