
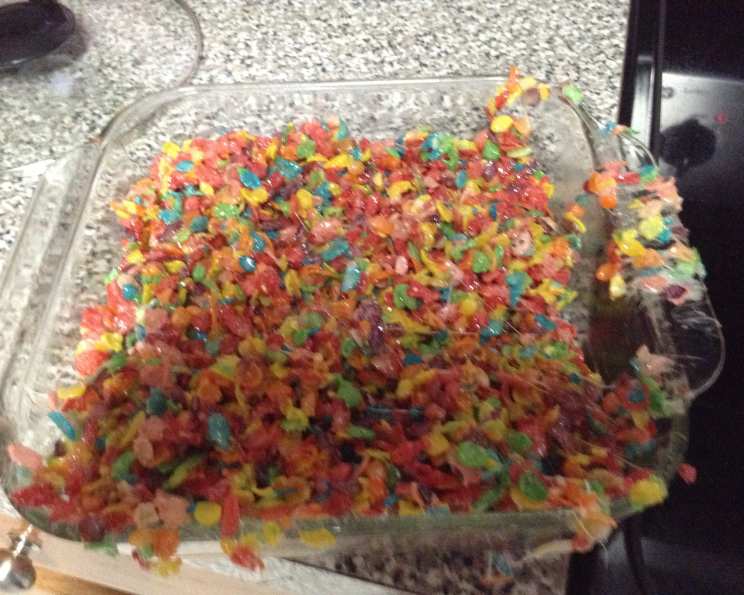
Unleash Your Inner Child: The Ultimate Rice Krispy/Fruity Pebbles Treats Recipe
The scent of melted butter and marshmallows is pure nostalgia for me. It instantly transports me back to elementary school bake sales, sticky fingers, and the pure, unadulterated joy of biting into a perfectly gooey Rice Krispy Treat. While the classic recipe is always a winner, experimenting with vibrant Fruity Pebbles elevates this simple treat to a whole new level of fun. These aren’t just kid snacks; they’re a whimsical, delicious indulgence for anyone who needs a little burst of happy.
Recipe Overview
- Prep Time: 5 minutes
- Cook Time: 5 minutes
- Total Time: 10 minutes
- Servings: Varies, approximately 9 squares
- Yield: One 13×9-inch pan
- Dietary Type: Not specified (can be adapted to gluten-free with gluten-free cereal)
Ingredients
- 3 tablespoons butter
- 15 oz of regular sized marshmallows
- 5 cups of Fruity Pebbles or 5 cups Rice Krispies cereal
Equipment Needed
- Large saucepan
- 13 x 9 x 2-inch pan
- Spatula or spoon
- Fork
Instructions
-
In a large saucepan, melt 3 tablespoons of butter over low heat. It’s crucial to keep the heat low to prevent the butter from browning or burning, which can impact the flavor.
-
Add the 15 oz of regular-sized marshmallows to the melted butter. Stir continuously until the marshmallows are completely melted and smooth. This step requires patience; don’t rush it by increasing the heat, as it can make the marshmallows tough. Aim for a glossy, flowing consistency.
-
In a 13 x 9 x 2-inch pan, add 5 cups of Fruity Pebbles (for a vibrant, colorful treat) or 5 cups of Rice Krispies (for the classic version).
-
Pour the melted butter and marshmallow mixture over the cereal in the pan.
-
Using a spatula or spoon, stir the butter/marshmallow mix with the Fruity Pebbles or Rice Krispies until the cereal is evenly coated. Ensure every piece is covered for optimal stickiness and flavor distribution.
-
Use a fork to press down the mixture in the pan, filling in any gaps and creating a compact, even layer. This helps the treats hold their shape and prevents them from being too crumbly.
-
Cool the treats in the refrigerator for approximately 5 minutes. This quick chill helps them set up faster and makes them easier to cut. You can also let them cool at room temperature, but it will take longer.
-
Once cooled, cut the treats into desired sizes. Squares or rectangles are traditional, but feel free to get creative with cookie cutters!
Expert Tips & Tricks
- Marshmallow Consistency: Don’t overcook the marshmallows! Overcooked marshmallows will lead to hard, brittle treats. As soon as they’re melted and smooth, remove them from the heat.
- Butter Browning: Brown butter adds a nutty depth. Cook the butter a little longer, watching carefully until it turns golden brown and smells nutty, before adding the marshmallows. Keep a close eye – burnt butter ruins the flavor.
- Sticky Situation: Spray your spatula or spoon with cooking spray before mixing. This will prevent the marshmallow mixture from sticking and make the process much easier.
- Cereal Crunch: For extra crunch, lightly toast the Rice Krispies cereal in a dry pan before adding the marshmallow mixture. Be sure to watch closely so they don’t burn.
- Flavor Infusion: Add a teaspoon of vanilla extract to the melted marshmallow mixture for a richer flavor. Other extracts, like almond or lemon (especially with Fruity Pebbles!), can also be used to create unique flavor profiles.
Serving & Storage Suggestions
Serve these treats at room temperature for the best texture. They’re perfect for parties, picnics, or a quick afternoon snack.
To store, wrap individual treats tightly in plastic wrap or store them in an airtight container at room temperature. They will stay fresh for up to 2-3 days. Storing them in the refrigerator can make them a bit harder, but they will last slightly longer. Freezing is not recommended, as it can significantly alter the texture.
Nutritional Information
Please note that these are estimated values and can vary based on specific ingredients and serving sizes.
| Nutrient | Amount per Serving | % Daily Value |
|---|---|---|
| Calories | 160 kcal | 8% |
| Total Fat | 9g | 14% |
| Saturated Fat | 6g | 28% |
| Cholesterol | 23mg | 8% |
| Sodium | 97mg | 4% |
| Total Carbohydrate | 21g | 7% |
| Dietary Fiber | 0g | 0% |
| Sugars | 15g | 30% |
| Protein | 1g | 2% |
Variations & Substitutions
- Gluten-Free: Use gluten-free Rice Krispies cereal to make gluten-free treats. Ensure all other ingredients are also gluten-free.
- Vegan: Substitute the butter with a vegan butter alternative and use vegan marshmallows. Check the labels carefully to ensure they are completely vegan.
- Chocolate: Add chocolate chips (milk, dark, or white) to the cereal before adding the marshmallow mixture.
- Peanut Butter: Stir in a few tablespoons of peanut butter to the melted marshmallow mixture for a peanut butter twist.
- Seasonal: Use holiday-themed sprinkles or candies to decorate the treats for special occasions. Consider using different colored marshmallows (like pastel colors for Easter).
- Cinnamon Toast Crunch: Replace the Rice Krispies or Fruity Pebbles with Cinnamon Toast Crunch cereal for a cinnamony treat.
FAQs (Frequently Asked Questions)
Q: My treats are too hard. What did I do wrong?
A: Overcooking the marshmallows or using too much cereal can lead to hard treats. Be sure to melt the marshmallows over low heat and use the correct ratio of cereal to marshmallow mixture.
Q: Can I use mini marshmallows instead of regular-sized ones?
A: Yes, you can use mini marshmallows. The melting time might be slightly shorter, so keep a close eye on them.
Q: How do I prevent the treats from sticking to the pan?
A: Grease the pan well with butter or cooking spray, or line it with parchment paper.
Q: Can I add food coloring to the marshmallow mixture?
A: Yes, you can add a few drops of food coloring to the melted marshmallow mixture to create colorful treats.
Q: How long do these treats last?
A: Stored properly in an airtight container at room temperature, they’ll stay fresh for about 2-3 days.
Final Thoughts
So, there you have it – a simple yet utterly satisfying recipe for Rice Krispy or Fruity Pebbles Treats. Whether you’re looking for a quick and easy dessert to make with the kids, a nostalgic trip down memory lane, or simply a sweet pick-me-up, these treats are guaranteed to bring a smile to your face. Don’t be afraid to get creative with the variations and make them your own! Now, go forth and create some marshmallowy magic! I’d love to hear about your experiences and any unique twists you try.