
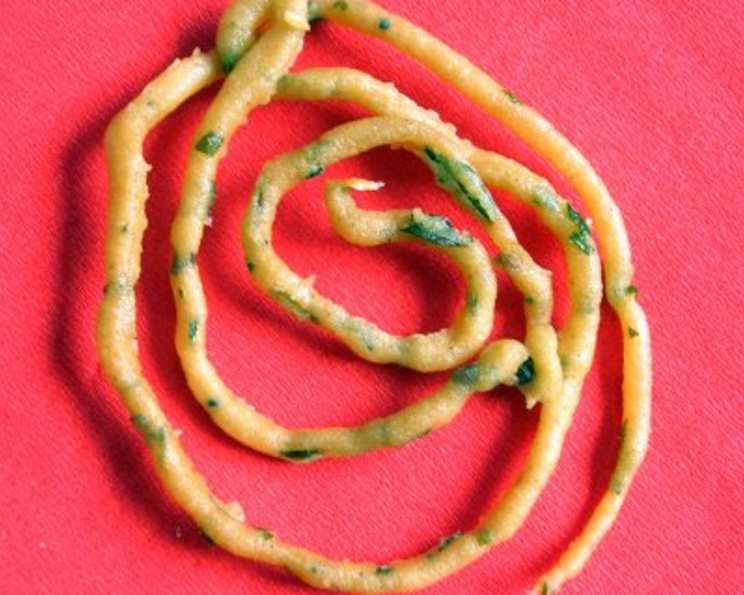
The Art of Rice Murukku: A Crispy South Indian Delight
The scent of freshly fried murukku always transports me back to my grandmother’s kitchen. During Diwali, the air would be thick with the aroma of spices and hot oil, and her nimble fingers would work magic, effortlessly shaping these crispy spirals. Each bite was a testament to her love and a celebration of tradition – a memory I cherish and strive to recreate with every batch I make.
Recipe Overview
- Prep Time: 2 hours 30 minutes
- Cook Time: 1 hour
- Total Time: 3 hours 30 minutes
- Yields: 40 murukkus
- Dietary Type: Vegetarian
Ingredients
- 2 cups boiled rice
- 4 cups water (for soaking)
- ¾ cup Urad Dal (split black lentils)
- Salt to taste
- ¾ cup Butter, softened
- Oil, for deep frying
Equipment Needed
- Large bowl
- Frying pan
- Grinder/Blender
- Clean muslin cloth
- Deep frying pan or wok
Instructions
- Begin by soaking the rice in the water for 2 hours. This step is crucial for softening the rice, making it easier to grind into a smooth paste.
- While the rice is soaking, dry fry the Urad Dal in a frying pan over medium heat. Stir constantly until the dal turns a light brownish color. Be careful not to burn it, as this will impart a bitter taste to the murukku.
- Once the Urad Dal has cooled slightly, grind it into a fine powder using a grinder or blender. Set aside.
- Drain the soaked rice and grind it to a fine paste. Add as little water as possible during grinding to achieve a thick consistency. The rice paste should be smooth and easily pliable.
- In a large bowl, combine the rice paste with 3 ½ teaspoons of the Urad Dal powder, salt to taste, and the softened butter.
- Knead the mixture thoroughly with your hands until it forms a smooth and cohesive dough. The dough should be soft and pliable, but not sticky. If it’s too dry, add a teaspoon of water at a time until you reach the desired consistency.
- Place the dough in a clean muslin cloth and cover it well to prevent it from drying out. This is essential to maintain the pliability of the dough as you shape the murukkus.
- Take a lemon-sized ball of dough from the muslin cloth.
- This step requires some practice. Place the ball of dough onto the muslin cloth and using your palm, gently press and roll it into a concentric circle by twisting the rice paste simultaneously in the cloth. Aim for about 2-3 concentric circles in a single murukku.
- Repeat steps 8 and 9 to make about 10-12 murukkus at a time before deep frying. This will allow you to work efficiently and prevent the dough from drying out.
- Heat oil in a deep frying pan or wok over medium-high heat. Ensure the oil is sufficiently hot before adding the murukkus. To test the oil, drop a tiny piece of dough into it; if it sizzles and rises to the surface immediately, the oil is ready.
- Gently slide about 5 murukkus into the hot oil at a time, ensuring not to overcrowd the pan.
- Deep fry the murukkus until they turn a golden brown color. Turn them occasionally to ensure even cooking.
- Remove the fried murukkus from the oil and place them on a paper towel-lined plate to drain excess oil.
- Allow the murukkus to cool completely before storing them in airtight containers. This will help maintain their crispness.
- Note that the size of a murukku can go up to 7 concentric circles about 20cm in diameter, but starting smaller is recommended until you get the hang of it.
Expert Tips & Tricks
- Dough Consistency: The most critical factor for perfect murukku is the dough consistency. If the dough is too dry, the murukku will crack while shaping. If it’s too wet, they will absorb too much oil during frying and become soggy.
- Frying Temperature: Maintain a consistent oil temperature throughout the frying process. If the oil is not hot enough, the murukku will absorb too much oil. If it’s too hot, they will brown too quickly on the outside while remaining uncooked inside.
- Shaping Technique: Practice makes perfect! Don’t be discouraged if your first few murukkus are not perfectly shaped. The key is to apply even pressure while rolling the dough on the muslin cloth.
- Butter Quality: Use good-quality unsalted butter for the best flavor and texture. The butter adds richness and helps create a tender, crispy murukku.
Serving & Storage Suggestions
Serve Rice Murukku as a delightful tea-time snack or as part of a festive spread. Their crispy texture and savory flavor pair perfectly with a hot cup of chai or coffee. Store cooled murukkus in airtight containers at room temperature. When properly stored, they can last for up to a month, retaining their crispness and flavor. Avoid storing them in the refrigerator, as the moisture can make them soggy.
Nutritional Information
| Nutrient | Amount per Serving | % Daily Value |
|---|---|---|
| Calories | 78.3 kcal | N/A |
| Calories from Fat | 31 kcal | N/A |
| Total Fat | 3.5 g | 5% |
| Saturated Fat | 2.2 g | 11% |
| Cholesterol | 9.2 mg | 3% |
| Sodium | 31.4 mg | 1% |
| Total Carbohydrate | 9.9 g | 3% |
| Dietary Fiber | 1.2 g | 4% |
| Sugars | 0.1 g | 0% |
| Protein | 1.6 g | 3% |
Note: Nutritional information is an estimate and may vary based on specific ingredients and preparation methods.
Variations & Substitutions
- Spicy Murukku: Add a pinch of red chili powder or finely chopped green chilies to the dough for a spicy kick.
- Sesame Seed Murukku: Incorporate 1-2 tablespoons of sesame seeds into the dough for added flavor and texture.
- Garlic Murukku: Add a teaspoon of garlic paste to the dough for a savory, aromatic twist.
- Herbed Murukku: Mix in finely chopped fresh herbs like cilantro or curry leaves for a refreshing flavor.
- Vegan Murukku: Substitute the butter with a vegan butter alternative or refined coconut oil.
FAQs (Frequently Asked Questions)
Q: Why are my murukkus breaking while shaping?
A: This is likely due to the dough being too dry. Try adding a teaspoon of water at a time until the dough becomes more pliable.
Q: How can I prevent the murukkus from absorbing too much oil?
A: Ensure the oil is sufficiently hot before frying the murukkus. Overcrowding the pan can also lower the oil temperature and cause the murukkus to absorb more oil.
Q: Can I use store-bought rice flour instead of grinding soaked rice?
A: While it’s possible, grinding soaked rice produces a superior texture. Store-bought rice flour may result in a slightly different texture.
Q: How do I know when the murukkus are cooked through?
A: The murukkus are cooked when they turn a golden brown color and feel crispy to the touch. They should also be firm and not soggy.
Q: Can I bake the murukkus instead of frying them?
A: Baking the murukkus will result in a different texture. They will be less crispy and more like a baked cracker. If baking, preheat the oven to 350°F (175°C) and bake for 15-20 minutes, or until golden brown.
Final Thoughts
Rice Murukku is more than just a snack; it’s a piece of culinary heritage passed down through generations. It’s a rewarding experience, and don’t be intimidated if your first attempt isn’t perfect. Embrace the process, experiment with flavors, and create memories with your loved ones as you share this delicious treat. I encourage you to try this recipe and share your experience! Pair your murukku with a steaming cup of masala chai for the ultimate South Indian indulgence.