
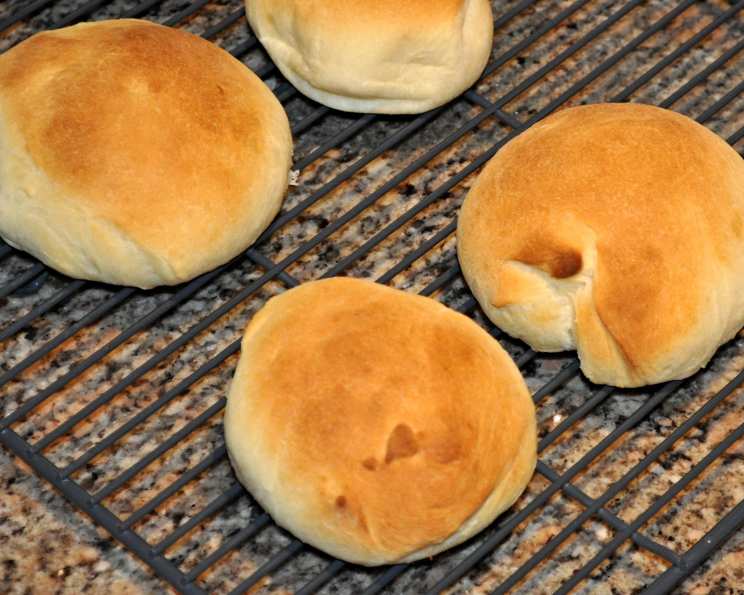
Rich Bread Machine Dinner Rolls
The aroma of freshly baked bread is a powerful memory trigger for me. I can vividly recall standing on a stool in my grandmother’s kitchen, watching her expertly knead dough for her famous dinner rolls. The warmth radiating from the oven, the gentle hum of conversation, and the anticipation of that first, buttery bite – it’s pure comfort. While I lack her kneading prowess, I’ve found the bread machine to be an excellent shortcut, and these rolls capture the same delicious flavor and soft texture that made hers so special.
Recipe Overview
- Prep Time: 15 minutes
- Cook Time: 12-15 minutes
- Total Time: 2 hours 15 minutes (including rise time)
- Servings: 12
- Yield: 12 rolls
- Dietary Type: Vegetarian
Ingredients
- 1 cup lukewarm milk (microwave for about 30 seconds)
- 1 egg
- ¼ cup shortening
- 3 ½ cups flour (bread flour is best)
- ¼ cup sugar
- 1 teaspoon salt
- 2 ¼ teaspoons yeast
Equipment Needed
- Bread Machine
- Measuring cups and spoons
- Lightly floured surface
- Greased cookie sheet or jelly roll pan
- Clean kitchen towel
Instructions
- Add all ingredients to the bread machine pan in the order specified by your bread machine manufacturer. This is crucial for proper gluten development and yeast activation. Typically, liquids go in first, followed by dry ingredients, with the yeast added last.
- Select the dough cycle on your bread machine and let it run until finished. This cycle will handle the kneading and the first rise of the dough.
- If your bread machine lacks a dedicated dough cycle, allow the machine to run through the initial kneading and first rise. After the first rise is complete, remove the dough from the machine.
- Turn the dough out onto a lightly floured surface. This prevents sticking and makes it easier to handle.
- Gently roll the dough into a thick log using your hands. Aim for a uniform thickness to ensure even baking.
- With a sharp knife or dough scraper, cut the log into 12 equal pieces. Visual estimation works, but for perfectly uniform rolls, you can use a kitchen scale.
- Shape each piece of dough as desired. You can create round rolls by tucking the edges underneath, or form crescent shapes by rolling the dough into small ovals and gently curving them.
- Place the shaped rolls onto a greased cookie sheet or jelly roll pan, leaving some space between each roll to allow for expansion during the second rise.
- Cover the rolls with a clean kitchen towel and let them rise in a warm area for 30 to 45 minutes, or until they have approximately doubled in size. The warmth encourages the yeast to continue working, resulting in light and airy rolls.
- Preheat your oven to 400 degrees Fahrenheit (200 degrees Celsius). It’s essential to preheat the oven thoroughly to ensure even baking and proper browning.
- Bake the rolls at 400 degrees Fahrenheit for 12 to 15 minutes, or until they are golden brown on top. Keep a close eye on them during the last few minutes of baking to prevent burning. The internal temperature of the rolls should reach around 200-210°F (93-99°C).
Expert Tips & Tricks
- Bread flour is highly recommended for these rolls. It has a higher protein content than all-purpose flour, which results in a chewier and more structured crumb.
- The milk temperature is critical. If the milk is too hot, it can kill the yeast. If it’s too cold, the yeast won’t activate properly. Aim for a lukewarm temperature, about 105-115°F (40-46°C).
- For a richer flavor and a slightly softer crust, brush the tops of the rolls with melted butter immediately after baking.
- Want perfectly even rolls? Weigh each piece of dough after you’ve divided it. This ensures they are all the same size and will bake at the same rate.
- If your kitchen is cold, you can create a warm environment for rising by turning your oven on to 150 degrees Fahrenheit for one minute, then turning it off. Place the covered rolls inside the warm oven to rise.
- If your rolls are browning too quickly, tent the baking sheet with foil for the last few minutes of baking.
Serving & Storage Suggestions
These dinner rolls are best served warm, ideally straight from the oven. Offer them with butter, jam, or alongside a hearty soup or stew. Leftover rolls can be stored in an airtight container at room temperature for up to 2 days. For longer storage, freeze the rolls in a freezer-safe bag for up to 2 months. To reheat, thaw completely and warm in a 350°F (175°C) oven for 5-10 minutes, or until heated through. You can also microwave them for a few seconds, but be careful not to overdo it, as they can become tough.
Nutritional Information
| Nutrient | Amount per Serving | % Daily Value |
|---|---|---|
| Calories | 208 kcal | N/A |
| Calories from Fat | 52 kcal | N/A |
| Total Fat | 5.8 g | 8% |
| Saturated Fat | 1.7 g | 8% |
| Cholesterol | 18.4 mg | 6% |
| Sodium | 210.8 mg | 8% |
| Total Carbohydrate | 33.3 g | 11% |
| Dietary Fiber | 1.2 g | 4% |
| Sugars | 4.3 g | N/A |
| Protein | 5.3 g | 10% |
Note: Nutritional information is an estimate and may vary based on specific ingredients and preparation methods.
Variations & Substitutions
- Sweet Rolls: Transform this dough into delicious sweet rolls by adding an extra ¼ cup of sugar and incorporating spices like cinnamon or cardamom. After shaping, fill with a mixture of softened butter, brown sugar, and cinnamon, then bake as directed.
- Herb Rolls: Mix in 1-2 tablespoons of chopped fresh herbs, such as rosemary, thyme, or oregano, into the dough before shaping. These rolls pair beautifully with savory dishes.
- Garlic Rolls: Add 1-2 teaspoons of garlic powder to the dough, or brush the baked rolls with garlic butter.
- Dairy-Free: Substitute the milk with a non-dairy alternative like almond, soy, or oat milk. Ensure it is also lukewarm. Use a dairy-free shortening option.
- Whole Wheat Rolls: Replace up to half of the bread flour with whole wheat flour for a nuttier flavor and added fiber. You may need to add a little more liquid if the dough seems dry.
FAQs (Frequently Asked Questions):
Q: Can I use all-purpose flour instead of bread flour?
A: While bread flour is recommended for a chewier texture, all-purpose flour can be used in a pinch. The rolls might be slightly less chewy and have a slightly different crumb.
Q: My dough didn’t rise properly. What could be the problem?
A: Several factors can affect the rise. Ensure your yeast is fresh and active, the milk is lukewarm, and the environment is warm. Cold temperatures inhibit yeast activity.
Q: Can I make the dough ahead of time and refrigerate it?
A: Yes, you can. After the dough cycle is complete, punch down the dough, wrap it tightly in plastic wrap, and refrigerate it for up to 24 hours. Let it come to room temperature before shaping and baking.
Q: My rolls are browning too quickly on top. What should I do?
A: Tent the baking sheet loosely with aluminum foil for the last few minutes of baking to prevent the tops from burning.
Q: Can I freeze the baked rolls?
A: Yes, baked rolls freeze well. Let them cool completely, then wrap them individually or in small batches in freezer-safe bags. Thaw completely before reheating.
Final Thoughts
There’s something truly special about sharing homemade bread with loved ones. These rich dinner rolls, made effortlessly with a bread machine, are a testament to the fact that comfort food doesn’t have to be complicated. I urge you to give this recipe a try, and don’t hesitate to experiment with different shapes, flavors, and variations. Let the aroma of freshly baked bread fill your home and create memories that will last a lifetime. Perhaps pair them with a creamy tomato soup or a roasted chicken – the possibilities are endless! I’d love to hear about your baking adventures, so feel free to share your feedback and any creative twists you’ve added. Happy baking!