
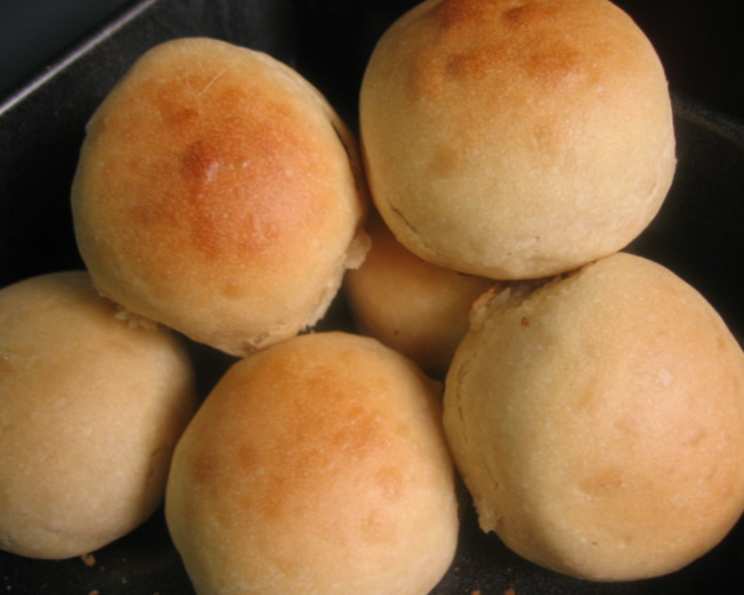
Rich Milk Rolls: A Taste of Home
The scent of baking bread has always transported me back to my grandmother’s kitchen. I remember being a small child, perched on a stool, mesmerized as she kneaded dough with her strong, flour-dusted hands. Her milk rolls were legendary – impossibly soft, with a subtle sweetness that made them irresistible. These rolls, warm from the oven and slathered with butter, were more than just food; they were love made edible.
Recipe Overview
- Prep Time: 1 hour
- Cook Time: 13-16 minutes
- Total Time: 2 hours 10 minutes (including proofing)
- Yields: 8-9 rolls
- Serves: 2-3
- Dietary Type: Not Vegetarian (Contains dairy)
Ingredients
- 200 g bread flour
- 20 g sugar
- 3 g salt
- 20 g unsalted butter
- 130 g milk
- 20 g warm water (for dissolving yeast)
- 3 g dry yeast
Equipment Needed
- Food processor (with dough blade)
- Large bowl
- Baking sheet
- Clean kitchen towel or plastic wrap
Instructions
- Begin by dissolving the dry yeast in the warm water. Ensure the water is warm, not hot, to avoid killing the yeast. Let it sit for about 5 minutes until it starts to foam. This indicates that the yeast is active.
- In the bowl of a food processor fitted with the dough blade, combine the bread flour, sugar, and salt. Pulse a few times to evenly distribute the ingredients.
- Add the yeast solution to the dry ingredients, ensuring it’s covered with the flour. This helps to activate the yeast within the dough.
- Start the food processor and run for approximately 90 seconds. Within the first 30 seconds, gradually add the milk at a consistent speed. This slow addition allows the dough to properly hydrate.
- Stop the machine and add the softened butter to the bowl. Mix well by hand, incorporating the butter into the dough. The dough will be sticky at this stage.
- Start the food processor again and run for another 40 seconds to fully incorporate the butter. The dough should start to come together into a smoother ball.
- Remove the dough from the food processor and shape it into a large ball. Place the dough in a lightly oiled bowl.
- Cover the bowl with a clean kitchen towel or plastic wrap and let it rise in a warm place (ideally around 28°C or 82°F) until it has doubled in size, approximately 40 to 50 minutes. This first rise is crucial for developing the dough’s flavor and texture.
- Once the dough has doubled, gently punch it down to release the air.
- Divide the dough into 8 equal pieces (or 9 if you prefer smaller rolls).
- Roll each piece into a smooth ball.
- Cover the dough balls with a cloth or plastic wrap and let them rest for 20 minutes. This allows the gluten to relax, making them easier to shape.
- After resting, reshape each ball to ensure they are round and smooth. Place the dough balls on a baking sheet lined with parchment paper, leaving some space between each roll.
- Let the rolls rise for another 20 to 25 minutes at 38°C (100°F) or until they have doubled in size. It’s crucial to maintain moisture during this second rise. You can achieve this by spraying water lightly into the area where the dough is rising, or by placing a pan of hot water in the oven alongside the rolls (if using the oven to proof).
- Preheat your oven to 190°C (375°F).
- Just before baking, brush the tops of the rolls with milk. This will give them a beautiful golden-brown color.
- Bake the rolls for 13-16 minutes, or until they are golden brown and sound hollow when tapped on the bottom. Keep a close eye on them during the last few minutes to prevent burning.
Expert Tips & Tricks
- Temperature Matters: The temperature of your milk and water is crucial for yeast activity. Too hot, and you’ll kill the yeast. Too cold, and it won’t activate properly. Aim for lukewarm.
- Dough Consistency: The dough should be slightly sticky. If it’s too dry, add a tablespoon of milk at a time until you reach the desired consistency. If it’s too wet, add a tablespoon of flour.
- Proofing Environment: A warm, humid environment is ideal for proofing. If your kitchen is cold, you can proof the dough in a slightly warmed oven (turned off!) with a bowl of hot water.
- Don’t Overbake: Overbaked rolls will be dry and tough. Start checking for doneness around 13 minutes. The internal temperature should be around 90°C (195°F).
- Shiny Crust: For an extra shiny crust, brush the rolls with an egg wash (1 egg beaten with 1 tablespoon of water) instead of milk.
Serving & Storage Suggestions
These rich milk rolls are best enjoyed warm, straight from the oven. Serve them with butter, jam, or alongside soups and stews. They also make fantastic sandwich rolls.
To store leftover rolls, let them cool completely and then store them in an airtight container at room temperature for up to 2 days, in the refrigerator for up to 5 days, or in the freezer for up to 2 months. To reheat, wrap them in foil and warm them in a preheated oven at 175°C (350°F) for about 5-10 minutes, or until heated through. You can also microwave them for a few seconds, but be careful not to overdo it, as they can become tough.
Nutritional Information
| Nutrient | Amount per Serving | % Daily Value* |
|---|---|---|
| Calories | 611.4 kcal | N/A |
| Calories from Fat | 106 g | N/A |
| Total Fat | 11.8 g | 18% |
| Saturated Fat | 6.8 g | 34% |
| Cholesterol | 30.6 mg | 10% |
| Sodium | 617.8 mg | 25% |
| Total Carbohydrate | 109 g | 36% |
| Dietary Fiber | 3.7 g | 14% |
| Sugars | 10.3 g | N/A |
| Protein | 15.7 g | 31% |
* Percent Daily Values are based on a 2,000 calorie diet.
Variations & Substitutions
- Sweet Rolls: Add a teaspoon of vanilla extract to the dough for a sweeter flavor. You can also brush the baked rolls with melted butter and sprinkle with powdered sugar.
- Savory Rolls: Add herbs like rosemary or thyme to the dough for a savory twist. You can also sprinkle the tops of the rolls with sesame seeds or poppy seeds before baking.
- Dairy-Free: Substitute the milk with a plant-based milk alternative like almond milk or soy milk. Ensure that the butter is also replaced with a vegan butter substitute. Be aware that this may affect the overall taste and texture.
- Whole Wheat: Replace up to half of the bread flour with whole wheat flour for a nuttier flavor and added fiber. You may need to add a bit more liquid as whole wheat flour absorbs more moisture.
FAQs (Frequently Asked Questions)
Q: Can I knead the dough by hand instead of using a food processor?
A: Absolutely! Kneading by hand will take about 10-15 minutes. The dough is ready when it becomes smooth and elastic.
Q: Can I use active dry yeast instead of instant dry yeast?
A: Yes, but you’ll need to proof the active dry yeast in warm water for about 10 minutes before adding it to the dough.
Q: What if my dough doesn’t rise?
A: Make sure your yeast is fresh and active. Also, ensure that the dough is in a warm place. If it still doesn’t rise, try adding a pinch of sugar to the dough to give the yeast a boost.
Q: Can I make the dough ahead of time and bake the rolls later?
A: Yes, you can let the dough rise in the refrigerator overnight. In the morning, shape the rolls and let them rise again before baking.
Q: My rolls are browning too quickly. What should I do?
A: Tent the rolls with foil to prevent them from browning too much. This will allow them to continue baking without burning.
Final Thoughts
Baking these rich milk rolls is a simple act, but the result is a profound connection to home, comfort, and the simple pleasures of life. I encourage you to try this recipe, fill your kitchen with that irresistible aroma, and share these warm, pillowy rolls with the people you love. Don’t hesitate to experiment with variations, adding your own personal touch. And most importantly, savor every delicious bite. These rolls are more than just bread; they’re a taste of happiness.