
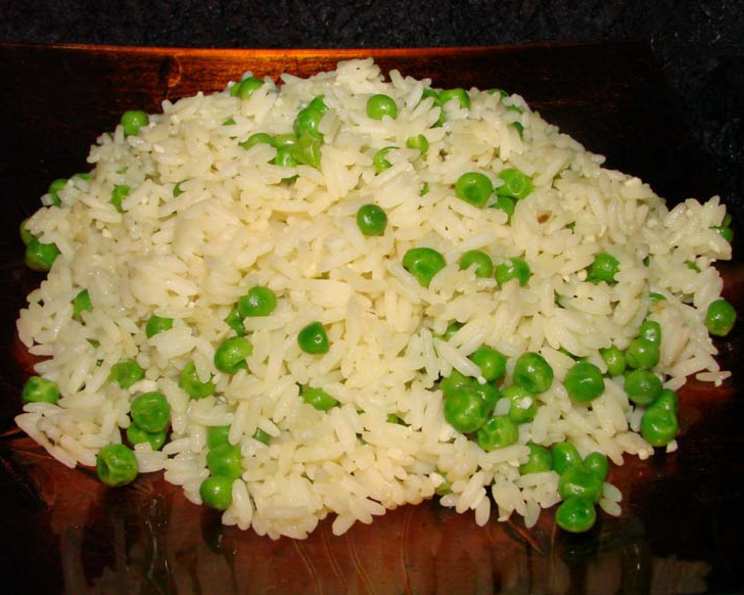
Risi e Bisi: A Venetian Springtime Classic
The first time I tasted risi e bisi, I was a student backpacking through Venice. I stumbled upon a tiny trattoria tucked away from the tourist crowds, drawn in by the aroma of something fresh and green mingling with savory broth. The owner, a nonna with a warm smile, insisted I try her “grandmother’s recipe.” That first spoonful was pure magic: creamy rice, sweet spring peas, and a hint of Parmesan (which I later learned is not strictly traditional but nonetheless delicious). It was more than just a meal; it was a taste of Venice, a bite of springtime, and a memory I’ve savored ever since. I’ve tweaked and played with the recipe over the years, but always return to the simple, elegant flavors that first captured my heart.
Recipe Overview
- Prep Time: 5 minutes
- Cook Time: 25 minutes
- Total Time: 30 minutes
- Servings: 6
- Yield: About 5 cups
- Dietary Type: Vegetarian (can be made vegan)
Ingredients
- 1 tablespoon olive oil
- 1 tablespoon butter (or vegan butter substitute)
- 3 garlic cloves, minced
- ½ teaspoon salt
- 1 ½ cups long-grain white rice
- 2 ¼ cups reduced-sodium chicken broth (or vegetable broth)
- 1 ½ cups fresh peas or 1 ½ cups thawed frozen peas
- ¼ cup chopped flat leaf parsley
- Fresh ground black pepper, to taste
Equipment Needed
- 10-inch frying pan or skillet
- Measuring cups and spoons
- Cutting board
- Knife
- Fork
Instructions
- Begin by heating the olive oil and butter (or vegan butter) in a 10-inch frying pan or skillet over medium-high heat. Allow the butter to melt completely.
- Add the minced garlic and salt. Cook, stirring constantly, until the garlic is fragrant, about 1 minute. Be careful not to burn the garlic, as this will impart a bitter flavor to the dish.
- Add the rice and cook, stirring frequently, until the grains become opaque, about 2-3 minutes. This toasting process enhances the flavor of the rice and helps prevent it from becoming mushy.
- Pour in the broth, stir to combine all the ingredients, and increase the heat to high. Bring the mixture to a boil.
- Once boiling, immediately reduce the heat to low, cover the pan tightly, and simmer undisturbed until the rice has absorbed most of the liquid. This should take approximately 15 minutes. Resist the urge to lift the lid during this time, as it will release steam and prolong the cooking process.
- After 15 minutes, remove the cover to check the rice. If some liquid remains, continue to simmer, uncovered, for a few more minutes until the liquid is absorbed.
- Remove the pan from the heat. Quickly add the peas on top of the rice – do not stir them in at this point. Return the cover to the pan and let the dish sit, off the heat, for 5 minutes. This gentle steaming will cook the peas to perfect tenderness.
- Finally, remove the cover, add the chopped parsley, and gently fluff the risi e bisi with a fork. Season with fresh ground black pepper to taste. Serve immediately.
Expert Tips & Tricks
- Broth is Key: The quality of your broth significantly impacts the final flavor. Homemade broth is always best, but a good quality store-bought reduced-sodium broth works well. If using vegetable broth, consider adding a pinch of nutritional yeast for a more savory, umami flavor.
- Rice Choice: While long-grain white rice is called for in this recipe, you can experiment with other varieties like Arborio for a creamier, risotto-like texture, just be aware that it will require more liquid and a longer cooking time.
- Pea Perfection: Fresh spring peas are ideal, but frozen peas are a perfectly acceptable substitute. Thaw frozen peas before adding them to the rice to prevent them from cooling the dish down too much. For the brightest green color and freshest flavor, consider blanching fresh or frozen peas for just a minute or two in boiling water, then shocking them in ice water before adding them to the dish.
- Don’t Overcook: The goal is for the rice to be tender but still have a slight bite (al dente). Overcooked rice will be mushy and unappetizing.
- Vegan Variation: This dish is easily made vegan by substituting butter with a high-quality vegan butter and using vegetable broth instead of chicken broth.
- Make Ahead Tip: You can prep the garlic and parsley ahead of time, storing them separately in the refrigerator. You can also cook the rice up to the point of adding the peas. Then, when ready to serve, simply reheat the rice with a splash of broth and add the peas as instructed.
Serving & Storage Suggestions
Serve risi e bisi hot, as a side dish or a light vegetarian main course. It pairs beautifully with grilled fish, chicken, or vegetables. A sprinkle of freshly grated Parmesan cheese (if not vegan) adds a lovely richness and salty note.
Leftovers can be stored in an airtight container in the refrigerator for up to 3 days. To reheat, gently warm in a saucepan over low heat, adding a splash of broth or water if needed to prevent sticking. Freezing is not recommended, as the texture of the rice may become mushy upon thawing.
Nutritional Information
Please note that these values are approximate and may vary based on specific ingredients and preparation methods.
| Nutrient | Amount per Serving | % Daily Value |
|---|---|---|
| Calories | 253 kcal | 13% |
| Total Fat | 5 g | 6% |
| Saturated Fat | 2 g | 10% |
| Cholesterol | 5 mg | 2% |
| Sodium | 240 mg | 10% |
| Total Carbohydrate | 44 g | 16% |
| Dietary Fiber | 3 g | 10% |
| Sugars | 2 g | N/A |
| Protein | 7 g | 14% |
Variations & Substitutions
- Creamier Risi e Bisi: For a richer, creamier texture, stir in a tablespoon of mascarpone cheese or heavy cream (or vegan alternatives) at the end of cooking.
- Spring Vegetable Medley: Add other seasonal vegetables like asparagus tips, fava beans, or zucchini along with the peas for a more complex flavor profile.
- Herbed Risi e Bisi: Experiment with different herbs like mint, basil, or chives in addition to or instead of parsley.
- Lemon Risi e Bisi: A squeeze of fresh lemon juice at the end of cooking adds a bright, zesty note.
- Spicy Risi e Bisi: Add a pinch of red pepper flakes or a dash of hot sauce for a little heat.
FAQs (Frequently Asked Questions)
Q: Can I use leftover rice for this recipe?
A: Yes, you can. Add the cooked rice to the pan with the garlic and salt, omitting the broth. Then, add the peas and stir until everything is heated through.
Q: Can I use brown rice instead of white rice?
A: Yes, but brown rice will require more cooking time and more broth. You may need to add an extra cup of broth and simmer for 40-45 minutes, or until the rice is tender.
Q: How do I prevent the rice from sticking to the bottom of the pan?
A: Use a heavy-bottomed pan and make sure to keep the heat low while simmering. Stirring occasionally can also help prevent sticking.
Q: Can I add Parmesan cheese to this dish?
A: While not strictly traditional, a sprinkle of freshly grated Parmesan cheese adds a lovely richness and salty flavor. If you are vegan, you can use a vegan Parmesan alternative.
Q: How do I know when the rice is cooked properly?
A: The rice should be tender and have absorbed most of the liquid. It should still have a slight bite (al dente). If the rice is still hard and there is no liquid left, add a little more broth and continue to simmer until tender.
Final Thoughts
I hope this recipe inspires you to create your own version of risi e bisi and experience the simple joy of Venetian cuisine. This dish is more than just a recipe; it’s a celebration of fresh, seasonal ingredients and a taste of the Italian springtime. Don’t be afraid to experiment with different variations and make it your own. I’d love to hear about your culinary creations – please share your feedback and any personal touches you add to this classic dish! Pair it with a crisp glass of Pinot Grigio for a truly authentic Venetian experience.