
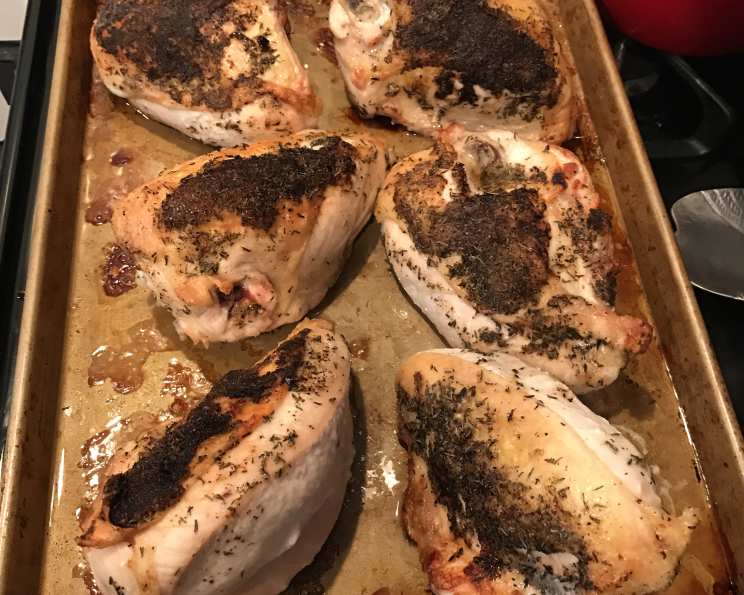
The Perfect Roast Chicken Breast: Crispy Skin, Juicy Meat
There’s something so comforting about a simple roast chicken. I remember my grandmother, every Sunday, would fill the house with the most incredible aroma of herbs and roasting chicken. While she usually roasted a whole bird, sometimes she would just do chicken breasts, and I loved those days! The skin, crackling and golden, always disappeared first, and the meat was so tender it practically melted in your mouth. Now, I recreate that comforting experience with this incredibly simple roast chicken breast recipe. Forget dry, flavorless chicken – this method guarantees juicy perfection every time.
Recipe Overview
- Prep Time: 5 minutes
- Cook Time: 18 minutes
- Total Time: 23 minutes
- Servings: 1
- Yields: 1 breast
- Dietary Type: High Protein
Ingredients
- 1 chicken breast half (bone-in, skin-on)
- ½ teaspoon garlic salt
- ½ teaspoon pepper
- ½ teaspoon thyme
- 1 teaspoon butter (optional, or use a butter substitute)
- ½ tablespoon olive oil
Equipment Needed
- Dry skillet or frying pan
- Baking sheet
- Meat thermometer (optional, but recommended)
Instructions
-
Preheat your oven to 450 degrees Fahrenheit (232 degrees Celsius). High heat is key to achieving crispy skin.
-
Heat a dry skillet or frying pan on the stovetop over medium-high heat. It’s crucial that the pan is dry – we want to render the fat from the chicken skin, not steam it.
-
Gently loosen the skin from the meat of the chicken breast to create a small pocket. Be careful not to tear the skin completely.
-
Slip the butter (or butter substitute) under the skin. This will add moisture and flavor directly to the meat as it cooks.
-
Rub the entire chicken breast with olive oil. This helps the seasonings adhere and promotes even browning.
-
Season generously with garlic salt, pepper, and thyme. Don’t be shy with the seasonings – they’re what give the chicken its delicious flavor.
-
When the pan is hot, carefully place the chicken breast skin-side down in the dry skillet. Resist the urge to move or touch it! Allow the skin to sear undisturbed for approximately three minutes, or until it develops a beautiful golden-brown crust. The goal is to get a deep, rich color on the skin.
-
Transfer the chicken breast from the skillet to a baking sheet.
-
Place the baking sheet with the chicken breast into the preheated oven and bake for 15 minutes.
-
After 15 minutes, check the internal temperature of the chicken with a meat thermometer. Insert the thermometer into the thickest part of the breast, avoiding the bone. The chicken is done when it reaches 160 degrees Fahrenheit (71 degrees Celsius). If you don’t have a meat thermometer, you can check for doneness by piercing the chicken with a fork. If the juices run clear, it’s likely done. Alternatively, insert a fork and leave it in the chicken for 30 seconds, then touch the fork to your hand. If the fork is hot, the chicken is most likely done.
-
Once the chicken breast reaches the desired temperature or shows signs of doneness, remove it from the oven and let it rest for 5-10 minutes. This is crucial for allowing the juices to redistribute throughout the meat, resulting in a more tender and flavorful breast.
-
(Optional) While the chicken rests, deglaze the pan you used on the stovetop to create a delicious pan sauce. Pour in a splash of wine (red or white works well) until the bottom of the pan is covered. Cook over medium heat, scraping up any browned bits from the bottom of the pan, until the wine has reduced to a syrupy consistency and you can drag a spoon through it, briefly seeing the bottom of the pan. Season the sauce with salt and pepper to taste.
Expert Tips & Tricks
- Don’t overcrowd the pan: If you’re cooking multiple chicken breasts, make sure they aren’t crammed together in the skillet. Overcrowding will lower the pan temperature and prevent the skin from browning properly. Work in batches if necessary.
- Pat the chicken dry: Before seasoning, pat the chicken breast dry with paper towels. This will help the skin crisp up in the oven.
- Adjust cooking time: Oven temperatures can vary, so it’s always best to check the internal temperature of the chicken to ensure it’s cooked through.
- Rest is key: Don’t skip the resting period! It allows the juices to redistribute and prevents the chicken from drying out.
- Elevate the chicken: For even crispier skin, consider placing the chicken breast on a wire rack set inside the baking sheet. This allows air to circulate underneath the chicken, promoting even browning.
Serving & Storage Suggestions
Serve the roasted chicken breast immediately for the best flavor and texture. Drizzle with the pan sauce (if you made it) and garnish with fresh herbs, such as parsley or thyme. It pairs beautifully with roasted vegetables, mashed potatoes, rice, or a simple salad.
Leftover roasted chicken breast can be stored in an airtight container in the refrigerator for up to 3-4 days. To reheat, you can microwave it (though this may dry it out slightly), bake it in a low oven (around 325 degrees Fahrenheit) until heated through, or shred it and use it in salads, sandwiches, or soups. For best results, add a little broth or sauce when reheating to help retain moisture. Leftovers can be frozen for up to 2-3 months. Thaw completely before reheating.
Nutritional Information
Note: Nutritional information is an estimate and may vary based on specific ingredients and portion sizes.
| Nutrient | Amount per Serving | % Daily Value |
|---|---|---|
| Calories | 600 kcal | N/A |
| Total Fat | 37 g | 57% |
| Saturated Fat | 11 g | 55% |
| Cholesterol | 196 mg | 65% |
| Sodium | 218 mg | 9% |
| Total Carbohydrate | 2 g | 0% |
| Dietary Fiber | 1 g | 1% |
| Sugars | 0 g | 0% |
| Protein | 61 g | 121% |
Variations & Substitutions
- Herb variations: Experiment with different herbs and spices to customize the flavor. Rosemary, oregano, paprika, or a blend of Italian herbs would all be delicious.
- Lemon-herb: Add a squeeze of lemon juice and some lemon zest to the chicken before roasting for a bright, citrusy flavor.
- Spicy: Add a pinch of red pepper flakes or a dash of hot sauce to the seasoning for a little heat.
- Butter alternatives: If you’re dairy-free, you can substitute the butter with olive oil or another plant-based butter substitute.
- Wine Substitution: If you do not want to use wine for the sauce, chicken broth will also work as a substitute.
FAQs (Frequently Asked Questions)
Q: Why do I need to heat the pan before putting the chicken in?
A: Heating the pan ensures that the chicken skin immediately begins to sear and crisp up, rather than steaming.
Q: Can I use boneless, skinless chicken breasts for this recipe?
A: While you can, the result will be quite different. The bone and skin contribute significantly to the flavor and moisture of the chicken. If you use boneless, skinless breasts, reduce the cooking time to prevent them from drying out.
Q: How do I prevent the skin from burning?
A: If the skin starts to brown too quickly in the oven, you can tent the chicken breast loosely with aluminum foil.
Q: Can I use different cuts of chicken for this recipe?
A: Yes, you can adapt this recipe for other bone-in, skin-on chicken pieces like thighs or drumsticks. Adjust the cooking time accordingly.
Q: What should I do if my chicken is still pink inside after the recommended cooking time?
A: Return it to the oven and continue cooking until it reaches an internal temperature of 160 degrees Fahrenheit (71 degrees Celsius). Use a meat thermometer for accuracy.
Final Thoughts
This roast chicken breast recipe is more than just a simple dish; it’s an invitation to create a comforting and flavorful meal with minimal effort. It’s a fantastic way to prepare a quick weeknight dinner or even a special weekend lunch. So, go ahead, preheat your oven, and let the enticing aroma of roasted chicken fill your kitchen. I encourage you to try it, experiment with different seasonings, and make it your own. And please, let me know how it turns out! I’d love to hear about your culinary adventures.