
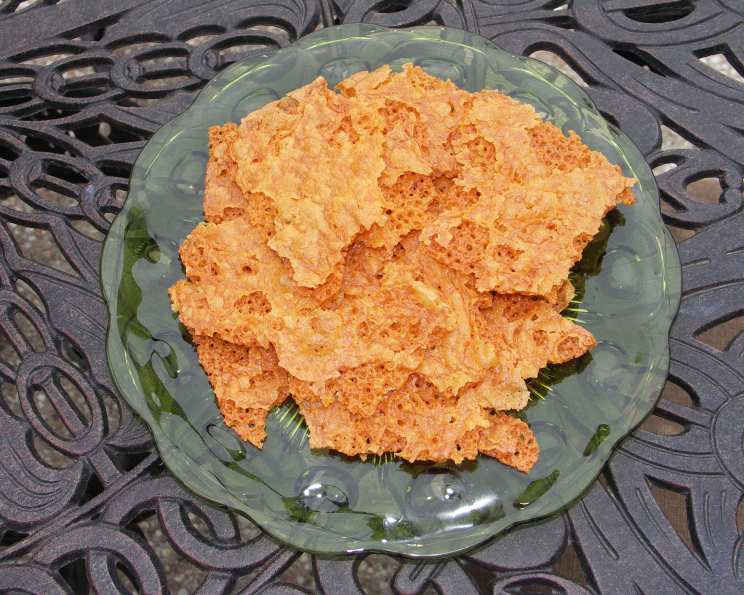
Golden Roasted Cheese Crisps: A Culinary Revelation
My grandmother, bless her heart, wasn’t much of a rule-follower in the kitchen. Her baking was always a delightful experiment, a pinch of this, a dash of that, and the results were… unpredictable. But her cheese crisps? Those were pure magic. I remember the distinct aroma wafting from her ancient oven, the anticipation building as I peeked through the glass door, watching those humble shreds of cheese transform into golden, bubbly masterpieces. They were a simple pleasure, a testament to the transformative power of heat and cheese, and a memory I cherish with every crispy bite.
Recipe Overview
- Prep Time: 10 minutes
- Cook Time: 15 minutes
- Total Time: 25 minutes
- Servings: Variable, depending on size
- Yield: About 2 batches
- Dietary Type: Gluten-Free (naturally), Keto-Friendly
Ingredients
- 12 ounces aged Monterey Jack cheese, chilled (or Manchego cheese, chilled) in one piece
- 2 tablespoons flour
- 1/3 teaspoon ground red pepper (or other spices as desired)
Equipment Needed
- Box grater
- Medium bowl
- Fork
- 16 1/2-by-11 1/2-inch sheet pan
- Silicone baking mat or parchment paper
- Paper towels
Instructions
-
Preheat your oven to 375°F (190°C). Ensuring your oven is properly preheated is crucial for even cooking and the right level of crispness.
-
Using a box grater with holes about 1/4-inch wide, shred the block of cheese lengthwise. Longer shreds tend to hold their shape better during baking, resulting in a more appealing crisp. Chilling the cheese beforehand makes it easier to grate.
-
Place the shredded cheese in a medium bowl.
-
Sprinkle the flour over the shredded cheese. This helps bind the cheese together slightly and contributes to the overall crispness.
-
Using a fork, gently toss the cheese with the flour until it’s evenly coated. Avoid overmixing.
-
Sprinkle with the ground red pepper (or other spices of your choosing). Toss again gently to distribute the spice evenly. Feel free to experiment here! A pinch of smoked paprika, garlic powder, or even a little dried oregano can add a wonderful depth of flavor.
-
Place a silicone baking mat or a sheet of parchment paper on your baking sheet. These prevent sticking and make cleanup a breeze.
-
Scatter half of the cheese mixture evenly over the prepared baking mat or parchment paper.
-
Gently shake the pan to even out the cheese distribution, creating a relatively thin and even layer. Alternatively, you can arrange the cheese mixture into individual circles of varying sizes (from 3 to 10 inches in diameter) depending on your preference. For hors d’oeuvres, smaller circles are ideal; for snacking, larger crisps might be more satisfying.
-
Bake until the cheese is molten and beautifully golden brown, about 14-15 minutes. Keep a close eye on them, as the baking time can vary slightly depending on your oven. The edges should be deeply golden, and the cheese should be bubbly.
-
Remove the baking sheet from the oven and let the cheese crisp cool completely on the pan. This allows the crisps to firm up and become even more brittle.
-
Once cooled, blot up any excess grease with paper towels.
-
Break the cheese crisp into large pieces and arrange them on a platter for serving. The irregular shapes add to the rustic charm of these delicious snacks.
-
Wipe off the baking mat or replace the parchment paper, and repeat the process with the remaining cheese mixture.
Expert Tips & Tricks
- Cheese Choice: While this recipe calls for aged Monterey Jack or Manchego, other hard cheeses like Parmesan, Asiago, or Pecorino Romano work beautifully. Avoid softer cheeses as they will simply melt into a flat sheet.
- Spice it Up: Don’t be afraid to get creative with your seasonings! Sweet or hot chile powder, cumin, fennel seeds, coriander seeds, rosemary, thyme, or even a sprinkle of everything bagel seasoning can elevate these crisps to another level. Lightly crushing seeds before adding them releases their aromatic oils.
- Even Baking: To ensure even baking, rotate the baking sheet halfway through the cooking time.
- Crispness Factor: If you find your cheese crisps aren’t as crispy as you’d like, you can place them back in the oven for a few minutes after cooling to further dry them out. Watch them closely to prevent burning.
- Make-Ahead Magic: You can prepare the cheese mixture ahead of time and store it in the refrigerator for up to 24 hours before baking. This is a great time-saver when entertaining.
Serving & Storage Suggestions
Serve these golden roasted cheese crisps immediately for the best texture and flavor. They make a wonderful addition to a cheese board, a delightful snack with cocktails, or a crunchy topping for salads and soups.
To store leftovers, place them in an airtight container at room temperature. They will stay crisp for a day or two, but they are best enjoyed fresh. Avoid storing them in the refrigerator, as the moisture can soften them. If they do lose their crispness, you can revive them by placing them in a preheated oven at 300°F (150°C) for a few minutes.
Nutritional Information
(Estimated per serving, assuming 8 servings and using Monterey Jack cheese):
| Nutrient | Amount per Serving | % Daily Value |
|---|---|---|
| Calories | 179 kcal | N/A |
| Total Fat | 14 g | 21% |
| Saturated Fat | 9 g | 44% |
| Cholesterol | 45 mg | 15% |
| Sodium | 264 mg | 11% |
| Total Carbohydrate | 2 g | 1% |
| Dietary Fiber | 0 g | 0% |
| Sugars | 0 g | 0% |
| Protein | 11 g | 22% |
Variations & Substitutions
- Vegan Cheese Crisps: While traditional cheese crisps rely on dairy, you can experiment with plant-based cheeses. Look for firm, aged vegan cheese alternatives and follow the same recipe.
- Herb Infusion: Incorporate fresh herbs like rosemary, thyme, or oregano into the cheese mixture for an aromatic twist. Chop the herbs finely before adding them.
- Spicy Kick: For those who enjoy a bit of heat, add a pinch of cayenne pepper or a drizzle of hot sauce to the cheese mixture.
- Nutty Delight: Sprinkle chopped nuts, such as almonds or walnuts, over the cheese crisps before baking for added texture and flavor.
FAQs (Frequently Asked Questions)
Q: Can I use pre-shredded cheese for this recipe?
A: While you can, it’s best to shred the cheese yourself from a block. Pre-shredded cheese often contains cellulose to prevent clumping, which can affect how the cheese melts and crisps.
Q: Why is flour added to the cheese?
A: The flour acts as a binder, helping the cheese shreds stick together and creating a more cohesive crisp. It also contributes to the overall crispness of the final product.
Q: My cheese crisps are sticking to the baking sheet. What am I doing wrong?
A: Ensure you’re using either a silicone baking mat or parchment paper to line your baking sheet. This will prevent sticking and make cleanup much easier.
Q: Can I make these in an air fryer?
A: Yes! Air frying is a great alternative. Preheat your air fryer to 350°F (175°C) and cook for about 8-10 minutes, or until golden brown and crispy. Watch them carefully to prevent burning.
Q: What can I serve with these cheese crisps?
A: These crisps are incredibly versatile! They’re delicious on their own as a snack, but also pair well with dips, soups, salads, or as a crunchy topping for casseroles.
Final Thoughts
These golden roasted cheese crisps are more than just a simple snack; they’re a blank canvas for culinary creativity. Experiment with different cheeses, spices, and herbs to create your own signature flavor combinations. Whether you’re serving them at a party or enjoying them as a quiet treat, these crispy delights are sure to impress. So, fire up your oven, gather your ingredients, and prepare to experience the joy of homemade cheese crisps! I encourage you to share your variations and feedback, and happy cooking!