
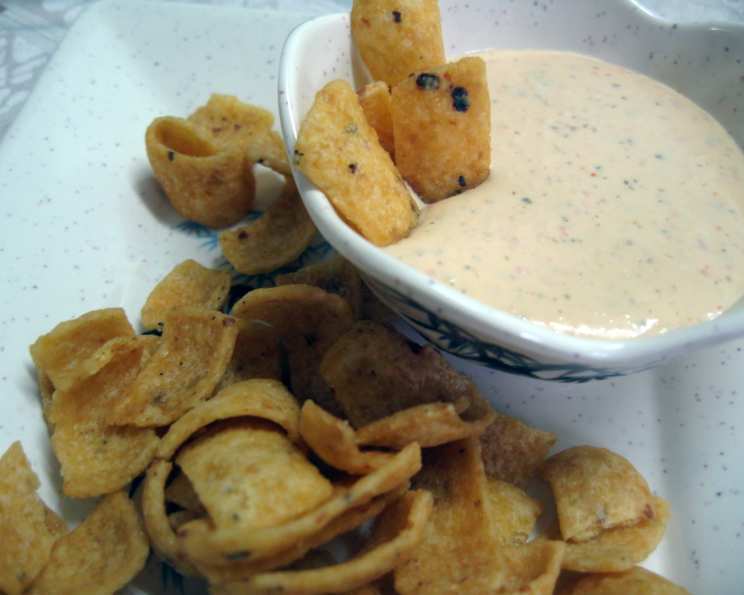
Roasted Red Pepper & Garlic Dip: A Culinary Symphony
The first time I tasted roasted red pepper dip was at a sun-drenched taverna on the Greek island of Santorini. The air buzzed with cicadas, the Aegean sparkled sapphire blue, and the creamy, smoky dip, served with warm pita bread, was an absolute revelation. It was the perfect embodiment of simple ingredients transformed into something extraordinary, a culinary magic trick I’ve been trying to replicate and perfect ever since. This recipe is my interpretation, infused with the memory of that perfect bite and the promise of sunshine in every mouthful.
Recipe Overview
- Prep Time: 15 minutes
- Cook Time: 45 minutes
- Total Time: 1 hour
- Servings: 10-12
- Yield: 2 Cups
- Dietary Type: Vegetarian, Gluten-Free
Ingredients
- 1 tablespoon olive oil
- 6 garlic cloves
- 3 red bell peppers, roasted, peeled and seeded
- 1 teaspoon ground cumin
- 1 tablespoon fresh cilantro
- 1⁄4 cup lemon juice (juice from one lemon)
- 1 (8 ounce) package cream cheese
- 1⁄4 cup sour cream
- 1⁄4 teaspoon salt
- 1⁄4 teaspoon pepper
Equipment Needed
- Aluminum foil
- Oven
- Blender or Food Processor
- Serving bowl or container
Instructions
-
Preheat your oven to 400°F (200°C). This temperature will ensure the garlic roasts beautifully and becomes sweet and mellow.
-
Prepare the garlic for roasting. Place the garlic cloves on a sheet of aluminum foil. Drizzle them generously with the olive oil, ensuring each clove is well-coated. This will help them soften and caramelize during roasting.
-
Tightly wrap the aluminum foil around the garlic cloves, creating a sealed packet. This steam-roasting method allows the garlic to become incredibly tender and fragrant.
-
Bake the garlic packet in the preheated oven for 45 minutes. The garlic is ready when it is soft to the touch and easily pierced with a fork. The aroma will fill your kitchen, a testament to the transformation taking place.
-
Once the garlic is roasted, carefully remove it from the oven and allow it to cool slightly. Open the foil packet and let the steam escape.
-
Gently remove the skin from the roasted garlic cloves. They should slip out easily, revealing the soft, golden flesh beneath.
-
Transfer the peeled, roasted garlic cloves to a blender or food processor.
-
Add the roasted, peeled, and seeded red bell peppers to the blender. The key here is to ensure the peppers are well-drained after roasting to prevent a watery dip.
-
Pour in the lemon juice. This adds a necessary tang to balance the sweetness of the peppers and garlic, creating a bright and vibrant flavor profile.
-
Begin blending the ingredients until they form a smooth puree. You may need to scrape down the sides of the blender a few times to ensure everything is evenly processed.
-
Add the ground cumin and fresh cilantro to the blender. Cumin provides a warm, earthy note, while fresh cilantro adds a vibrant, herbaceous element.
-
Incorporate the cream cheese and sour cream into the mixture. These ingredients add richness and creaminess to the dip, creating a luxurious texture.
-
Continue to blend until all the ingredients are thoroughly mixed and the dip is smooth and homogenous.
-
Season the dip with salt and pepper to taste. Start with the recommended amount and then adjust according to your preference.
-
Give the dip one final blend to ensure the salt and pepper are evenly distributed.
-
Transfer the Roasted Red Pepper & Garlic Dip to a serving bowl or container.
-
Refrigerate the dip for at least 1 hour before serving. This allows the flavors to meld together and the dip to chill, improving its overall taste and texture.
Expert Tips & Tricks
- Roasting the Red Peppers: For the best flavor, roast your own red peppers! Place them directly on the gas stovetop flame, turning occasionally until blackened. Alternatively, broil them in the oven, turning until charred. Place the blackened peppers in a bowl and cover with plastic wrap for 10 minutes to steam. The skins will then easily peel off.
- Garlic Variation: For a more intense garlic flavor, you can add a raw garlic clove to the blender along with the roasted garlic. Start with one clove and taste as you go, adding more if desired.
- Consistency Control: If the dip is too thick, add a tablespoon or two of olive oil or water until you reach your desired consistency.
- Spice it Up: Add a pinch of red pepper flakes for a touch of heat.
- Make Ahead: This dip can be made up to 3 days in advance. Store it in an airtight container in the refrigerator. The flavors will actually improve over time.
Serving & Storage Suggestions
Serve the Roasted Red Pepper & Garlic Dip chilled with an array of dippers. Pita bread, tortilla chips, vegetable sticks (carrots, celery, cucumbers), and crackers all pair beautifully with this flavorful dip. To elevate your presentation, garnish the dip with a drizzle of olive oil, a sprinkle of fresh cilantro, or a few Kalamata olives.
Leftover dip should be stored in an airtight container in the refrigerator. It will keep for up to 3-4 days. While you can technically freeze it, the texture of the cream cheese may change upon thawing, so it’s best enjoyed fresh.
Nutritional Information
| Nutrient | Amount per Serving | % Daily Value |
|---|---|---|
| Calories | 75 kcal | 4% |
| Total Fat | 6g | 9% |
| Saturated Fat | 3g | 15% |
| Cholesterol | 10mg | 3% |
| Sodium | 80mg | 3% |
| Total Carbohydrate | 3g | 1% |
| Dietary Fiber | 1g | 4% |
| Sugars | 2g | 0% |
| Protein | 1g | 2% |
Note: Nutritional information is an estimate and may vary based on specific ingredients and portion sizes.
Variations & Substitutions
- Vegan Option: Substitute the cream cheese and sour cream with plant-based alternatives like vegan cream cheese and cashew cream or a thick coconut yogurt.
- Mediterranean Twist: Fold in chopped Kalamata olives, sun-dried tomatoes, and a sprinkle of oregano for a taste of the Mediterranean.
- Spicy Version: Add a roasted jalapeño pepper or a pinch of red pepper flakes to the blender for a fiery kick.
- Herbaceous Delight: Experiment with different herbs such as dill, parsley, or mint to create unique flavor combinations.
- Smoked Paprika: Add a pinch of smoked paprika for a deeper, smoky flavor.
FAQs (Frequently Asked Questions)
Q: Can I use jarred roasted red peppers?
A: Yes, you can, but fresh roasted red peppers will provide a superior flavor. If using jarred, make sure to drain them well before adding them to the blender.
Q: How do I peel the roasted garlic easily?
A: Roasting the garlic in foil allows the cloves to steam, making the skins very easy to slip off. Simply squeeze the clove from the base and it should pop right out.
Q: Can I make this dip without a blender or food processor?
A: While a blender or food processor is recommended for the smoothest texture, you can finely chop all the ingredients and mix them together thoroughly by hand.
Q: How long does the dip last in the refrigerator?
A: The dip will last for up to 3-4 days in an airtight container in the refrigerator.
Q: Can I use Greek yogurt instead of sour cream?
A: Yes, Greek yogurt is a great substitute for sour cream. It will provide a similar tang and creaminess.
Final Thoughts
This Roasted Red Pepper & Garlic Dip is more than just a recipe; it’s an invitation to savor the simple pleasures of life. Gather your friends and family, serve this vibrant dip with your favorite dippers, and create moments of shared joy and culinary delight. I encourage you to experiment with the variations and find your own perfect twist on this classic recipe. And if you do, please share your creations and feedback – I’d love to hear about them! Enjoy!