
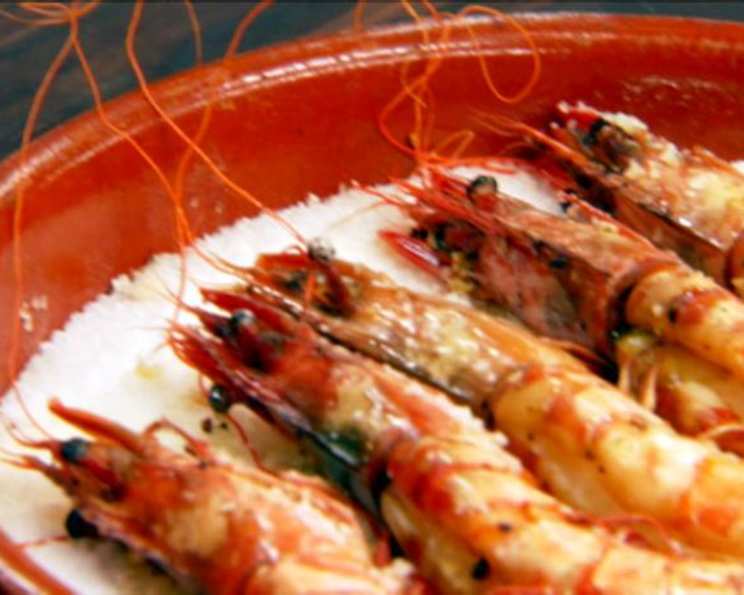
Rock Salt Shrimp: A Taste of the Sea, Baked to Perfection
The salty tang of the sea air, the sizzle of shrimp on a hot pan, the laughter of friends sharing a simple, exquisite meal – these are the memories evoked every time I make Rock Salt Shrimp. My first encounter with this deceptively easy dish was at a tiny, unassuming seafood shack overlooking the rocky coast of Maine. The owner, a weathered fisherman with hands as rough as barnacles, tossed a handful of plump shrimp onto a bed of sizzling rock salt, the aroma of garlic and the ocean filling the air. From that moment on, I was hooked. It wasn’t just the flavor; it was the experience, the simplicity, and the sheer joy of sharing something so elemental and delicious.
Recipe Overview
- Prep Time: 15 minutes
- Cook Time: 32 minutes
- Total Time: 47 minutes
- Servings: 5
- Dietary Type: Pescatarian
Ingredients
- 1-2 lb rock salt (enough to fill your casserole dish by 1 inch)
- 5-6 garlic cloves, minced
- Olive oil, for drizzling
- 5 large shrimp, head and shells left on
Equipment Needed
- 2-inch deep casserole dish (large enough to hold the shrimp in a single layer)
- Mixing bowl
Instructions
- Preheat your oven to 400 degrees F (200 degrees C). It’s crucial to have the oven fully preheated to ensure the rock salt reaches the optimal temperature.
- Select a 2-inch deep casserole dish that is large enough to hold the shrimp in a single layer. This is important for even cooking.
- Add the rock salt to the casserole dish to form a 1-inch bed. Ensure the layer is even to distribute heat uniformly. Using enough salt is key to preventing scorching and imparting the desired flavor.
- Slide the casserole dish into the preheated oven and heat for 30 minutes. This allows the rock salt to get incredibly hot, which is what will cook the shrimp quickly and evenly. Be careful when handling the hot dish!
- While the rock salt is heating, prepare the marinade. Add the minced garlic and olive oil to a mixing bowl. Don’t skimp on the garlic – it infuses the shrimp with fantastic flavor.
- Make an incision down the back of each of the shrimp. This allows the marinade to penetrate and also helps with even cooking.
- Devein or remove the intestine from each piece of shrimp. Nobody wants gritty shrimp! A small paring knife makes this task easier.
- Add the prepared shrimp to the garlic and olive oil marinade.
- Toss together to coat the shrimp thoroughly, ensuring each piece is well covered with the marinade.
- Let the shrimp rest in the marinade for at least 10 minutes. This allows the flavors to meld and the shrimp to absorb the garlic and olive oil.
- Once the rock salt is heated, carefully pull the casserole dish from the oven. Use oven mitts – it will be extremely hot!
- Arrange the marinated shrimp on the bottom of the casserole dish in a single layer. Do not overcrowd the dish; this will steam the shrimp instead of roasting them.
- Return the casserole dish to the oven and roast for 2 minutes. Watch closely; they cook quickly on the hot salt.
- Turn each shrimp over and set them aside to let the residual heat from the pan finish cooking their second sides. The carryover cooking is crucial for preventing overcooking.
- Serve warm immediately.
Expert Tips & Tricks
- For extra flavor, add a pinch of red pepper flakes to the marinade for a little heat.
- Use high-quality olive oil for the best flavor. Extra virgin olive oil is recommended.
- Don’t be afraid to experiment with different herbs in the marinade. Fresh thyme or rosemary would be delicious.
- If you don’t have a casserole dish, you can use a cast-iron skillet.
- Ensure your oven is accurately calibrated. An oven thermometer can help with this.
- The size of your shrimp can affect the cooking time, so keep a close eye on them.
- To make the presentation even more impressive, garnish with chopped fresh parsley and a lemon wedge.
- For easier cleanup, line the casserole dish with aluminum foil before adding the salt, though this will reduce some of the rock salt flavor.
Serving & Storage Suggestions
Serve the Rock Salt Shrimp immediately while they are hot and the flavors are at their peak. They make a fantastic appetizer or a light main course. Accompany with a side of crusty bread for dipping into the garlic and olive oil. Lemon wedges are a must for squeezing over the shrimp for a burst of freshness.
Leftovers, if any, should be stored in an airtight container in the refrigerator. They are best consumed within 24 hours. To reheat, gently warm them in a skillet over low heat, being careful not to overcook them. Microwaving is not recommended, as it can make the shrimp tough. While not ideal, you can freeze cooked shrimp for up to a month; ensure they are tightly wrapped to prevent freezer burn, and thaw thoroughly before reheating.
Nutritional Information
| Nutrient | Amount per Serving | % Daily Value |
|---|---|---|
| Calories | 150 kcal | 8% |
| Total Fat | 10g | 15% |
| Saturated Fat | 1.5g | 8% |
| Cholesterol | 150mg | 50% |
| Sodium | 1500mg | 65% |
| Total Carbohydrate | 2g | 1% |
| Dietary Fiber | 0g | 0% |
| Sugars | 0g | 0% |
| Protein | 15g | 30% |
Nutritional information is an estimate and may vary based on specific ingredients and preparation methods.
Variations & Substitutions
- Spicy Rock Salt Shrimp: Add a pinch of cayenne pepper or a dash of hot sauce to the marinade for a spicy kick.
- Herb-Infused Rock Salt: Mix dried herbs like rosemary, thyme, or oregano into the rock salt before heating.
- Lemon-Garlic Rock Salt Shrimp: Add lemon zest and juice to the garlic and olive oil marinade.
- Rock Salt Scallops: Substitute large sea scallops for the shrimp. Adjust the cooking time as needed.
- Vegetarian Option: While the core of this recipe is shrimp, you can apply a similar technique to roast vegetables like bell peppers or asparagus on the rock salt (adjust cooking times accordingly).
FAQs (Frequently Asked Questions)
Q: Can I use regular table salt instead of rock salt?
A: No, regular table salt is too fine and will dissolve and potentially burn. Rock salt is essential for this recipe.
Q: Do I have to leave the heads and shells on the shrimp?
A: Leaving the heads and shells on adds flavor and helps to prevent the shrimp from drying out, but you can remove them if you prefer.
Q: Can I prepare the rock salt ahead of time?
A: You can heat the rock salt up to an hour in advance. Just be sure to keep the oven at a low temperature to maintain the heat.
Q: How do I know when the shrimp are done?
A: The shrimp are done when they turn pink and opaque. Be careful not to overcook them, as they will become tough.
Q: My rock salt has discolored after cooking. Is this normal?
A: Yes, it’s normal for the rock salt to discolor after being heated. You can reuse it for future Rock Salt Shrimp dishes, but discard it if it becomes excessively dirty or contaminated.
Final Thoughts
Rock Salt Shrimp is more than just a recipe; it’s a culinary adventure waiting to happen. It’s a testament to the fact that simple ingredients, when treated with care and respect, can create truly extraordinary flavors. Don’t be intimidated by the simplicity of the dish – embrace it! Experiment with different seasonings, share it with loved ones, and savor the taste of the sea. And if you happen to be near the coast of Maine, keep an eye out for that little seafood shack; you might just find yourself hooked, too. I encourage you to try this simple yet delectable recipe and share your experience with me. Buon Appetito!