
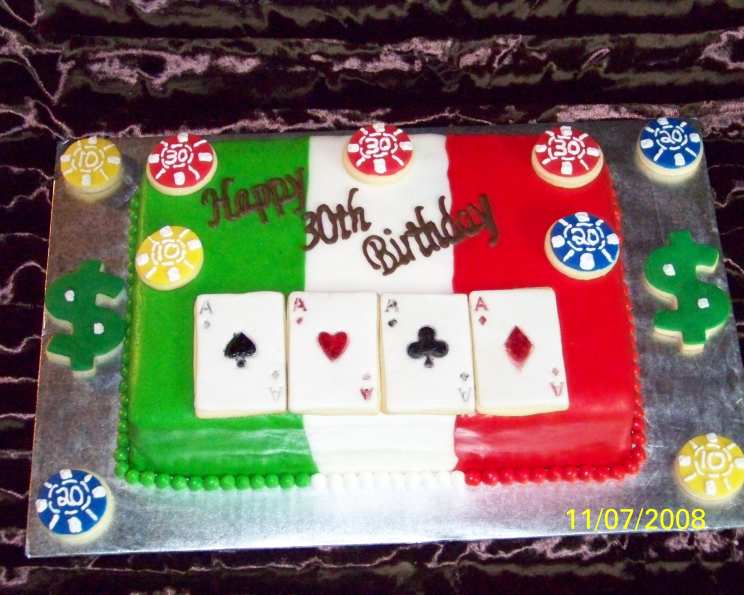
The Magic of Rolled Buttercream: A Chef’s Guide to Smooth, Sculptable Icing
My grandmother, bless her heart, was a purist. Fondant? Never. She believed that true cake artistry came from mastering buttercream, but not just any buttercream. She was a staunch advocate for rolled buttercream, an icing so smooth and pliable, it could be sculpted into roses that looked like they’d been plucked straight from the garden. I remember watching, mesmerized, as she transformed ordinary cakes into edible masterpieces with her trusty batch of rolled buttercream. The taste, a delicate balance of sweetness and subtle flavorings, was the perfect complement to her homemade cakes. To this day, the scent of vanilla and sugar transports me back to her kitchen, filled with warmth and the promise of something beautiful and delicious.
Recipe Overview
- Prep Time: 20 minutes
- Cook Time: 0 minutes
- Total Time: 20 minutes (plus 30 minutes resting time)
- Servings: Varies depending on use
- Yield: Approximately 4 pounds of icing
- Dietary Type: Vegetarian
Ingredients
- 1 cup vegetable shortening, solid
- 1 cup corn syrup, clear
- 1/2 teaspoon butter flavoring, clear
- 1 teaspoon vanilla flavoring, clear
- 1/2 teaspoon popcorn salt (or regular salt)
- 7-8 cups powdered sugar, approximately 2 pounds
Equipment Needed
- Heavy-duty stand mixer
- Mixing bowl
- Paddle attachment
- Work surface (silicone mat or lightly greased countertop)
- Sealed plastic bag
- Airtight container
Instructions
-
Begin by ensuring your vegetable shortening is at a cool room temperature. This will help it cream properly. Place the shortening and corn syrup in the mixing bowl of your heavy-duty mixer.
-
Using the paddle attachment, beat the shortening and corn syrup together until the mixture is creamy and well combined. This may take a few minutes, so be patient and scrape down the sides of the bowl as needed to ensure even mixing.
-
Add the butter flavoring, vanilla flavoring, and salt to the mixture. Beat until these ingredients are thoroughly blended in, about 30 seconds.
-
Now comes the key step: incorporating the powdered sugar. With the mixer running on low speed, gradually add the powdered sugar to the bowl over a period of approximately 30 seconds. Pouring it in too quickly can create a dusty mess, so take your time.
-
Once all the powdered sugar has been added, continue to blend the icing for approximately 30 seconds to one minute, until it comes together. Again, scrape down the sides of the bowl to ensure all ingredients are fully incorporated. The mixture will be quite thick.
-
Turn the icing out onto your clean work surface. Lightly grease your hands and the work surface if the icing is particularly sticky.
-
Knead the icing until it is smooth and well blended. This step is crucial for achieving the right consistency and texture. The kneading process develops the gluten in the powdered sugar, resulting in a pliable and elastic icing.
-
Place the kneaded icing in a sealed plastic bag. Remove as much air as possible from the bag before sealing it.
-
Place the bagged icing in an airtight container. Let it sit at room temperature for about 30 minutes. This resting period allows the ingredients to fully hydrate and the icing to relax, making it easier to roll and work with.
-
The icing can be refrigerated for several weeks or frozen for several months. When ready to use, let it come to room temperature before kneading again until pliable.
-
Testing for Readiness: This is an important step. Pull a small piece of icing apart.
- If it stretches when pulled apart, the icing is too soft. Knead in additional powdered sugar, 1/2 cup at a time, until it reaches the desired consistency.
- When you’re confident that the icing isn’t too soft, gently stroke a portion of the icing with the palm of your hand. If all cracks and marks disappear and the surface appears shiny, it’s ready to use.
- If the cracks do not disappear, the icing is too firm. Knead in a few drops of water at a time until the proper consistency is achieved. Be cautious not to add too much water, as this can make the icing sticky.
-
Coloring the Icing:
- To color the ENTIRE batch of icing: Mix the color with the shortening and corn syrup mixture BEFORE adding the powdered sugar. Gel food coloring is recommended, as liquid food coloring can alter the consistency of the icing.
- To color small portions of icing: Make a small indentation in the center of a ball of icing. Add the food coloring to the indentation. Knead the color in until it is well blended. If the color softens the icing, knead in more powdered sugar.
-
To cover a cake, use the same method as if using rolled fondant. Roll out the icing to the desired thickness on a lightly powdered surface and drape it over the cake. Smooth out any imperfections with a fondant smoother.
Expert Tips & Tricks
- Achieving the Perfect Consistency: The key to rolled buttercream is finding the right balance of moisture and sugar. If your icing is too sticky, add more powdered sugar a tablespoon at a time. If it’s too dry and cracks easily, add a few drops of water or a small amount of shortening.
- Preventing Elephantskin: “Elephantskin” is when the rolled buttercream drys out when covering your cake. To help avoid elephantskin, gently mist your cake with a simple syrup or water, or vegetable shortening. This thin coating allows the rolled buttercream to stick to the cake without dry out.
- Flavor Variations: While vanilla and butter are classic choices, don’t be afraid to experiment with other flavorings. Almond extract, lemon extract, or even a touch of peppermint can add a unique twist to your rolled buttercream.
- Working with Humidity: Humidity can affect the consistency of your rolled buttercream. If you’re working in a humid environment, you may need to add a bit more powdered sugar to compensate.
- Kneading: Don’t skimp on the kneading! It’s essential for developing the right texture. Think of it like working with bread dough.
- Using a Pasta Machine: If you have one, consider using a pasta machine to roll out your buttercream evenly. This can save time and effort, especially for larger cakes.
Serving & Storage Suggestions
Rolled buttercream icing is best served on cakes, cupcakes, and other desserts. It can be used to create smooth, flawless finishes or intricate decorations. Store leftover icing in an airtight container at room temperature for up to a week, or in the refrigerator for up to two weeks. It can also be frozen for up to two months. Be sure to bring it back to room temperature and knead it well before using.
Nutritional Information
Note: Nutritional information is an estimate and may vary based on specific ingredient brands and portion sizes.
| Nutrient | Amount per Serving (Approx. 1/4 cup) | % Daily Value |
|---|---|---|
| Calories | 450 kcal | 23% |
| Total Fat | 30g | 46% |
| Saturated Fat | 8g | 40% |
| Cholesterol | 0mg | 0% |
| Sodium | 150mg | 6% |
| Total Carbohydrate | 65g | 22% |
| Dietary Fiber | 0g | 0% |
| Sugars | 55g | N/A |
| Protein | 0g | 0% |
Variations & Substitutions
- Vegan Rolled Buttercream: Replace the vegetable shortening with a vegan shortening alternative. Ensure the butter flavoring is also vegan-friendly.
- Flavor Infusions: Steep warm milk or cream with flavors like lavender, rose petals, or citrus zest. Let cool, strain, and use a few drops in place of water to adjust the consistency.
- Chocolate Rolled Buttercream: Add melted and cooled chocolate to the shortening and corn syrup mixture. Adjust the amount of powdered sugar as needed.
- Honey Rolled Buttercream: Substitute some of the corn syrup with honey for a more complex sweetness and a slightly stickier texture.
- Gluten-Free: This recipe is inherently gluten-free, as it does not contain any wheat-based ingredients. Ensure all flavorings are also gluten-free.
FAQs (Frequently Asked Questions)
Q: Why is my rolled buttercream cracking?
A: Cracking typically indicates that the icing is too dry. Try kneading in a few drops of water or a small amount of vegetable shortening to restore moisture.
Q: How do I prevent my rolled buttercream from tearing when I roll it out?
A: Ensure your work surface is lightly dusted with powdered sugar. Roll the icing to the desired thickness, being careful not to stretch it too thin.
Q: Can I use this icing for making sugar flowers?
A: Yes! Rolled buttercream is excellent for making sugar flowers and other decorations due to its pliability and ability to hold its shape.
Q: My rolled buttercream is too sticky. How can I fix it?
A: Gradually knead in additional powdered sugar, one tablespoon at a time, until the icing reaches the desired consistency.
Q: How long can I store a cake covered in rolled buttercream?
A: A cake covered in rolled buttercream can be stored at room temperature for up to 3 days, or in the refrigerator for up to a week.
Final Thoughts
I hope this recipe inspires you to create your own edible masterpieces with rolled buttercream. It might seem daunting at first, but with a little patience and practice, you’ll be amazed at what you can achieve. Don’t be afraid to experiment with flavors and colors to create your own signature style. And most importantly, have fun! Share your creations with friends and family, and let the joy of baking and decorating brighten their day. Now, go forth and create something beautiful!