
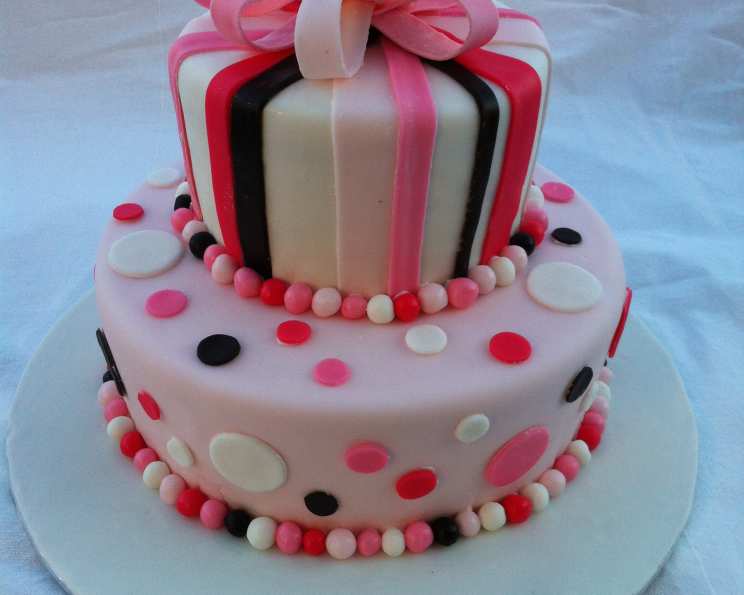
The Magic of Homemade Rolled Fondant: A Baker’s Secret Weapon
I still remember the first time I saw a perfectly smooth, elegantly draped fondant-covered cake. It was at a friend’s wedding, and the cake looked like it belonged in a museum, not on a dessert table. Intrigued, I embarked on a journey to master the art of fondant, starting with the humbling realization that the store-bought stuff simply wouldn’t cut it. The flavor was often artificial, the texture was tough, and achieving that flawless finish seemed impossible. That’s when I discovered the transformative power of homemade rolled fondant—a revelation that opened up a whole new world of cake decorating possibilities.
Recipe Overview
- Prep Time: 20 minutes
- Cook Time: 5 minutes
- Total Time: 25 minutes + 12 hours resting
- Servings: Varies
- Yield: About 3 pounds of fondant
- Dietary Type: Not specified (can be modified, see variations)
Ingredients
- ¼ ounce unflavored gelatin
- ¼ cup cold water
- ½ cup corn syrup
- 1 tablespoon glycerine (available at most craft stores or online; helps with pliability)
- 2 tablespoons shortening
- 1 teaspoon vanilla extract (or your flavor of choice)
- 6 cups confectioners’ sugar, sifted (plus more for kneading and dusting)
Equipment Needed
- Large mixing bowl
- Microwave-safe bowl or double boiler
- Wooden spoon
- Plastic wrap
- Airtight container
- Rolling pin
- Cornstarch (for dusting)
Instructions
-
In a microwave-safe bowl or small saucepan, combine the gelatin and cold water. Let stand for about 5 minutes to allow the gelatin to soften and thicken. This process is called “blooming” and is essential for proper hydration.
-
Warm the gelatin mixture gently. If using a microwave, heat in short bursts (10-15 seconds) to prevent boiling, stirring in between, until the gelatin is completely dissolved. If using a saucepan, heat over low heat, stirring constantly until dissolved. Be careful not to boil the gelatin, as this can affect its elasticity.
-
Add the corn syrup and glycerine to the dissolved gelatin, mixing well to combine. The glycerine acts as a humectant, keeping the fondant soft and pliable, preventing it from drying out too quickly.
-
Stir in the shortening. Continue stirring until the shortening is almost completely melted. Remove the mixture from the heat just before the shortening is fully melted and continue stirring until it is completely incorporated and smooth. This prevents overheating the gelatin and potentially compromising the final texture.
-
Stir in the vanilla extract (or your chosen flavor). Make sure everything is well combined.
-
Place 4 cups of the sifted confectioners’ sugar into a large mixing bowl. Sifting the sugar is crucial to prevent lumps in the fondant, ensuring a smooth, professional finish.
-
Make a well in the center of the confectioners’ sugar and pour in the lukewarm gelatin mixture. Using a wooden spoon, gently stir the wet ingredients into the sugar, gradually incorporating more sugar from the sides of the bowl as you go.
-
Continue mixing until a sticky dough begins to form. At this point, start adding the remaining confectioners’ sugar gradually, a little at a time, until the stickiness starts to disappear.
-
Switch to using your hands to knead the fondant. Generously dust your hands and the work surface with confectioners’ sugar to prevent the fondant from sticking. Continue to knead in the remaining sugar, adding more if necessary, until the fondant becomes smooth, pliable, and no longer sticky. This kneading process is critical for developing the right consistency and elasticity.
-
If the fondant is too soft, add more confectioners’ sugar, a tablespoon at a time, until you achieve the desired consistency. If the fondant is too stiff, add water, a drop at a time, kneading it in until the fondant softens. Be patient and add the sugar or water gradually to avoid overcorrecting.
-
Once the fondant reaches the desired consistency, wrap it tightly in plastic wrap, ensuring there are no air pockets. Then, place the wrapped fondant in an airtight container.
-
Allow the fondant to set at room temperature for at least 12 hours before using it. This resting period allows the ingredients to fully meld and the fondant to develop its optimal texture and elasticity.
-
When you are ready to use the fondant, dust your work surface with cornstarch (not confectioners’ sugar, as it can make the fondant too sweet). Also, dust your rolling pin with cornstarch.
-
Roll out the fondant to your desired thickness and use it to cover your cake or create decorations. This recipe will provide enough fondant to cover a 12-inch cake, but adjust quantities according to your specific needs.
Expert Tips & Tricks
- Coloring Fondant: If you want to color your fondant, use gel food coloring, not liquid food coloring. Liquid food coloring can alter the consistency of the fondant, making it too sticky. Add the gel color gradually and knead it in thoroughly until you achieve your desired shade. Be aware that adding too much coloring, especially dark colors, can sometimes cause the fondant to become crumbly.
- Preventing Elephant Skin: “Elephant skin” is a common issue with fondant, where the surface becomes dry and cracked. To prevent this, ensure the fondant is properly wrapped and stored, and avoid working with it in a dry environment. If elephant skin does occur, lightly mist the fondant with water and gently smooth it out.
- Adding Flavor: Experiment with different extracts to add subtle flavors to your fondant. Almond, lemon, and peppermint extracts are all excellent choices.
- Working with Humidity: Humidity can be a challenge when working with fondant. If you live in a humid climate, consider using a dehumidifier in your work area to reduce the moisture in the air. You may also need to add a bit more confectioners’ sugar to the fondant to compensate for the extra moisture.
Serving & Storage Suggestions
Fondant-covered cakes are best served at room temperature. Store any leftover fondant tightly wrapped in plastic wrap and in an airtight container at room temperature. It can be stored for several weeks. Do not refrigerate fondant, as this can cause it to become sticky and difficult to work with. If the fondant becomes a little stiff after storage, knead it well until it softens up again.
Nutritional Information
Please note that the nutritional information is an estimate and may vary based on specific ingredients and serving size.
| Nutrient | Amount per Serving (estimated) | % Daily Value (estimated) |
|---|---|---|
| Calories | 350 kcal | 18% |
| Total Fat | 3g | 4% |
| Saturated Fat | 1g | 5% |
| Cholesterol | 0 mg | 0% |
| Sodium | 5 mg | 0% |
| Total Carbohydrate | 85g | 31% |
| Dietary Fiber | 0g | 0% |
| Sugars | 75g | N/A |
| Protein | 1g | 2% |
Variations & Substitutions
- Vegan Fondant: Substitute the gelatin with a vegan alternative like agar-agar. Be sure to follow the package instructions for proper hydration and usage, as the ratio may differ from gelatin.
- Gluten-Free Fondant: This recipe is naturally gluten-free as long as you ensure your confectioners’ sugar is certified gluten-free.
- Chocolate Fondant: Add melted and cooled dark chocolate to the gelatin mixture for a rich chocolate flavor and color. Start with about 2-4 ounces of high-quality chocolate and adjust to your taste preference.
- Marshmallow Fondant: While this recipe is for traditional rolled fondant, you can find many variations online for marshmallow fondant, which uses melted marshmallows as a base.
- Flavor Variations: Get creative with extracts! Try almond, lemon, orange, peppermint, or even a touch of rose water for unique flavor profiles.
FAQs (Frequently Asked Questions)
Q: Why is my fondant cracking?
A: Cracking, or “elephant skin,” can be caused by dryness. Make sure your fondant is properly wrapped and stored, and avoid working with it in a dry environment. You can also lightly mist the fondant with water and gently smooth it out.
Q: My fondant is too sticky. What can I do?
A: If your fondant is too sticky, gradually add more confectioners’ sugar, kneading it in until you achieve the desired consistency. Be patient and add the sugar a little at a time to avoid overcorrecting.
Q: Can I make fondant ahead of time?
A: Absolutely! In fact, it’s recommended. This fondant needs to set for at least 12 hours. You can store it, properly wrapped, at room temperature for several weeks.
Q: How do I get a smooth finish on my fondant-covered cake?
A: Start with a well-prepared cake base. Use a fondant smoother to gently smooth out any imperfections or air bubbles in the fondant. Patience is key!
Q: Can I refrigerate my fondant-covered cake?
A: It’s generally not recommended to refrigerate fondant-covered cakes, as the moisture can cause the fondant to become sticky or even melt. If you must refrigerate it, wrap the cake well to protect it from moisture.
Final Thoughts
Creating your own rolled fondant might seem daunting, but the reward is a far superior product compared to anything you can buy in a store. The taste, the texture, and the endless possibilities for customization make it well worth the effort. So, gather your ingredients, embrace the process, and prepare to be amazed by the beautiful, professional-looking cakes you can create with your own homemade rolled fondant. Don’t hesitate to experiment with flavors and colors, and most importantly, have fun! I encourage you to share your creations and any tips or tricks you discover along the way. Happy baking!