
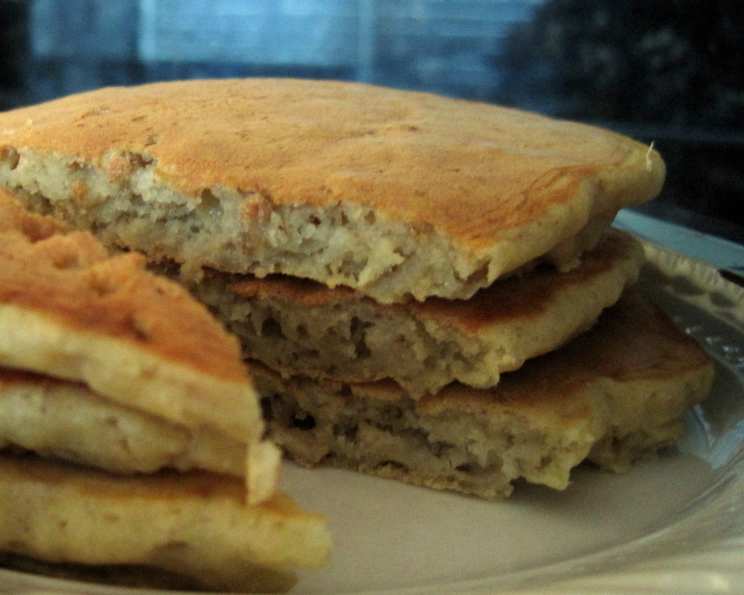
Gluten-Free Rolled Oats Pancakes: A Delicious and Nutritious Start to Your Day
My grandmother, bless her heart, wasn’t much of a baker, but she excelled at breakfast. I have fond memories of waking up to the comforting aroma of pancakes sizzling on her well-worn griddle. While her recipe wasn’t gluten-free (or particularly healthy, if I’m being honest!), the warmth and love she poured into each batch inspired me to create my own version – one that’s packed with wholesome ingredients, suitable for those with gluten sensitivities, and just as satisfying. These rolled oats pancakes are a tribute to her morning ritual, a way to carry on the tradition with a modern, health-conscious twist.
Recipe Overview
- Prep Time: 5 minutes
- Cook Time: 6 minutes
- Total Time: 11 minutes
- Servings: 8
- Dietary Type: Gluten-Free
Ingredients
- 1/2 cup rolled oats
- 1 cup milk
- 2/3 cup gluten-free flour (I use Bette Hagman’s four flour blend, 3 parts corn starch, 3 parts tapioca, 2 parts garfava and 1 part rice flour)
- 1/3 cup brown rice flour (or other high nutrient flour like amaranth)
- 1 teaspoon baking powder
- 1/2 teaspoon baking soda
- 1/2 teaspoon salt
- 1 egg (or 2 egg whites)
- 1 teaspoon vanilla extract
- 1 mashed ripe banana (about 1/3 cup)
- 1/4 cup skim milk or 1/4 cup soymilk
Equipment Needed
- Microwave-safe bowl
- Whisk
- Mixing bowl
- Non-stick skillet or griddle
- Measuring cups and spoons
Instructions
-
Begin by preparing the oatmeal base. In a microwave-safe bowl, combine the rolled oats and milk. Microwave on high for 1 minute and 45 seconds. Then, reduce the power to 40% and microwave for another 3 minutes. This softens the oats and helps them blend seamlessly into the pancake batter.
-
While the oats are cooking, prepare the dry ingredients. In a mixing bowl, whisk together the gluten-free flour, brown rice flour, baking powder, baking soda, and salt. Ensure the dry ingredients are well combined to avoid any pockets of baking powder or soda that could affect the pancake’s texture.
-
In a separate bowl, prepare the wet ingredients. Stir together the egg (or egg whites), vanilla extract, mashed ripe banana, and skim milk (or soymilk). Blend these ingredients until the egg is fully incorporated and the mixture is relatively smooth. The mashed banana adds natural sweetness and moisture to the pancakes.
-
Once the oatmeal mixture has cooled slightly (this prevents the egg from cooking prematurely), add it to the bowl of wet ingredients. Stir to combine.
-
Gradually add the wet ingredients to the dry ingredients, stirring until just combined. Be careful not to overmix, as this can result in tough pancakes. It’s okay if there are a few small lumps in the batter; they will disappear during cooking.
-
Let the batter sit for 2 minutes. This allows the gluten-free flours to absorb the liquid and helps the pancakes achieve a lighter, fluffier texture.
-
Heat a non-stick skillet or griddle over medium-low heat. If you don’t have a non-stick surface, lightly grease the skillet with cooking spray or a small amount of oil. The low heat ensures that the pancakes cook evenly and don’t burn.
-
Pour 1/3 cup of batter onto the hot skillet for each pancake. Spread the batter slightly with the back of a spoon if needed.
-
Cook for 2-3 minutes per side, or until golden brown and cooked through. Flip the pancakes when bubbles start to form on the surface and the edges look set.
-
Serve immediately with your favorite toppings!
Expert Tips & Tricks
- Flour Blend is Key: The specific gluten-free flour blend you use will significantly impact the texture of the pancakes. If you don’t have access to the Bette Hagman’s blend I recommend, experiment with other blends until you find one you like. Ensure it has a good balance of starches and flours.
- Banana Ripeness: The riper the banana, the sweeter and moister your pancakes will be. Overripe bananas are ideal for this recipe.
- Batter Consistency: If your batter seems too thick, add a tablespoon or two of additional milk (skim or soy) until it reaches a pourable consistency.
- Don’t Overmix: Overmixing the batter develops the gluten in the flours (even gluten-free ones), leading to tough pancakes. Stir just until the ingredients are combined.
- Heat Control: Maintaining a low to medium-low heat is essential for preventing the pancakes from burning on the outside while remaining uncooked on the inside.
- Freezing for Later: These pancakes freeze beautifully. Let them cool completely, then stack them between pieces of parchment paper and freeze in a freezer-safe bag or container. Reheat in the microwave, toaster, or oven.
Serving & Storage Suggestions
Serve these gluten-free rolled oats pancakes warm, straight from the griddle. They are delicious with a variety of toppings, such as:
- Fresh fruit (berries, bananas, sliced peaches)
- Maple syrup
- Honey
- Yogurt (dairy or non-dairy)
- Nuts and seeds
- Chocolate chips
Leftover pancakes can be stored in an airtight container in the refrigerator for up to 3 days. For longer storage, freeze them as described above. Reheat refrigerated pancakes in a microwave for 30-60 seconds, or in a toaster oven until warmed through. Frozen pancakes can be reheated directly from the freezer using the same methods, but may require a longer heating time.
Nutritional Information
| Nutrient | Amount per Serving | % Daily Value |
|---|---|---|
| Calories | 89.6 kcal | N/A |
| Calories from Fat | N/A | N/A |
| Total Fat | 2.3 g | 3% |
| Saturated Fat | 1 g | 5% |
| Cholesterol | 27.7 mg | 9% |
| Sodium | 298.8 mg | 12% |
| Total Carbohydrate | 13.9 g | 4% |
| Dietary Fiber | 1.2 g | 4% |
| Sugars | 2 g | 8% |
| Protein | 3.4 g | 6% |
Note: Nutritional information is an estimate and may vary based on specific ingredients and portion sizes.
Variations & Substitutions
- Dairy-Free: Use your favorite non-dairy milk (almond, oat, or coconut milk) in place of the skim milk.
- Egg-Free: Substitute the egg with a flax egg (1 tablespoon ground flaxseed mixed with 3 tablespoons of water, let sit for 5 minutes to thicken).
- Spice It Up: Add a dash of cinnamon, nutmeg, or cardamom to the dry ingredients for a warm and comforting flavor.
- Chocolate Chip Pancakes: Fold in 1/4 cup of chocolate chips to the batter before cooking.
- Berry Pancakes: Add 1/2 cup of fresh or frozen berries to the batter before cooking.
FAQs (Frequently Asked Questions)
Q: Can I use regular all-purpose flour instead of gluten-free flour?
A: While you could, this recipe is specifically designed for gluten-free flours. Using all-purpose flour will change the texture and may require adjustments to the liquid content.
Q: My pancakes are sticking to the skillet. What am I doing wrong?
A: Ensure your skillet is truly non-stick and that it’s heated to the correct temperature (medium-low). You may also need to add a small amount of oil or cooking spray to the skillet.
Q: The batter is too thick. How can I thin it out?
A: Add milk (skim or non-dairy) one tablespoon at a time until the batter reaches a pourable consistency.
Q: Can I make the batter ahead of time?
A: Yes, you can prepare the batter up to 24 hours in advance and store it in the refrigerator. You may need to add a tablespoon or two of milk to thin it out before cooking.
Q: Why are my pancakes flat and not fluffy?
A: This could be due to a few reasons: using old baking powder or baking soda, overmixing the batter, or not letting the batter rest for a few minutes before cooking.
Final Thoughts
These gluten-free rolled oats pancakes are more than just a recipe; they’re a celebration of simple, wholesome ingredients and the joy of a homemade breakfast. I encourage you to try them out, experiment with different toppings, and make them your own. Whether you’re gluten-free or simply looking for a healthier pancake option, I’m confident that these pancakes will become a staple in your morning routine. Share your creations and feedback – I’d love to hear how they turn out! Perhaps serve them alongside a steaming mug of herbal tea or a vibrant fruit smoothie for a truly complete and nourishing breakfast experience. Happy cooking!