
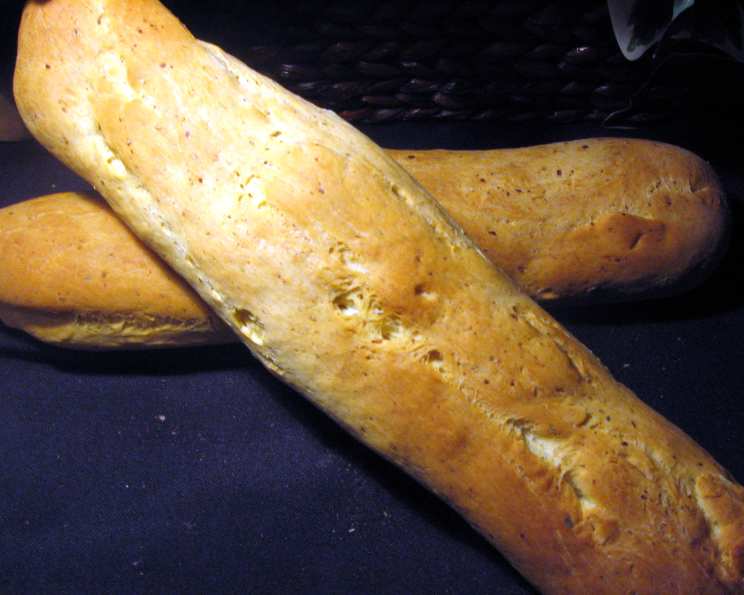
Romano Oregano Bread (ABM): An Italian-Inspired Delight
The aroma of warm bread baking in the oven always takes me back to my Nonna’s kitchen. I remember the simple joy of tearing off a piece of her freshly baked, crusty loaf, the steam carrying the scent of yeast and herbs. This Romano Oregano Bread, while made with the convenience of a bread machine, evokes those same cherished memories – a taste of Italy with every bite. It’s incredibly versatile, perfect for sandwiches, dipping in olive oil, or simply enjoying warm with a pat of butter.
Recipe Overview
- Prep Time: 10 minutes
- Cook Time: Varies based on bread machine cycle
- Total Time: Varies based on bread machine cycle
- Servings: Varies (approximately 8-10 slices)
- Yield: 1 1/2 lb loaf
- Dietary Type: Not specified (Contains dairy and gluten)
Ingredients
- 3 cups bread flour
- 1 cup water
- ¾ cup grated Romano cheese
- 2 tablespoons sugar
- 1 tablespoon dried oregano
- 1 ½ tablespoons olive oil
- 1 teaspoon salt
- 2 teaspoons dry yeast
Equipment Needed
- Bread Machine
- Measuring cups and spoons
- Optional: Knife and cutting board (if using cheese chunks)
Instructions
- Add the ingredients to your bread machine according to the manufacturer’s instructions. Typically, this involves placing the wet ingredients (water, olive oil) in the pan first, followed by the dry ingredients (flour, sugar, salt, oregano, grated Romano cheese), and finally topping it off with the yeast. Ensure the salt and yeast are kept separate during the initial stages to prevent interfering with the yeast’s activation.
- Select the appropriate setting on your bread machine. This is usually the “Basic” or “White Bread” setting. If your machine has a crust setting, you can choose your preferred crust color.
- Start the bread machine. The machine will now knead, proof, and bake the bread according to the selected cycle.
- Optional: Cheese Chunks. If you prefer chunks of cheese throughout your bread rather than grated, cut the Romano cheese into ½ inch cubes. Add the cheese chunks to the bread machine pan when the machine signals for additions. This ensures the cheese remains intact and doesn’t melt completely into the dough.
- Once the baking cycle is complete, carefully remove the bread pan from the machine. Use oven mitts as the pan will be hot.
- Let the bread cool in the pan for about 5-10 minutes before removing it to a wire rack to cool completely. This prevents the bread from becoming soggy.
Expert Tips & Tricks
- Flour Power: Using bread flour is crucial for developing the gluten structure needed for a good rise and chewy texture. All-purpose flour can be used in a pinch, but the result will be slightly less airy.
- Cheese Considerations: While Romano cheese provides a lovely sharp flavor, you could substitute it with Parmesan or Asiago for a slightly different taste profile.
- Herbal Harmony: Fresh oregano can be used in place of dried oregano, but you’ll need to use about 3 tablespoons of fresh oregano as the flavor is less concentrated. Chop the fresh oregano finely before adding it to the bread machine.
- Sweetness Adjustment: Adjust the amount of sugar to suit your preference. A little more sugar will result in a slightly sweeter bread, while less sugar will make it more savory.
- Dough Enhancers: For an even softer crumb, consider adding a tablespoon of vital wheat gluten to the dough. This will further enhance the gluten development.
- Troubleshooting a Dense Loaf: If your bread doesn’t rise properly, ensure your yeast is fresh and active. Also, check that the water temperature is correct – it should be warm, but not hot, to activate the yeast. Too much salt can also inhibit yeast activity.
- Oven Baking Option: If you prefer baking the bread in the oven, remove the dough from the bread machine after the kneading and first proofing cycle. Shape the dough into a loaf and place it on a baking sheet. Let it rise for another 30-45 minutes, then bake at 375°F (190°C) for 25-30 minutes, or until golden brown and the internal temperature reaches 200°F (93°C).
Serving & Storage Suggestions
This Romano Oregano Bread is best enjoyed fresh, warm from the oven. Serve it with a drizzle of olive oil for dipping, alongside a bowl of hearty soup, or as an accompaniment to your favorite pasta dish. It’s also fantastic as a base for sandwiches, especially Italian-style sandwiches with cured meats, cheeses, and vegetables.
To store the bread, wrap it tightly in plastic wrap or place it in an airtight container at room temperature. It will stay fresh for about 2-3 days. For longer storage, slice the bread and freeze it in a freezer-safe bag. Frozen bread can be thawed at room temperature or warmed in the oven. To reheat, wrap the bread in foil and bake at 350°F (175°C) for 10-15 minutes. You can also toast individual slices for a quick and easy snack.
Nutritional Information
| Nutrient | Amount per Serving (estimated) | % Daily Value (approximate) |
|---|---|---|
| Calories | 290 kcal | 15% |
| Total Fat | 10g | 15% |
| Saturated Fat | 5g | 25% |
| Cholesterol | 20mg | 7% |
| Sodium | 550mg | 23% |
| Total Carbohydrate | 45g | 15% |
| Dietary Fiber | 2g | 8% |
| Sugars | 3g | – |
| Protein | 8g | 16% |
Note: Nutritional information is an estimate and may vary based on specific ingredients and serving size.
Variations & Substitutions
- Garlic Romano Oregano Bread: Add 1-2 cloves of minced garlic to the dough for an extra layer of flavor.
- Spicy Romano Oregano Bread: Incorporate a pinch of red pepper flakes into the dough for a touch of heat.
- Gluten-Free Option: Substitute the bread flour with a gluten-free bread flour blend. Be sure to add a binding agent like xanthan gum to improve the texture.
- Dairy-Free Version: Replace the Romano cheese with a dairy-free Parmesan alternative or nutritional yeast.
- Herb Variations: Experiment with different herbs such as basil, thyme, or rosemary to create your own unique flavor combinations.
- Olive Variations: Add ½ cup of chopped olives (such as Kalamata or green olives) to the dough for a savory twist.
FAQs (Frequently Asked Questions)
Q: Can I use active dry yeast instead of instant dry yeast?
A: Yes, you can use active dry yeast. However, you’ll need to proof it first by dissolving it in warm water with a teaspoon of sugar for about 5-10 minutes before adding it to the bread machine.
Q: My bread is too dense. What did I do wrong?
A: A dense loaf is often caused by using old or inactive yeast, using too much salt, or not using enough water. Ensure your yeast is fresh, measure ingredients accurately, and check the consistency of the dough – it should be slightly sticky.
Q: Can I make this bread without a bread machine?
A: Yes, you can knead the dough by hand or in a stand mixer. After kneading, let the dough rise in a warm place for 1-1.5 hours, then shape it into a loaf and bake in a preheated oven at 375°F (190°C) for 25-30 minutes.
Q: How can I get a crustier crust?
A: For a crustier crust, try brushing the loaf with an egg wash or olive oil before baking. You can also place a pan of hot water in the bottom of the oven to create steam during the first half of the baking time.
Q: The cheese melted completely into the dough. How can I prevent this?
A: To prevent the cheese from melting completely, use cheese chunks instead of grated cheese and add them at the “addition” signal from the bread machine. This will ensure that the cheese retains its shape and texture.
Final Thoughts
This Romano Oregano Bread recipe offers a simple and satisfying way to enjoy a taste of Italy in your own home. The bread machine makes the process incredibly easy, but the results are anything but ordinary. I encourage you to try this recipe and adapt it to your own preferences – experiment with different cheeses, herbs, and additions to create your perfect loaf. Don’t hesitate to share your creations and feedback! Pair this bread with a glass of Chianti and a simple Caprese salad for a truly authentic Italian experience. Buon appetito!