
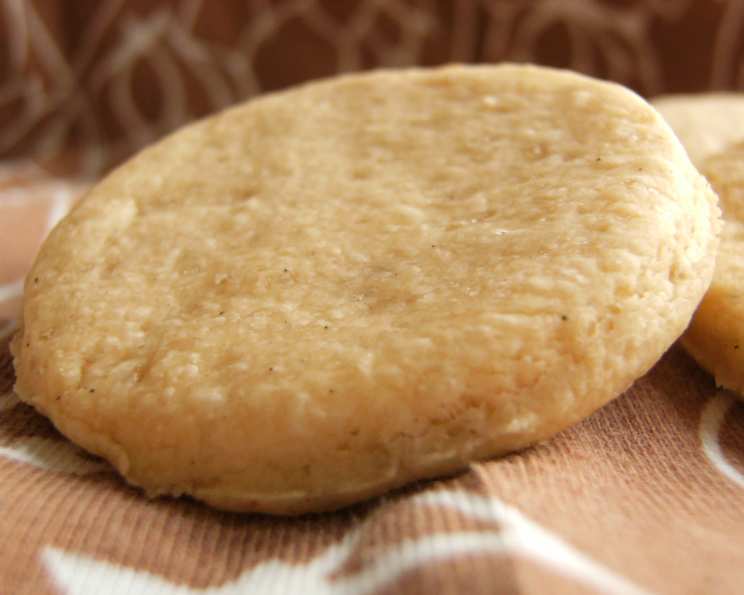
Rooster Cookies: A Timeless Classic
My grandmother, bless her heart, was the queen of simple joys. Her farmhouse kitchen, always smelling of vanilla and cinnamon, was where she worked her magic. Every year, for the county fair, she’d meticulously craft dozens of these Rooster Cookies. Not just any sugar cookies, mind you, but perfectly shaped roosters, each adorned with vibrant, hand-painted royal icing feathers. They were more than just cookies; they were edible works of art, symbols of tradition, and a testament to her unwavering love, a love I hope to pass on through this recipe.
Recipe Overview
- Prep Time: 4 hours 10 minutes
- Cook Time: 8-10 minutes
- Total Time: 4 hours 20 minutes
- Yields: 4 dozen
- Dietary Type: Vegetarian
Ingredients
- 1 cup butter, softened
- 2/3 cup sugar
- 1 egg
- 1/2 teaspoon salt
- 2 1/2 cups flour, sifted
Equipment Needed
- Mixing bowl
- Electric mixer
- Measuring cups and spoons
- Plastic wrap
- Rolling pin
- Rooster-shaped cookie cutter (or any desired shape)
- Baking sheets
- Parchment paper (optional, but recommended)
- Cooling rack
Instructions
-
In a large mixing bowl, cream together the softened butter and sugar until light and fluffy. This step is crucial for creating a tender cookie, so don’t rush it! The mixture should be noticeably paler and almost airy in texture.
-
Beat in the egg, ensuring it’s fully incorporated into the butter and sugar mixture. Scrape down the sides of the bowl to ensure even distribution.
-
Add the salt and gradually add the sifted flour. Mix until all ingredients are well blended. Be careful not to overmix the dough, as this can develop the gluten in the flour, resulting in tough cookies. Mix only until the dough comes together.
-
Divide the dough in half, flatten each half into a disc, wrap each disc tightly in plastic wrap, and chill for 3-4 hours, or even overnight. This chilling period is essential! It allows the gluten to relax, making the dough easier to roll out and preventing the cookies from spreading too much during baking.
-
Preheat your oven to 350°F (175°C). Line your baking sheets with parchment paper. This prevents the cookies from sticking and makes cleanup a breeze.
-
On a lightly floured surface, roll out one disc of chilled dough to about 1/4-inch thickness. Use a rooster-shaped cookie cutter (or any shape you prefer) to cut out cookies.
-
Carefully transfer the cut-out cookies to the prepared baking sheets, leaving about 1 inch between each cookie.
-
Bake for approximately 8-10 minutes, or until the edges are barely colored. Keep a close eye on them; they can burn easily! The goal is for the cookies to be lightly golden, not brown.
-
Remove the baking sheets from the oven and let the cookies cool on the sheets for a few minutes before transferring them to a wire rack to cool completely.
-
Once the cookies are completely cool, they can be frosted and decorated as desired, or enjoyed plain.
Expert Tips & Tricks
-
Soft Butter is Key: Make sure your butter is truly softened, but not melted. It should be pliable and easily creamed.
-
Sifting Flour: Sifting the flour ensures a lighter, more tender cookie. It also helps to remove any lumps.
-
Don’t Overmix: Overmixing develops gluten, resulting in tough cookies. Mix just until the ingredients are combined.
-
Chilling is Crucial: Don’t skip the chilling step! It prevents spreading and makes the dough easier to work with. If you are in a rush, you can chill the dough for a minimum of 2 hours.
-
Rolling Out: Roll out the dough evenly to ensure consistent baking. If the dough sticks, lightly flour your rolling pin and surface.
-
Baking Time: Keep a close watch on the cookies while they are baking. Ovens vary, so adjust the baking time as needed. A light golden color is what you’re aiming for.
-
Re-rolling Scraps: If you re-roll the dough scraps, be aware that the cookies from the second rolling may be slightly tougher. Try to minimize the number of times you re-roll the dough.
-
Royal Icing: For intricate designs, royal icing is your best bet. It dries hard and holds its shape beautifully.
Serving & Storage Suggestions
These Rooster Cookies are perfect for serving at parties, holidays, or as a special treat for friends and family. They make beautiful edible gifts, especially when decorated with care. Store the cooled, undecorated cookies in an airtight container at room temperature for up to 5 days. Frosted cookies are best stored in a single layer in an airtight container to prevent the frosting from smudging. Decorated cookies can also be frozen for up to 2 months. Thaw them at room temperature before serving. They can be served with milk, coffee, or tea.
Nutritional Information
| Nutrient | Amount per Serving | % Daily Value |
|---|---|---|
| Calories | 838.7 kcal | N/A |
| Calories from Fat | 432 g | 52% |
| Total Fat | 48 g | 73% |
| Saturated Fat | 29.7 g | 148% |
| Cholesterol | 174.9 mg | 58% |
| Sodium | 636.6 mg | 26% |
| Total Carbohydrate | 93.1 g | 31% |
| Dietary Fiber | 2.1 g | 8% |
| Sugars | 33.7 g | N/A |
| Protein | 10.1 g | 20% |
Please note: Nutritional information is an estimate and may vary based on specific ingredients and portion sizes.
Variations & Substitutions
-
Lemon Zest: Add 1-2 teaspoons of lemon zest to the dough for a bright, citrusy flavor.
-
Vanilla Extract: Enhance the vanilla flavor by adding 1 teaspoon of pure vanilla extract to the dough.
-
Almond Extract: Substitute vanilla extract with almond extract for a nutty flavor.
-
Chocolate Chips: Fold in 1/2 cup of mini chocolate chips to the dough for a chocolatey twist.
-
Gluten-Free: Substitute the all-purpose flour with a gluten-free all-purpose flour blend for a gluten-free version. Be sure to choose a blend that contains xanthan gum or add it separately to help bind the dough.
-
Vegan Cookies: Use a vegan butter substitute, an egg replacement (such as flax egg or aquafaba), and ensure your sugar is vegan-friendly (some sugar is processed with bone char).
FAQs (Frequently Asked Questions)
Q: Why is chilling the dough so important?
A: Chilling allows the gluten to relax, preventing the cookies from spreading too much during baking and resulting in a more tender cookie. It also makes the dough easier to roll out.
Q: Can I freeze the cookie dough?
A: Yes, you can freeze the cookie dough. Wrap it tightly in plastic wrap and store it in the freezer for up to 2 months. Thaw the dough in the refrigerator overnight before rolling and baking.
Q: How do I prevent the cookies from burning?
A: Keep a close eye on the cookies while they are baking and adjust the baking time as needed. Ovens vary, so start checking for doneness around 8 minutes.
Q: Can I use different cookie cutters?
A: Absolutely! Feel free to use any cookie cutters you like. The rooster shape is just a suggestion; get creative and have fun!
Q: My dough is too sticky to roll out. What should I do?
A: If the dough is too sticky, add a little more flour, one tablespoon at a time, until it reaches a workable consistency. Be careful not to add too much flour, as this can make the cookies tough. You can also chill the dough for a longer period of time.
Final Thoughts
These Rooster Cookies are more than just a recipe; they are a connection to tradition, a taste of home, and a chance to create lasting memories. Whether you’re a seasoned baker or just starting out, I encourage you to give this recipe a try. Don’t be afraid to experiment with different flavors and decorations to make them your own. Share them with loved ones, and watch their faces light up with joy. After all, the best part of baking is sharing the love. Happy baking!