
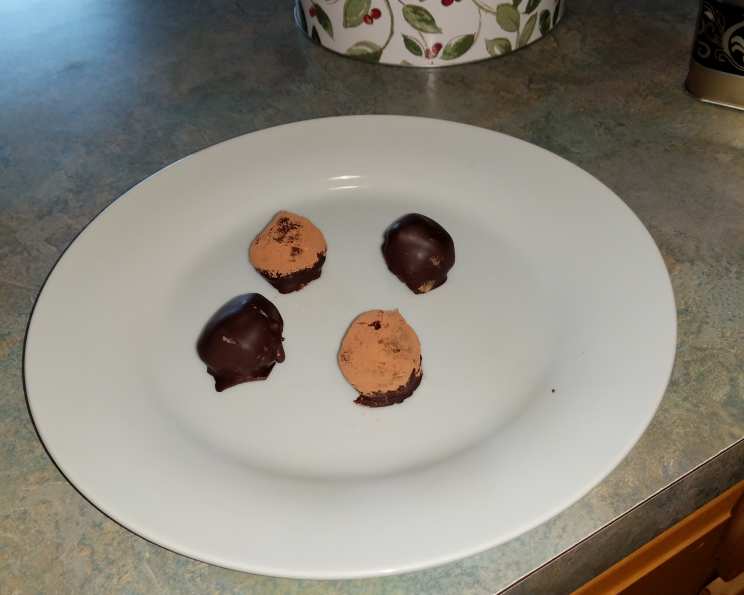
Rose Truffles: A Symphony of Chocolate and Floral Elegance
The scent of roses always takes me back to my grandmother’s garden. She had a sprawling rose bush, its blooms a riot of pinks and reds, each petal carrying the promise of summer. One year, inspired by a French pastry chef, she decided to capture that essence in chocolate truffles. The result was magical: a delicate balance of rich cocoa and the subtle perfume of roses. These truffles are my attempt to recreate that magic, a tribute to her creativity and her love of simple, beautiful things.
Recipe Overview
- Prep Time: 45 minutes
- Cook Time: 22 minutes
- Total Time: 1 hour 7 minutes
- Yields: 18 Truffles
- Serves: 18
- Dietary Type: Vegetarian
Ingredients
BASE
- 8 ounces bittersweet chocolate chips, coarsely chopped (high quality brand such as Ghiradelli or Vahlrona; this makes a big difference)
- 2 ounces milk chocolate chips, coarsely chopped
- ½ cup whipping cream
- 1 pinch salt
- 1 egg yolk, beaten (optional)
FLAVORING
- 2 tablespoons rose water
- 1 tablespoon Amaretto
SHELL
- 8 ounces bittersweet chocolate chips, coarsely chopped
- 2 ounces milk chocolate chips, coarsely chopped
Equipment Needed
- Small saucepan
- Medium metal bowl or sauté pan
- Medium sauce pot
- Candy thermometer (optional)
- Double boiler setup
- Microwave-safe cup or bowl
- Skewers, dipping forks, or plastic forks
- Plastic plate or wax paper
- Small cookie scoop (optional)
- Plastic gloves (optional)
Instructions
- Heat the Cream: In a small saucepan over medium-low heat, gently heat the whipping cream. Stir very frequently to prevent a film from forming on top. If a film does form, simply skim it off. Bring the cream to a boil, then immediately reduce the heat to low, continuing to stir.
- Add Salt: Stir the pinch of salt into the hot cream.
- Set up the Double Boiler: Create a double boiler by placing a medium metal bowl or sauté pan over a medium sauce pot. Ensure there’s about 1 inch of water at the bottom of the pot, and that the water does NOT touch the top bowl. Also, make sure there are no gaps for steam to escape. Heat on medium until the top bowl is warm to the touch (about a minute or two), then reduce the heat to low.
- Melt the First Chocolate Portion: Add about a third of the chopped bittersweet and milk chocolate to the top of the double boiler. Stir gently until the chocolate has melted, ensuring the temperature never exceeds 100°F. A candy thermometer is helpful here, or you can test the temperature against your skin – it should feel roughly the same as your body temperature.
- Incorporate the Yolk and Second Chocolate Portion: Add the next third of the chocolate and the optional beaten egg yolk. Stir until the mixture thickens slightly and the chocolate is fully melted.
- Combine Remaining Chocolate and Cream: Add the rest of the chocolate and pour the warm cream over it.
- Remove from Heat: Immediately remove the top bowl from the double boiler and place it on the counter. Carefully wipe off any condensation from the bottom of the bowl to prevent the chocolate from seizing.
- Stir Until Smooth: Continue to stir gently; vigorous stirring at this point can create unwanted air bubbles. The residual heat should melt the remaining chocolate in a few minutes. If not, briefly return the bowl to the double boiler until melted.
- Add Flavoring: Once the chocolate is completely melted and smooth, stir in the rose water and Amaretto until the mixture is silky and well combined.
- Chill the Mixture: Cover the bowl and refrigerate for about 30 minutes, allowing the chocolate to firm up slightly.
- Form the Truffle Balls: Once the chocolate is more moldable, scoop out rough, rounded teaspoon-sized balls. A small cookie scoop can be helpful here. Work quickly with minimal hand contact to prevent the chocolate from melting. Don’t worry about perfection at this stage. If you find the chocolate is melting too quickly, consider using plastic gloves.
- Chill Again: Refrigerate the formed balls for another 5 minutes.
- Perfect the Shape: Remove the balls from the fridge and perfect their shape, smoothing out any imperfections. Return them to the refrigerator once you’re satisfied.
- Prepare the Shell Chocolate: Place the bittersweet and milk chocolate for the shell in a microwave-safe cup or bowl. Choose a container that allows you to fully immerse the truffles.
- Melt the Shell Chocolate: Microwave the chocolate in 15-20 second bursts at 60% power. The power setting may vary depending on your microwave, so it’s best to start slow. Stir briefly between each burst. After about a minute or so, the chocolate should be mostly melted, and you can use the residual heat to melt the remaining chocolate while stirring.
- Dip the Truffles: Use skewers, dipping forks, or plastic forks to quickly immerse each truffle into the melted chocolate. Then, slide it off onto a plastic plate or a piece of wax paper. You may need a second utensil to help push the truffle off. Work quickly to prevent the truffle from drying onto the fork. If the chocolate starts to melt and become messy, return the truffles to the fridge for a short period.
- Final Chill: Once all the truffles are dipped, return them to the refrigerator for about half an hour to allow the shell to harden completely.
- Finishing Touches (Optional):
- Roll chilled truffle balls into a mixture of confectioner’s sugar and a splash of rose water.
- Pipe a pink rose on top of the hardened shell using royal icing or melted white chocolate dyed pink.
- Use a floral mold to make creative shapes (follow the directions on the package for making the candies; you will need to make the shell first and them fill it with the molten chocolate).
Expert Tips & Tricks
- Tempering Chocolate: Working with tempered chocolate can be tricky. It’s very temperature-sensitive, so avoid exceeding 100°F. Use a candy thermometer if you have one. Clean, dry utensils are essential, as moisture can ruin the temper. While tempering is ideal for a shiny, stable shell, it’s not strictly necessary for these truffles, especially if you’re keeping them refrigerated.
- Batch Size: This recipe can be doubled to create a larger batch and experiment with different flavor combinations. However, halving the recipe may not yield the best results.
- Troubleshooting Seized Chocolate: If your chocolate seizes (becomes grainy and stiff), try adding a tablespoon of boiling water and whisking vigorously. This can sometimes bring it back together.
Serving & Storage Suggestions
Serve these Rose Truffles chilled, as an elegant dessert, after-dinner treat, or a thoughtful gift.
- Room Temperature: They can be kept at room temperature for a few hours, but they are best stored in the refrigerator to maintain their shape and texture, especially in warmer climates.
- Refrigerator: Store in an airtight container in the refrigerator for up to 2 weeks.
- Freezer: For longer storage, freeze the truffles in an airtight container for up to 2 months. Thaw them in the refrigerator before serving.
Nutritional Information
Note: Nutritional information is an estimate and may vary based on specific ingredients used.
| Nutrient | Amount per Serving | % Daily Value |
|---|---|---|
| Calories | 183 kcal | – |
| Calories from Fat | 157 kcal | 86% |
| Total Fat | 17.5 g | 26% |
| Saturated Fat | 10.8 g | 54% |
| Cholesterol | 10.5 mg | 3% |
| Sodium | 22.1 mg | 0% |
| Total Carbohydrate | 11.4 g | 3% |
| Dietary Fiber | 4.4 g | 17% |
| Sugars | 3.5 g | 13% |
| Protein | 3.9 g | 7% |
Variations & Substitutions
- Different Floral Flavors: Experiment with other floral extracts like lavender or orange blossom water for unique flavor profiles.
- Vegan Option: Substitute the whipping cream with full-fat coconut cream and omit the egg yolk. Use vegan chocolate chips for both the base and the shell.
- Nutty Twist: Add a tablespoon of finely chopped toasted nuts (almonds, pistachios, or hazelnuts) to the truffle base for added texture and flavor.
- Spice Infusion: Infuse the whipping cream with cardamom pods or a cinnamon stick while heating for a subtle spiced note.
FAQs (Frequently Asked Questions)
Q: Can I use a different type of chocolate?
A: Yes, but the quality of the chocolate greatly affects the taste. Using high-quality bittersweet and milk chocolate will yield the best results.
Q: What if my chocolate seizes while melting?
A: Try adding a tablespoon of boiling water and whisking vigorously. This can sometimes bring it back together, but it’s best to avoid seizing in the first place by melting the chocolate slowly and carefully.
Q: Can I make these truffles without Amaretto?
A: Absolutely! You can omit the Amaretto or substitute it with another liqueur that complements the rose flavor, such as raspberry liqueur, or simply add an extra teaspoon of rose water.
Q: How do I prevent the truffles from melting in my hands while shaping them?
A: Work quickly, use plastic gloves, and chill the truffle mixture and formed balls frequently.
Q: How can I make the chocolate shell smoother?
A: Tempering the chocolate will result in a smoother, shinier shell, but is not strictly necessary. You can also add a teaspoon of coconut oil to the melted chocolate to improve its fluidity.
Final Thoughts
These Rose Truffles are more than just a dessert; they’re an experience. The delicate floral aroma combined with the rich, smooth chocolate creates a symphony of flavors that will delight your senses. I encourage you to try this recipe, experiment with different variations, and share your creations with loved ones. The kitchen is a place for creativity and joy, so don’t be afraid to get a little adventurous. Pair these truffles with a glass of sparkling rosé or a cup of Earl Grey tea for the perfect indulgence. And most importantly, enjoy the process!