
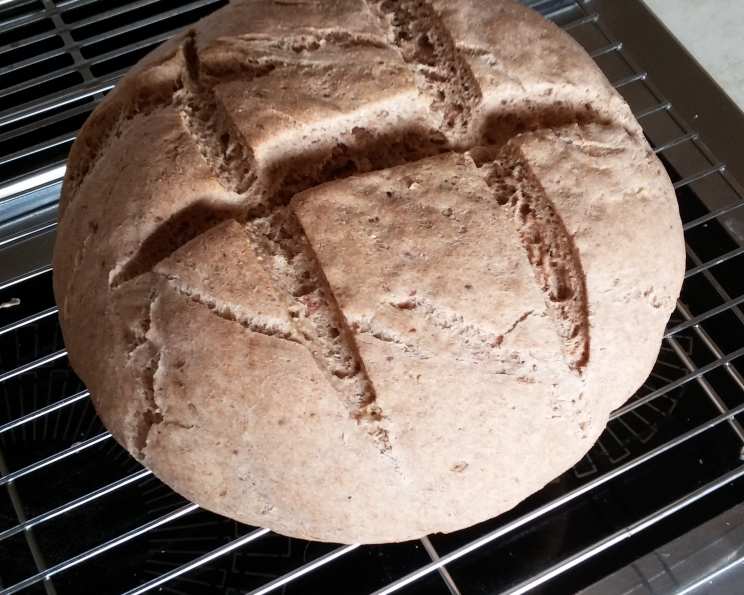
Rosemary Artisan Bread: A Taste of Home
The scent of rosemary has always been my culinary North Star, guiding me back to cherished memories. As a child, my grandmother would tend to her sprawling herb garden, its earthy aroma filling the air. I can still picture her, hands dusted with flour, carefully kneading dough infused with freshly picked rosemary. The resulting bread, crusty on the outside and ethereally soft within, was more than just food; it was an edible embodiment of her love, warmth, and the simple joys of home. This recipe is my humble attempt to recreate that magic.
Recipe Overview
- Prep Time: 20 minutes
- Cook Time: 30-40 minutes
- Total Time: 1 hour 50 minutes (including rising time)
- Servings: 12
- Yield: 1-2 loaves
- Dietary Type: Vegetarian
Ingredients
- 1 tablespoon dry yeast
- 2 cups warm water
- 2 tablespoons sugar
- 1/4 cup olive oil
- 1 tablespoon sea salt
- 2 tablespoons fresh rosemary, chopped
- 2 tablespoons lemon juice
- 1 teaspoon instant minced garlic
- 1 teaspoon dried onion flakes
- 1/2 cup freshly grated Pecorino Romano cheese
- 6 cups all-purpose flour, plus more for dusting
Equipment Needed
- Large mixing bowl or stand mixer
- Measuring cups and spoons
- Oiled bowl
- Clean kitchen towel or plastic wrap
- Greased ceramic stoneware or two 9×5 inch loaf pans
- Wire racks
Instructions
-
In a large bowl or the bowl of your stand mixer, combine the dry yeast, warm water, and sugar. Stir gently and let sit for 5 minutes, or until the mixture becomes foamy. This indicates that the yeast is active and ready to work its magic.
-
To the yeast mixture, add the olive oil, lemon juice, sea salt, rosemary, garlic, onion flakes, Pecorino Romano cheese, and 3 cups of the all-purpose flour. Stir to combine.
-
Gradually mix in the remaining 3 cups of flour. The dough will become quite stiff. If using a stand mixer, use the dough hook attachment. If kneading by hand, turn the dough out onto a lightly floured surface.
-
Knead the dough for 5 to 10 minutes, or until it is smooth and elastic. The dough should be firm but pliable.
-
Place the dough in a large, oiled bowl, turning it to coat all sides with oil. This prevents the dough from drying out during rising.
-
Cover the bowl with a clean kitchen towel or plastic wrap. Let rise in a warm place for 1 hour, or until the dough has doubled in size. I often preheat my oven to 400°F for just one minute, then turn it off and place the covered dough inside. The residual warmth creates the perfect environment for rising.
-
Punch down the dough to release all the air. This step is crucial for creating a light and airy texture.
-
Shape the dough into a ball if using a ceramic stoneware, or divide it in half and shape it into two loaves if using 9×5 inch loaf pans.
-
Place the shaped dough into a greased ceramic stoneware or into two greased 9×5 inch loaf pans.
-
Allow the dough to rise again for 30 minutes, or until doubled in size, in a warm place.
-
Bake in a preheated oven at 350°F (175°C). If baking two loaves, bake for 30 minutes. If baking one loaf, bake for 40 minutes. The bread is done when it is golden brown and sounds hollow when tapped on the bottom.
-
Remove the loaves from the pans and let them cool on wire racks for at least 15 minutes before slicing. This allows the bread to finish baking and prevents it from becoming soggy.
Expert Tips & Tricks
- Fresh Rosemary is Key: Whenever possible, use fresh rosemary for the most intense flavor. If using dried rosemary, reduce the amount to 1 tablespoon.
- Cheese Variation: While Pecorino Romano adds a delightful salty tang, you can substitute Parmesan or Asiago cheese if preferred.
- Lemon Zest Boost: For an even more pronounced lemon flavor, add 1 teaspoon of lemon zest to the dough.
- Scoring the Loaf: Before baking, score the top of the loaf with a sharp knife. This allows the bread to expand evenly and creates a beautiful artisan look.
- Room Temperature Matters: Make sure your ingredients are at room temperature for best results. This is especially important for the yeast and water.
- Dough Consistency: Adjust the amount of flour slightly if necessary to achieve a dough that is tacky but not sticky.
Serving & Storage Suggestions
This Rosemary Artisan Bread is delicious served warm with a drizzle of olive oil or a pat of butter. It’s also fantastic alongside soups, salads, or as part of a charcuterie board. Leftover bread can be stored at room temperature in an airtight container for up to 3 days. For longer storage, wrap tightly and freeze for up to 2 months. To reheat, thaw completely and warm in a preheated oven at 350°F (175°C) for 5-10 minutes. You can also toast individual slices.
Nutritional Information
Please note that these values are approximate and can vary based on specific ingredients and portion sizes.
| Nutrient | Amount per Serving | % Daily Value |
|---|---|---|
| Calories | 287 kcal | 14% |
| Total Fat | 7.2g | 11% |
| Saturated Fat | 1.2g | 6% |
| Cholesterol | 2mg | 1% |
| Sodium | 585mg | 24% |
| Total Carbohydrate | 48g | 16% |
| Dietary Fiber | 2.5g | 10% |
| Sugars | 2.4g | – |
| Protein | 7.8g | 16% |
Variations & Substitutions
- Vegan Version: Omit the Pecorino Romano cheese or substitute with a vegan Parmesan alternative.
- Gluten-Free: Use a high-quality gluten-free all-purpose flour blend. You may need to add a binder like xanthan gum to improve the texture.
- Other Herbs: Experiment with different herbs such as thyme, oregano, or sage.
- Whole Wheat: Substitute up to half of the all-purpose flour with whole wheat flour for a nuttier flavor and added fiber.
- Garlic Lovers: Increase the amount of minced garlic or add roasted garlic cloves to the dough.
FAQs (Frequently Asked Questions)
Q: Can I use active dry yeast instead of instant dry yeast?
A: Yes, you can. Simply proof the active dry yeast in warm water for 10-15 minutes before adding it to the other ingredients.
Q: My dough isn’t rising. What could be the problem?
A: The most common cause is old or inactive yeast. Make sure your yeast is fresh and that the water is warm, but not too hot, as excessive heat can kill the yeast. A cold environment can also inhibit rising.
Q: Can I make the dough ahead of time and bake it later?
A: Yes, you can. After the first rise, punch down the dough, wrap it tightly, and refrigerate it for up to 24 hours. Let it come to room temperature for about 30 minutes before shaping and baking.
Q: The crust is getting too dark during baking. What should I do?
A: Tent the bread loosely with aluminum foil during the last 10-15 minutes of baking to prevent it from burning.
Q: Can I bake this bread in a Dutch oven?
A: Absolutely! Preheat the Dutch oven in the oven while it preheats. Carefully place the dough inside the hot Dutch oven and bake covered for the first 20 minutes, then uncovered for the remaining time to achieve a crispy crust.
Final Thoughts
This Rosemary Artisan Bread is more than just a recipe; it’s an invitation to slow down, savor the simple pleasures, and create lasting memories in your own kitchen. The aroma alone is enough to transport you to a sun-drenched Mediterranean hillside. Don’t be intimidated by the thought of baking bread – this recipe is surprisingly forgiving and yields consistently delicious results. So, gather your ingredients, put on your favorite music, and embark on this culinary adventure. I encourage you to experiment with variations, share your creations with loved ones, and most importantly, enjoy the process. And please, let me know how it turns out!