
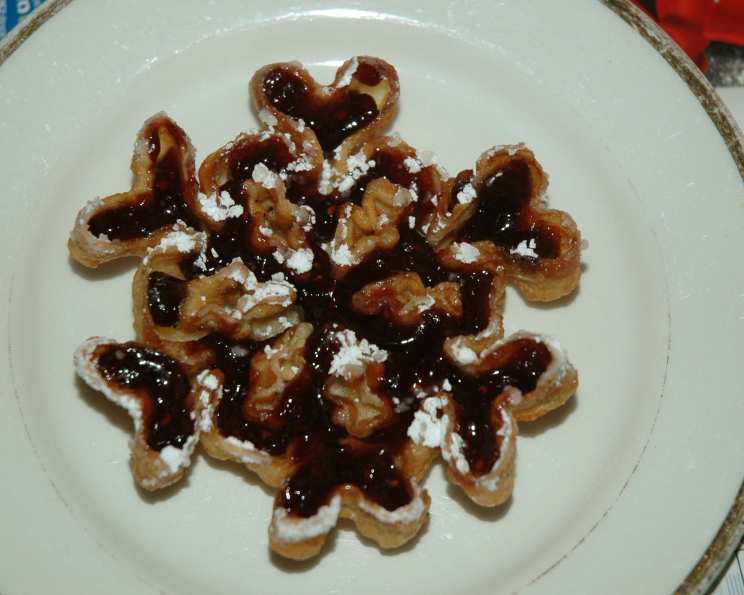
Rosettes: A Delicate Dance of Crispness and Sweetness
My grandmother, bless her heart, was a whirlwind in the kitchen, especially around the holidays. But it was her rosettes, those delicate, fried pastries dusted with powdered sugar, that truly captured my imagination. I remember standing on a rickety stool, mesmerized as she dipped the iron into the batter and then into the bubbling oil, creating these lacy, golden treats. The sweet aroma, a mix of fried dough and lemon, still brings back the warmth of her kitchen and the joy of those festive gatherings.
Recipe Overview
- Prep Time: 20 minutes
- Cook Time: 30 minutes
- Total Time: 50 minutes
- Yields: Approximately 42 rosettes
- Serves: 10-12
- Dietary Type: Vegetarian
Ingredients
- 2 eggs
- 2 teaspoons sugar
- ¼ teaspoon salt
- 1 cup milk
- 1 cup flour
- 1 tablespoon lemon extract
- Oil, for frying (vegetable, canola, or peanut oil work well)
- Confectioners’ sugar, for coating
- Optional: Raspberry jam or other favorite jam, for filling
Equipment Needed
- Rosette iron
- Deep pot or fryer
- Thermometer (optional)
- Absorbent paper towels
- Whisk
- Shallow bowl or dish for batter
- Knife or utensil for releasing rosettes
Instructions
- In a mixing bowl, lightly beat the eggs.
- Add the 2 teaspoons of sugar to the beaten eggs and mix well.
- Pour in the 1 cup of milk and stir to combine.
- In a separate bowl, sift the 1 cup of flour before measuring. Add the ¼ teaspoon of salt to the flour and whisk together.
- Gradually stir the flour mixture into the egg mixture until the batter is smooth and about the consistency of heavy cream. Ensure there are no lumps.
- Stir in the 1 tablespoon of lemon extract. This adds a bright, fragrant note to the rosettes.
- Heat the oil in a deep pot or fryer to 370°F (188°C). Use a thermometer to ensure accurate temperature.
- If you don’t have a thermometer, you can test the oil’s temperature by dropping a small piece of bread into the hot oil. It should brown in about 60 seconds.
- Submerge the rosette iron into the hot oil to heat it up. This is crucial for the batter to adhere properly. Drain off any excess oil by holding the iron above the pot and allowing it to drip onto absorbent paper.
- Dip the heated iron into the batter, immersing it about ¾ of its height. Avoid getting batter over the top of the iron, as this will make it difficult to release the rosette later.
- If the iron is properly heated and drained, the batter will coat it evenly. If the batter doesn’t adhere, the iron is likely too cool or greasy. Reheat the iron for a bit longer, and make sure to drain it well.
- Plunge the batter-coated iron quickly into the hot oil. Cook for approximately 2 to 3 minutes, or until the active bubbling ceases and the rosette is lightly golden brown.
- Invert the iron over the hot oil to drain off any excess fat.
- Carefully remove the rosette from the iron and place it on absorbent paper to drain completely. Inverting the rosette ensures even draining.
- The rosette should be crisp as soon as it is slightly cool. If it is not crisp, the oil may not be hot enough, or the rosette may not have cooked long enough.
- If the rosette does not drop off the iron easily, gently rap the form sharply with a knife handle to jar it loose. Be careful not to damage the rosette.
- While the rosettes are still warm, sprinkle them generously with confectioners’ sugar.
- Optionally, before coating with confectioners’ sugar, you can fill the crevices with raspberry jam or your favorite jam.
Expert Tips & Tricks
- Temperature is key: Maintaining a consistent oil temperature is essential for perfectly crisp rosettes. Use a thermometer to monitor the temperature and adjust as needed. If the oil is too cool, the rosettes will be greasy; if it’s too hot, they’ll burn before they cook through.
- Iron care: Make sure the rosette iron is thoroughly heated before dipping it into the batter. Also, ensure you drain off excess oil from the iron before dipping it into the batter and after frying each rosette.
- Batter consistency: The batter should be smooth and the consistency of heavy cream. If it’s too thick, the rosettes will be heavy and dense; if it’s too thin, the batter won’t coat the iron properly.
- Prevent sticking: If the rosettes are sticking to the iron, try reheating the iron for a longer period or scrubbing the iron to remove any buildup. Seasoning the iron by heating it in oil repeatedly can also help.
- Batch frying: Work in batches to avoid overcrowding the pot, which can lower the oil temperature.
Serving & Storage Suggestions
Rosettes are best served fresh and warm, dusted generously with confectioners’ sugar. You can also fill the crevices with jam, whipped cream, or chocolate sauce for an extra touch of indulgence.
Store leftover rosettes in an airtight container at room temperature. They will remain crisp for a day or two, but they are best enjoyed as soon as possible. You can also freeze them for longer storage. To reheat, place the rosettes on a baking sheet and bake at 300°F (150°C) for a few minutes until warmed through.
Nutritional Information
| Nutrient | Amount per Serving | % Daily Value |
|---|---|---|
| Calories | 82.2 kcal | N/A |
| Calories from Fat | 18 g | 22% |
| Total Fat | 2 g | 3% |
| Saturated Fat | 0.9 g | 4% |
| Cholesterol | 45.7 mg | 15% |
| Sodium | 84.4 mg | 3% |
| Total Carbohydrate | 11.6 g | 3% |
| Dietary Fiber | 0.3 g | 1% |
| Sugars | 0.9 g | N/A |
| Protein | 3.4 g | 6% |
Note: Nutritional information is an estimate and may vary based on specific ingredients and portion sizes.
Variations & Substitutions
- Flavor variations: Experiment with different extracts, such as vanilla, almond, or anise. You can also add a pinch of cinnamon or nutmeg to the batter for a warm, spicy flavor.
- Gluten-free rosettes: Substitute the all-purpose flour with a gluten-free all-purpose blend.
- Dairy-free rosettes: Use a plant-based milk alternative, such as almond milk or soy milk, in place of cow’s milk.
- Savory rosettes: Omit the sugar and lemon extract and add herbs and spices, such as garlic powder, onion powder, or paprika, for a savory twist. Serve with a dipping sauce.
FAQs (Frequently Asked Questions)
Q: Why aren’t my rosettes crispy?
A: The most common reason for soft rosettes is that the oil temperature isn’t hot enough. Make sure the oil is consistently at 370°F (188°C). Also, ensure you don’t overcrowd the pot, as this can lower the oil temperature.
Q: My batter isn’t sticking to the rosette iron. What am I doing wrong?
A: The iron may not be hot enough or may be too greasy. Reheat the iron in the hot oil for a longer period and make sure to drain off any excess oil before dipping it into the batter.
Q: How do I prevent the rosettes from sticking to the iron?
A: Ensure the iron is well-seasoned by heating it in oil repeatedly. If the rosettes still stick, try gently rapping the form with a knife handle to loosen them.
Q: Can I make the batter ahead of time?
A: Yes, you can make the batter up to 24 hours in advance. Store it in the refrigerator and stir well before using.
Q: Can I freeze rosettes?
A: Yes, you can freeze rosettes. Place them in a single layer on a baking sheet and freeze until solid. Then, transfer them to an airtight container or freezer bag. Reheat in a preheated oven at 300°F (150°C) until warmed through.
Final Thoughts
Rosettes are more than just a delicious treat; they’re a connection to tradition and a celebration of shared moments. Don’t be intimidated by the specialized equipment; with a little practice, you’ll be creating these beautiful, lacy pastries in no time. Gather your loved ones, share the experience of making these delicate delights, and let the sweet aroma fill your kitchen with warmth and joy. I encourage you to experiment with flavors and fillings to create your own signature rosette recipe, and don’t hesitate to share your creations and feedback! Pair these crispy, delicate sweets with a cup of hot coffee or tea for a truly delightful experience.