
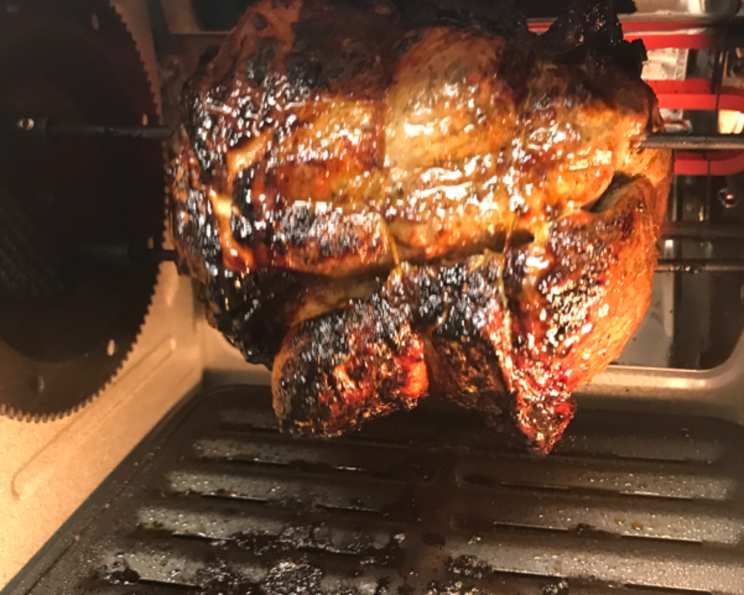
The Ultimate Rotisserie Roast Pork: A Culinary Classic Reimagined
My earliest memory of roast pork is the aroma that would envelop our entire house on Sunday afternoons. It wasn’t just the smell of pork, but a symphony of garlic, herbs, and perfectly rendered fat that promised a feast to come. My grandfather, a butcher by trade, always insisted on using the rotisserie, claiming it was the only way to achieve that irresistible, crispy skin while keeping the meat succulent. To this day, the taste of rotisserie roast pork brings back waves of nostalgia, and I’m excited to share this slightly elevated, yet equally comforting, version with you.
Recipe Overview
- Prep Time: 15 minutes
- Cook Time: 1 hour 20 minutes (estimated)
- Total Time: 1 hour 35 minutes (estimated)
- Servings: 4-6
- Yield: 1 roast
- Dietary Type: Not specified (classic recipe)
Ingredients
- 1 boneless roast pork
- 2 fresh garlic cloves, cut in half
- Seasoning salt
- Garlic powder
- 1 teaspoon thyme
- Household string
Equipment Needed
- Sharp knife
- Rotisserie
- Rotisserie rod
- Serving platter
Instructions
-
Begin by preparing the pork roast. Rinse it thoroughly under cold water and pat it dry with paper towels. This ensures the seasonings adhere properly and the skin crisps up beautifully.
-
Using a sharp knife, create 4 deep slits into the meat. Make 2 slits evenly spaced on each side of the roast. These slits are essential for infusing the pork with garlic flavor throughout the cooking process.
-
Push a piece of fresh garlic down deep into each of the slits. Ensure the garlic is nestled securely within the meat. The garlic will roast along with the pork, imparting its aromatic essence from the inside out.
-
Tie your roast firmly together with household string, if necessary. This is particularly important for boneless roasts, as it helps maintain a uniform shape as the roast cooks and rotates. Proper tying ensures even cooking and prevents the roast from falling apart on the rotisserie.
-
Move the pork roast to a clean working surface. Now it’s time to season generously. Sprinkle the entire roast liberally with seasoning salt, garlic powder, and thyme. Don’t be shy with the seasonings; they are crucial for developing a rich, savory crust.
-
Use your hands to rub the seasonings deep into the roast. Work the mixture into every nook and cranny, repeating the process until you can no longer feel the grittiness of the seasoning. The goal is to ensure the thyme leaves are evenly distributed across the surface.
-
Fit the pork roast snugly onto the rotisserie rod, positioning it as dead center as possible. A balanced roast ensures even cooking and prevents undue stress on the rotisserie motor.
-
Calculate the cooking time. A general guideline is at least 20 minutes per pound of pork roast. However, the most reliable method is to monitor the internal temperature. The roast is done when the internal temperature reaches 160 degrees Fahrenheit. Use a meat thermometer to check the temperature at the thickest part of the roast, avoiding contact with the rotisserie rod. Keep in mind that carryover cooking will continue to raise the temperature by a few degrees after removing it from the heat.
-
Once the pork roast reaches the desired internal temperature, carefully remove it from the rotisserie, off the rod, and onto a serving platter. Use heat-resistant gloves or tongs to handle the hot roast.
-
Let the meat stand undisturbed for 5-10 minutes before carving. This resting period allows the juices to redistribute throughout the meat, resulting in a more tender and flavorful final product. Carve the meat as you usually would, into thin, even slices, and serve immediately.
Expert Tips & Tricks
- For an even more flavorful crust, consider adding a touch of smoked paprika to the seasoning mix. The smoky flavor complements the pork beautifully.
- If you’re short on time, you can marinate the pork roast in a simple mixture of olive oil, garlic, herbs, and lemon juice for a few hours before cooking. This will enhance the flavor and moisture content of the meat.
- To prevent the roast from drying out during cooking, you can place a pan of water underneath the rotisserie. The steam will help keep the meat moist and tender.
- Don’t discard the pan drippings! They’re liquid gold. Use them to make a flavorful gravy or drizzle them over the sliced pork for added richness.
- If the skin starts to brown too quickly, tent the roast with aluminum foil to prevent it from burning.
Serving & Storage Suggestions
Serve your Rotisserie Roast Pork hot, accompanied by your favorite side dishes. Classic pairings include roasted potatoes, steamed green beans, applesauce, or a simple salad. Leftovers can be stored in an airtight container in the refrigerator for up to 3-4 days. For longer storage, wrap the leftover pork tightly in plastic wrap and then in a freezer bag, and freeze for up to 2-3 months. To reheat, thaw the pork in the refrigerator overnight and then reheat in a preheated oven at 325 degrees Fahrenheit until warmed through. You can also reheat slices in a skillet with a little olive oil or broth.
Nutritional Information
(Note: Nutritional information is an estimate and can vary based on specific ingredients and portion sizes.)
| Nutrient | Amount per Serving | % Daily Value |
|---|---|---|
| Calories | 300 kcal | 15% |
| Total Fat | 18g | 28% |
| Saturated Fat | 7g | 35% |
| Cholesterol | 80mg | 27% |
| Sodium | 500mg | 22% |
| Total Carbohydrate | 2g | 1% |
| Dietary Fiber | 0g | 0% |
| Sugars | 0g | 0% |
| Protein | 30g | 60% |
Variations & Substitutions
- For a spicier kick, add a pinch of red pepper flakes to the seasoning mix.
- Experiment with different herbs. Rosemary, sage, or oregano would all be delicious additions.
- If you don’t have fresh garlic, you can use garlic powder instead, but the flavor won’t be quite as intense.
- For a sweeter flavor profile, brush the pork roast with a glaze of honey or maple syrup during the last 15 minutes of cooking.
- If you prefer a different cut of pork, you can use a pork shoulder or a pork loin roast instead. Just adjust the cooking time accordingly.
FAQs (Frequently Asked Questions)
Q: Can I use a different cut of pork for this recipe?
A: Yes, while this recipe specifies a boneless roast pork, you can also use a pork shoulder or pork loin roast. Adjust the cooking time based on the weight and thickness of the cut.
Q: How do I know when the pork is cooked through?
A: The most accurate way to determine doneness is to use a meat thermometer. The internal temperature should reach 160 degrees Fahrenheit. Remember that carryover cooking will continue to raise the temperature a few degrees after removing the roast from the rotisserie.
Q: Can I prepare the pork roast ahead of time?
A: Yes, you can prepare the pork roast up to 24 hours in advance. Season the roast and store it in the refrigerator until you’re ready to cook it.
Q: What can I do with the pan drippings?
A: The pan drippings are a valuable ingredient! Use them to make a delicious gravy or drizzle them over the sliced pork for added flavor and moisture.
Q: The skin of my roast isn’t crispy enough. What can I do?
A: Increase the heat during the last 15-20 minutes of cooking. Watch it closely to prevent burning.
Final Thoughts
This Rotisserie Roast Pork is more than just a recipe; it’s an invitation to create lasting memories. Whether you’re hosting a Sunday dinner or simply craving a taste of home, this dish is sure to impress. Don’t be afraid to experiment with different seasonings and side dishes to create your own unique version. I encourage you to give this recipe a try and share your feedback. Pair it with a crisp apple cider or a robust red wine for a truly unforgettable dining experience. Happy cooking!